How to Grow Chives at Home

The bulbous perennial hub called chives (Allium schoenoprasum) develop about 12 to 18 inches tall and yield appealing pink flower in spring. That thin, hollow, deep Green leaves upload a slight onion flavour to a number foods. Chives are hardy in US branch of agriculture hardiness zones four thru 8, however in addition they develop interior in pots, permitting entertainment of those appealing and engaging herbs

Uses of chives

Culinary Chives are grown for his or her scapes and leaves, that are used for culinary functions as a flavoring herb, and offer a incredibly milder onion-like taste than the ones of different Allium species.. The flora will also be used to garnish dishes. There is a place name Poland and Germany, In these types of places chives are served with quark. Chives are one of the fines herbes of French cuisine, the others being tarragon, chervil and parsley. Chives may be determined sparkling at maximum markets year-round, making them effortlessly available; they also can be dry-frozen with out tons impairment to the taste, giving domestic growers the possibility to keep big portions harvested from their personal gardens.

Also Read: How to Grow Chinese Cabbage from Cuttings?

Uses in plant cultivation

Farmers might plant chives among the rocks making up the borders in their flowerbeds, to preserve the vegetation loose from pests (along with Japanese beetles).  The developing plant repels undesirable insect life, and the juice of the leaves may be used for the identical purpose, in addition to combating fungal infections, mildew, and scab.

Also Read: Can I Grow Snake Gourd Plant in Container?

Types of Chives

There are exceptional varieties of chives to select from, and all of it relies upon to your wishes to pick out one:

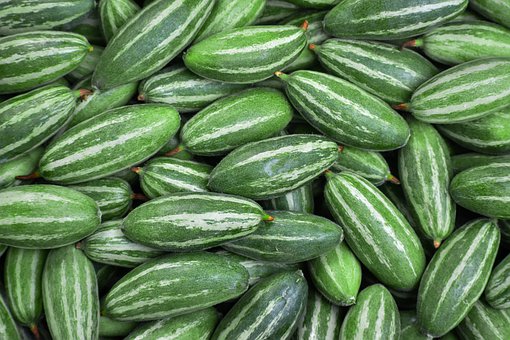
Onion Chives or Common Chives (Allium schoenoprasum):

The maximum famous and typically regarded form of chives. It normally grows as much as 10-12 inches tall. As the call suggests, chives flavor like moderate and uncooked onion. The sensitive taste makes it an brilliant addition to salads, omelets, and whatever you need them to feature in. *The plant life also are edible.

Garlic Chives (Allium tuberosum):

Also regarded as Chinese chives, it’s typically grown for culinary cause and may be as much as 12-24 inches tall, large than not un usual place chives. The leaves are utilized in cooking, typically in stir-fries, meat dishes, and salads. The flavor is sharper than chives and lots just like garlic. Its white plants also are safe to eat and appeal to bees and butterflies.

Giant Siberian Chives (Allium ledebourianum):

It’s loads of chives that’s large in length than the opposite ones and grows to round 18-30 inches in height. Flavored like an onion, they may be brought to numerous dishes or used as a border plant due to their length

Blue Chives (Allium nutans):

Also referred to as Siberian chives, this species of chives generally develop as much as 10-12 inches in pots and prefers wet soil. It has blue-inexperienced leaves, consequently the name. You can develop it in small pots–the taste is moderate garlicky

HOW TO HARVEST CHIVES ?

When to harvest:

Harvest sparkling inexperienced leaves constantly early spring to fall, however don’t begin harvest till flora are as a minimum 6 inches tall approximately five weeks after planting. Established flora a yr antique or greater can face up to everyday harvest.

Must Read: Harvesting Onions – When And How To Harvest Onions

How to harvest:

Cut leaves with lawn scissors or sharp knife. Cut the outer leaves first. Harvest from the bottom of leaves to keep away from flora with reduce tops. Leave approximately 2 inches of leaf blade above the soil so as for the leaves to regrow. Always go away a few pinnacle boom at the clumps to hold the power of the bulbs. Stop harvest three weeks earlier than the primary frost date to permit flora to flower and the clump to expand. Garlic chives may be pulled roots and al

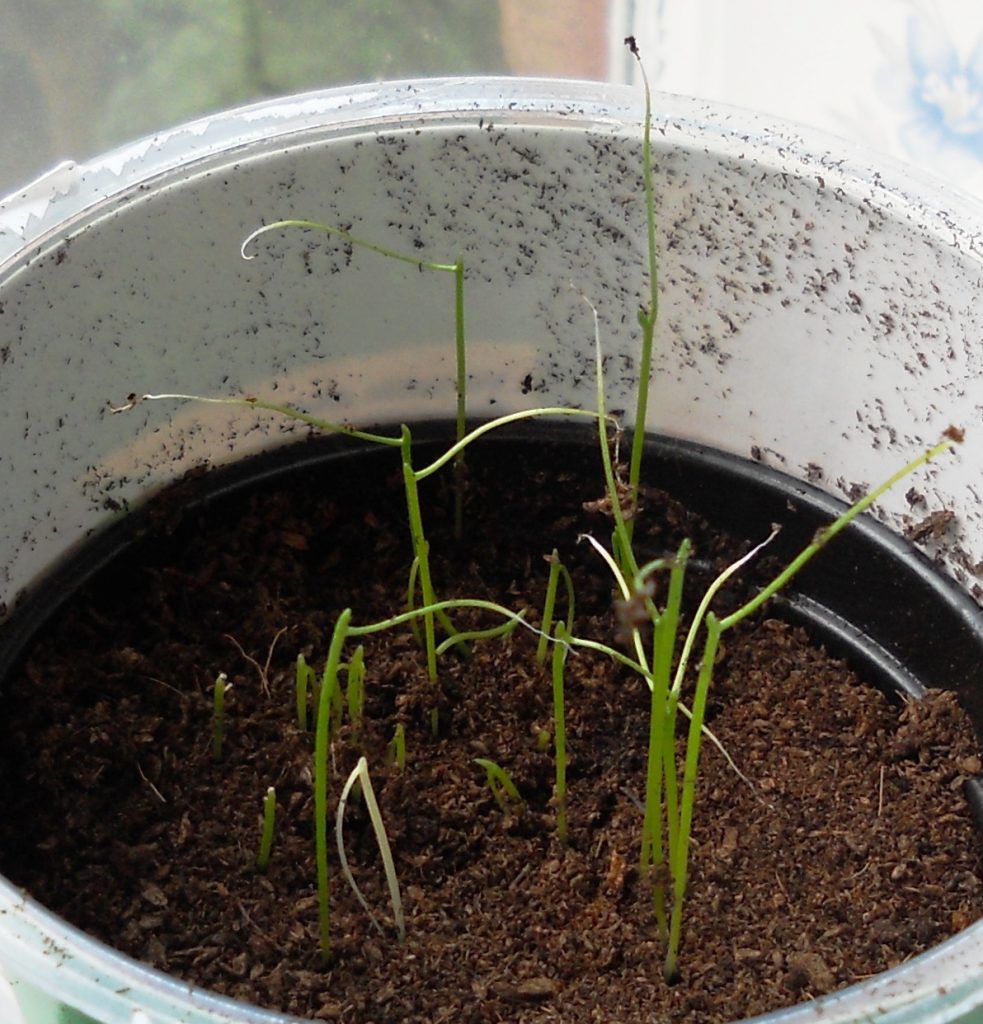
How to grow Chives indoor?

Developing chives inside bode well with the goal that you may have them close to the kitchen. Use chives generously in dishes; chives developing inside will profit by a customary trim. Continue perusing to learn, how to develop chives inside.

Tips for Planting Chives Indoors

To plant chives indoor you have to fill a 6-inch (15 cm.) clay pot with well-draining potting medium that you have pre-moistened. Soil have to shape a ball whilst squeezed, however now no longer be soggy or dripping water. Broadcast seeds over the pre-moistened medium and cowl with a quality layer of the pre-moistened soil, approximately ¼ inch (.6 cm.) deep.

Place withinside the lighted area. Seeds can be stored wet till germination with a mist of water, vulnerable plant meals or vulnerable compost tea. Chives germinate inside weeks, regularly extra quickly. Growing chives interior gives a on hand and smooth manner to season your meals and brighten your space.

Thinks you need

  •          Container & Soil

Chives are pretty famous to develop because of their cap potential to thrive in surprisingly small boxes. In fact, many humans select to develop them in very small boxes on windowsills. Obviously you’ll develop much less in smaller pots, however their cap potential to be flexible makes them attractive to many gardeners. Our advice for boxes is clay pots as they assist with right drainage, however virtually any field will do if cared for correctly.

The maximum crucial aspect is to ensure there may be right drainage in order that water doesn’t take a seat down at the lowest of the pot. Small holes is commonly sufficient to permit extra water out of the pot. Too tons water sitting withinside the pot can lead to root rot, that can kill your plant.

For soil, you’ll need to apply a properly draining potting soil. Most business soils will work, in addition to the ones categorized specially for herbs. When planting interior, continually ensure get a potting soil and now no longer a lawn soil. Garden soil won’t permit for correct drainage.

When planting, you’ll need to pre-moisten the soil earlier than sowing the seeds or planting the seedlings. Plant the seeds approximately 1/4″ deep, and cowl the roots for seedlings.

If planting from seeds, count on them to germinate in round 2 weeks.

  •          Lighting

When developing chives interior one of the top issues is mild. Chives commonly require approximately six-eight hours of direct sunlight. If now no longer possible, supplementing with a develop mild is a  choice.

Using a develop mild is flawlessly fine, and ought to be located more or less 6-12 inches farfar from the plant relying on intensity.

If you word your chives start to bend, truly rotate the pot in order that they bend farfar from the mild. They will accurate themselves as they attain the other manner to develop closer to the mild. It’s endorsed to present them a rotation each week or so as to make sure right growth.

  •          Water & Feeding

Chives are pretty hardy plants, in order that they don’t want to be watered constantly. Simply take a look at each day or so to peer if the soil is dry to touch, and in that case supply them a radical dose of water. You’ll need to saturate the soil, however now no longer soak it. Watch for any drainage holes to begin leaking, and that’s commonly a quite excellent signal to prevent because the soil is very well saturated.

Chives additionally revel in a chunk of humidity. Following popular humidity practices is a superb idea, and you could additionally gently mist them among watering to hold the humidity from getting too low.

For fertilizing, a low electricity fertilizer is preferred. Use a water soluble fertilizer, and dilute to 1/2 of electricity 1-2 instances in line with month at some point of the hotter season. Chives generally tend to develop slower at some point of the winter (even interior) and consequently don’t want to be fed as often.

How to Store Chives

Use chives while they’re clean or frozen (freeze the leaves in an hermetic bag). Dried chives lose their taste.

Store chives in a fab location in a resealable container.

Recommended Varieties:

Garlic chives, to feature a moderate garlic taste to any dish

Wit and Wisdom:

In the garden, plant chives subsequent to carrots and tomatoes, however keep away from planting close to beans and peas.

Chives are stated to repel aphids and Japanese beetles. Plant them close to susceptible plants.

Bunches of chives hung withinside the domestic had been used to power away sicknesses and evil. Find out extra natural folklore here.

Chives are stated to represent usefulness

Is Chives Nutritious ?

Eating chives can also additionally assist enhance someone’s sleep and bone health.

Chives are a nutrient-dense food. The statement that they’re low in calories however excessive in useful nutrients, including vitamins, minerals, and antioxidants.

That said, to get a giant quantity of those nutrients, someone could must devour a huge amount of chives. Instead, humans frequently use chives as a garnish. A not unusual place serving is ready 1 tablespoon (tbsp), or three grams.

According to the United States Department of Agriculture (USDA), 1 tbsp of chopped chives gives the subsequent nutrients:

energy:  0.nine calories

diet K:  6.38 micrograms (mcg), or 5% of the Daily Value (DV)

diet C:  1.seventy four milligrams (mg), or 2% of the DV

folate:  three.15 mcg, or 1% of the DV

diet A:  6.forty three mcg, or 1% of the DV

calcium:  2.seventy six mg, or much less than 1% of the DV

potassium:  8.88 mg, or much less than 1% of the DV

Care of Chives

Chive plants profit by soggy soil yet will endure infrequent dryness. The best strategy is to check the dirt by embeddings a finger to an inch deep towards the edge of the holder. It ought to be anything but difficult to detect if the dirt is dry by testing thusly, yet there are additionally self-watering pots and gadgets that can be utilized to test soil dampness levels.

Since they are perpetual, chives will keep on creating for some seasons, years even! They will, in any case, should be isolated like clockwork. After a few seasons, the little bulbs underneath the dirt will have increased and packed together into bunches. To isolate them, tenderly uncover the bulbs, separate them, and re-plant them, moving the abundance bulbs to another holder or reaping the entire plant to eat. Prepare plants in any event once every year to keep them delivering admirably.

Conclusion

Chives are the ultimate “gateway culinary herb” for reluctant indoor growers. They are flexible and smooth to comprise into dishes and require nearly no care– making them an extraordinarily exact go back on investment.

How to grow pointed gourd at home

Growing vegetables at home make us learn how to grow healthy and eat healthily. It is the process in nature to indulge in it while growing. Every vegetable is possible to grow if and only all the requirements are fulfilled. Therefore different types of vegetables can be chosen to make our garden beautiful.

Most vegetable gardens are made beautiful when the creepers are planted. One of the healthiest creepers that can be grown easily at home in less time and gives plenty of health benefits is this plant. Growing Pointed Gourd at home is easiest compared to others. Before knowing about the growing process, we should know more about Pointed Gourd.

What is Pointed Gourd?

Pointed Gourd is a perennial plant that can be suitably grown in tropical regions. It is indigenous to the Indian subcontinent. It is popularly known as Parwal at its native place. The scientific name of Pointed Gourd is Cucurbitaceae and belongs to the Gourd family. Probably Pointed Gourd is similar to the vegetable Ivy Gourd but larger in size.

Pointed Gourd has major health benefits as compared to other plants in the family. It consists of the rich amounts of vitamin A, C, and carbohydrates and also traces elements like potassium, magnesium, copper, and silver.

As Pointed Gourd has a good amount of vitamins, it helps in solving digestion problems. It controls the sugar levels in the body. As it gives a good amount of fiber to the body, it controls the cholesterol levels and reduces all the heart problems to keep it healthy. It helps in treating constipation. It also helps in blood purifying. It helps in flu infections. It also fights with aging. Therefore it is considered as a healthy vegetable used for weight loss programs too.

As Pointed Gourd is native to the Indian subcontinent, there are different names used for naming this plant. Some of the names are:

  • English: Pointed gourd/Parwal
  • Telugu: Kommu Potla / Chedu Potla
  • Hindi: Parval
  • Tamil: Kambu Pudalai
  • Bengali & Assamese: Patol
  • Marathi & Gujarati: Paraval
  • Punjabi: Parwal
  • Oriya: Patal
  • Urdu: Prora
  • Kannada: Kaadu Padaval
  • Malayalam: Patolam

Cultivation

Seeds of the Pointed Gourd cannot produce germination processes because we cannot determine the sex of the seed before flowering so that they are unable to proceed with the germination. To produce germination and seeds, maintaining male and female ratio for cultivation is very important i.e, 9:1 ratio should be considered for female and male ratio respectively. We take the help of already grown plants while new seedling processes so that it can give fast growth. To grow Pointed Gourd the minimum and important step to follow is the propagation process for its seed. Therefore Pointed Gourd is harvested by cutting the vines and roots of the plant.

Also Read: Papaya Cultivation Guide

How to Grow Pointed Gourd?

Soil Requirement

Pointed Gourd requires light soils. It cannot be grown in heavy soils. The soils that are suitable for growing Pointed Gourd are like loamy or clay soil which is light soils. And also soil should have its PH value in the range of 6.0 to 6.5

Climate Requirement

The climate for growing the Pointed Gourd is warm. As it is a perennial plant, dry tropical weather and the hot temperature are preferred for cultivation. The plant will not support growth in frosting and cold regions. Therefore it prefers a hot humid climate and does not prefer cool weather, the climate that comes after monsoon is mostly preferred to grow the Pointed Gourd.

Distance between pointed gourd plants

As Pointed Gourd is a vein producer, this needs more space for creeping. But the space given to it depends upon how we train the veins. Approximately the distance should be 1.5 meters x 1.5 meters or 2 meters X 2 meters should be maintained between two plants.

How to Plant Pointed Gourd?

Land preparation:

Before we plant the seeds, the soil should be allowed to plow up to 2 to 3 times to get fine soil. Adding Manure to the soil is very important. Manure selection for cultivation is a crucial step. Farmyard manure is suggested to be used for cultivation. It gives a good yield to vegetables.

Propagation method:

  • Seed propagation:

Seed propagation is a late process that takes a long time for converting seed into a plant and then into flower. Because the reproductive progeny takes time in the seed. Usually, flowering fruiting plants use pollinating processes, mostly seed propagation is used only for staminate plants.

  • Vegetation propagation: 

Vegetation propagation is the process where it tries to reproduce the plant from an already grown plant so that it gives fast results. A 1meter long root will be cut from a one-year-old plant and is rooted in the same plant i.e If a plant is rooted in October, in February, or march the plant should be transplanted into fields and again in October 1meter root of that matured plant is cut and directly rooted into 20meters to 30meters deep in the same plant and covered with moist soil.

By this 90% of the growth required from the sowing the seed to growing into the plant will be fastened. So that the plant grows faster and the growing process will be easier by cutting and using the matured plant.

Mostly this process is used for growing the Pointed Gourd. Because this is the fastest and easiest growing method of the Pointed Gourd.

  • Tissue propagation:

Tissue propagation is multiple production methods which are produced from the small piece of organ culture in the small space. This small space provides a nutrient medium for propagation.

Planting process:

In the planting process of Pointed Gourd, root suckers, or cut veins are used. These are collected from the mature and one-year-old plant so that for the easy process of cultivation. The roots used for rooting new plants should consist of a minimum of 8 to 10 nodes of the root so that it can help in harvesting. The roots used for planting are also rerooted plants. But the condition is the roots or veins collected should be fresh. These roots will be replanted after the subdivision of the plant. They will help in controlling all the circumstances. And also the main condition is to collect the roots in the ratio of 9:1 of female roots and male roots respectively which helps in the germination process.

By using this process the faster and easier cultivation process takes place. And the result will be approximately produced in a one-month duration only.

Irrigation requirement:

Irrigation is the most important part of growing Pointed Gourd. As soon as the rooting process ends, the first irrigation process starts. This plant does not take the overflow of water. The excess water may lead to rot of plant roots. So removing excess water is very much required for this plant, mainly in the rainy season. It is better to use a drip irrigation or sprinkling process. So that the weed occurrence will be avoided and the soil will be moist.

Fertilizers and Manure usage

Manure used should be well decomposed that is used for cultivation. As mentioned above, Farmyard manure is well-decomposed manure.

Applying micronutrients and macronutrients should be provided to achieve good results. Macronutrients that should be considered are Phosphorous, Nitrogen, and Potassium. They should be split into dosages for avoiding an excessive amount of chemicals.

Before managing the nutrients, soil testing should be done. After soil testing, fertilizing the soil is a mandatory step. So, for fertilizing and nutrition management too many chemicals will be used. Therefore in the time of spraying the chemicals, the dosage should be maintained so that the soil will not get dry and poisonous.

After providing all the required ingredients, land should be irrigated.

Pests and Diseases

The diseases that can be occurred for Pointed Gourd are:

  • Fruit flies
  • Fruit Rot
  • Mosaic viruses
  • Epilachna beetle
  • Red beetles
  • Red Pumpkin beetle
  • Root-Knot Nematode
  • Downy Mildew

All these diseases that occur will be most in the rainy season, because of the excess water provided to the plant. They occur due to the forming of viruses, fungus, pests, and insects.

These pests and diseases can be controlled by providing Potassium, Nitrogen, and Phosphorous in the required amount for the land. Potassium can be used up to 40 to 50 kg, Nitrogen can be used up to 60 to 80 kg and Phosphorous can be used up to 40 kg. These can be used as fertilizers for the hectare of land.

How to Harvest Pointed Gourd?

Usually, after rooting the vines and after transplanting in the month of February, the plant starts fruiting in 120-140 days and it completes till approximately September. From 15-18 days after pollination, they are ready for harvesting. The fruit will be ready between July to October months. Harvesting should have happened between these days. Because fully ripened fruits are not suitable for eating. They should be harvested before they reach a fully mature stage. Therefore before tuning into fruit, the Pointed Gourd vegetable should be harvested.

Yielding process:

The yielding of Pointed Gourd is mainly dependent upon growth management, nutrition management, fertilizers, and irrigation management. The estimation of the yielding can be 15 to 20 tonnes per hectare.

Hybrid varieties of the Pointed Gourd

  • Swarna Rekha
  • Swarna Suruchi
  • Swarna Alaukik
  • Rajendra Parwal-1
  • Rajendra Parwal-2

Pointed Gourd Plant Care Tips

Mainly while harvesting, the main steps to be taken are nutrition management, fertilizers, and irrigation management. These will ensure the good growth of the crop.

Post-Harvest management:

Pointed Gourd vegetables should be cleaned after harvesting. They should be cleaned before use.

Conclusion

Pointed gourd can be used as a good alternative at home gardens in the view of nutritious vegetables. As it consists of extraordinary health benefits, it should be preferred to consuming.

The exploitation of Pointed Gourd is very much indeed for the Asian subcontinent countries India and Bangladesh. This can be produced by the hybridization process. This hybridization can be processed by using genetic progeny. This process is conducted by collecting the veins from parental clones. Different types of species can be produced in large amounts by this genetic progeny. This process leads to the production of new genetic spices, which helps in the expansion of the very important crop Pointed Gourd.

This is a very important vegetable in terms of health and wealth too. It can be commercially increased all over the world by the form of genetic progeny. Then the species can be exported to other countries all over the world. There are already many species that exist in the countries India and Bangladesh. They can also give a high yielding rate to the farmer. To grow crops properly, macronutrients, micronutrients, and fertilizers should be equally supplied to the crops in the form of dosages. Then after irrigation should be processed and maintained properly. By the maintenance of these processes, the crop can give healthy growth with extraordinary results.