How to Use Coffee for Skin Whitening?

Coffee might be your favorite mood booster to start your day. It might be the best way for you to elevate your energy and metabolism every day. Yes, coffee is one of the most favorite beverages worldwide and has plenty of health benefits. But for your surprise, coffee can be a single remedy for a lot of skin problems, especially dark skin too! Yes, “coffee for skin whitening” might sound a bit strange, but it has the potential to give you a clean, radiant, and glowing skin.

Coffee is packed with various antioxidants, including phenols, and can fight free radicals that can cause so much damage your skin. In fact, according to a study from the American Chemical Society, coffee is one of the primary sources of antioxidants in the USA – even more than other common beverages known for their great antioxidating properties.

While a refreshing coffee cup can be a great source of antioxidant, you can obtain various skin benefits by using coffee beans or coffee powder topically. And the best part is, you can use coffee for skin whitening in a lot of different ways, including a paste, mask, and scrub.

In this manual, we will support you with different tips and tricks of using coffee to obtain clean, glowing, and healthy skin. But before that, let’s know why coffee can be so effective for your skin.

How does coffee work on Your Skin?

Following are some amazing skin benefits of coffee that make it a decent skin whitening remedy.

  • Coffee Reduces Cellulite

Coffee may be helpful to reduce the cellulite appearance on your skin. Thanks to its caffeine content, coffee can play a decisive role in eliminating cellulite by dilating the blood vessels right beneath the skin layers. In addition, coffee also improves the skin’s blood flow and in result, reduces the bad appearance of cellulite.

  • Coffee is Packed with Surprising Calming Effects

If you think coffee can only calm your mind and boost your mood, you haven’t experienced the best of it. Thanks to its antioxidants content, coffee can calm your skin’s tissues as well.

  • The Anti-aging Benefits

Using coffee for face whitening can successfully delay the premature ageing. Coffee may reduce the appearance of fine lines, redness, sun spots, hyperpigmentation, and a lot of other types of facial spots. In fact, according to a study, researchers found a direct link between coffee consumption and photoaging effects.

  • Vitamin B-3 For Skin Cancer

Although more researches and studies are needed, coffee scrub for skin whitening is also linked with reducing the risk of skin cancer. Coffee is a great supplier of vitamin B3 mainly due to the breakdown of trigonelline. And if the studies from Skin Cancer Foundation are to be believed, niacin content of coffee may be effective in preventing nonmelanoma types of skin cancers, and may also avoid other types of abnormal skin growth.

  • Reducing Inflammation

Coffee contains chlorogenic acid and melanoidins – both of which are linked with reducing skin inflammation and hyperpigmentation. And hence, using coffee beans for skin whitening can also reduce skin inflammation due to various skin conditions.

  • Acne Treatment

Regular use of coffee can help in fighting with acne-causing bacteria. As coffee contains CGAs, and have both antibacterial and anti-inflammatory properties, it can be a beneficial acne treatment and can fight the darkness left after acne.

  • Dak Circles

Coffee may also be effective against some of the most stubborn dark circles under the eyes, Beverly Hills MD Cosmeceuticals states. This is because of the caffeine content of coffee that may dilate the blood vessels contributing to the appearance of dark circles.

Different Ways of Using Coffee for Skin Whitening

In this segment, we are sharing some very effective coffee recipes you can try to get rid of different skin problems. Let’s find out more in details.

 1. Coffee, Curd and Turmeric Face Pack

Turmeric is not an alien ingredient when it comes to natural remedies for glowing skin. It can restore the natural glow by working on uneven skin tone. Hyperpigmentation is the primary cause for unnatural skin darkness, and turmeric can be that ultimate ingredient that can control hyperpigmentation without causing any adverse effect on your skin.

On the other hand, thanks to the presence of skin-friendly contents like lactic acid and zinc, curd can moisturize your skin and also slow down the process of ageing. Combine the extraordinary properties of these two ingredients with scrubbing prowess of coffee; you will get a toned, glowing, and healthy skin.

Recipe

  • Properly mix one tbsp each of turmeric, coffee powder and curd for skin whitening.
  • Stir well to get a consistent, lump-free paste.
  • Cleanse your face with water and pat dry before applying.
  • Now, apply the mixture levelly on your face as well as neck in a downward motion.
  • Give a “dry out” time of about twenty minutes.
  • Lather your face with lukewarm water and pat dry again.
  • You can repeat this treatment twice or maybe thrice a week for best results.

 2. Coffee, Coconut Oil, and Cinnamon Powder Face Pack for Pimples

Coconut oil can be proved handy when it comes to improving your skin’s complexion. It is also a very effective as well as a gentle home remedy for hyperpigmentation, dullness, unnatural darkness, and pimples etc.

If we talk about cinnamon powder, it is packed with powerful skin lightening properties. It can be especially effective to improve the scars and dark spots after acne scars, blemishes, and pimples etc. And, of course, we have discussed a lot about the amazing results of using coffee for skin whitening.

Recipe

  • Add ½ tbsp coconut oil and ¼ tbsp cinnamon powder to one tbsp coffee powder.
  • Mix all these ingredients evenly so that you get a smooth paste.
  • Apply on the cleansed, and dried face.
  • Wash the paste off after twenty-odd minutes.
  • Pat dry, and finish with a mild moisturizer.
  • Repeating this method once a week should be enough.

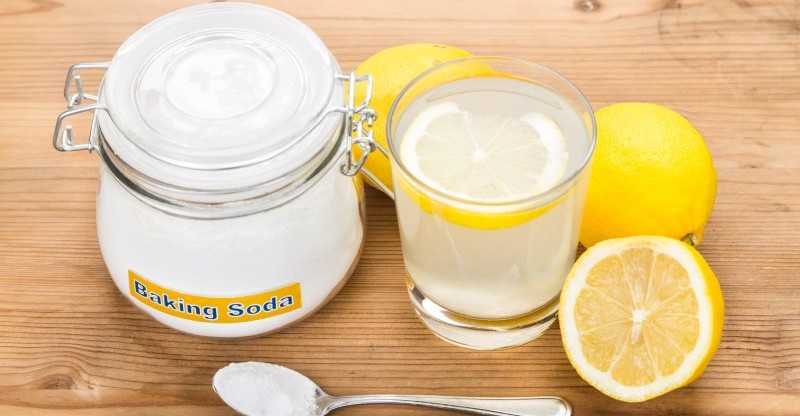
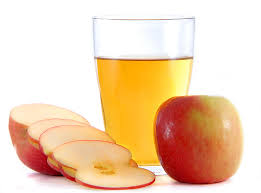
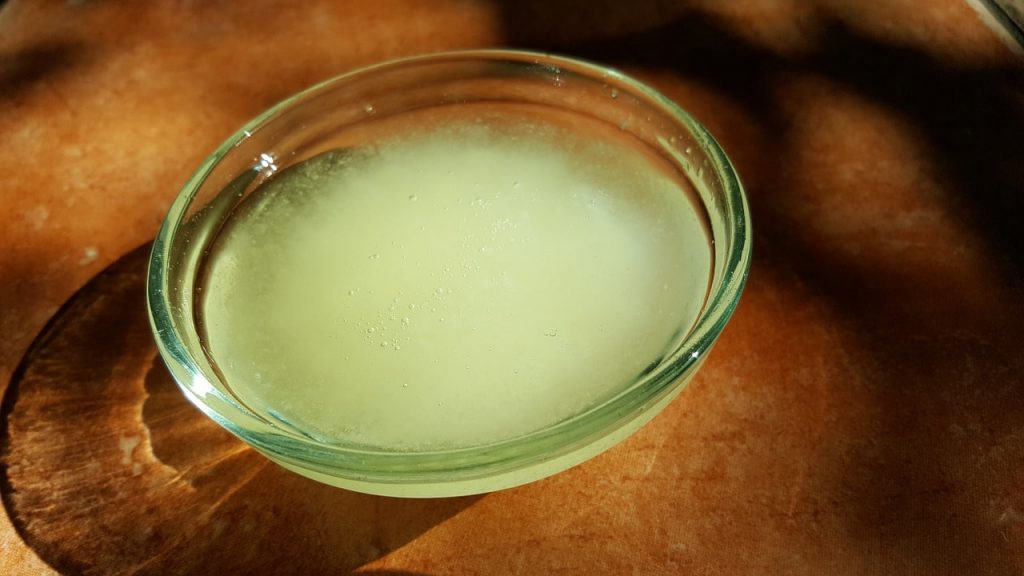
 3. Coffee and Lemon for Skin Whitening

Thanks to the high concentration of vitamin C and powerful antioxidants, you can use lemon juice very effective for skin whitening. Humble lemon juice can singlehandedly get rid of various causes of skin darkness, including dark spots, freckles, acne, hyperpigmentation, and sunburn etc. Vitamin C content of lemon juice reduces the melanin and hence improves the natural skin appearance. On the other hand, caffeine constituents of coffee can remove the tan and lighten the skin up.

Recipe

  • Mix one tbsp each of lemon juice and coffee powder in a bowl.
  • Stir appropriately to prepare a fine, lump-free paste.
  • Cleanse your face and apply the mixture evenly focusing on face as well as neck.
  • Wash the paste off with lukewarm water after twenty minutes.
  • You can try this remedy twice a week for best results.

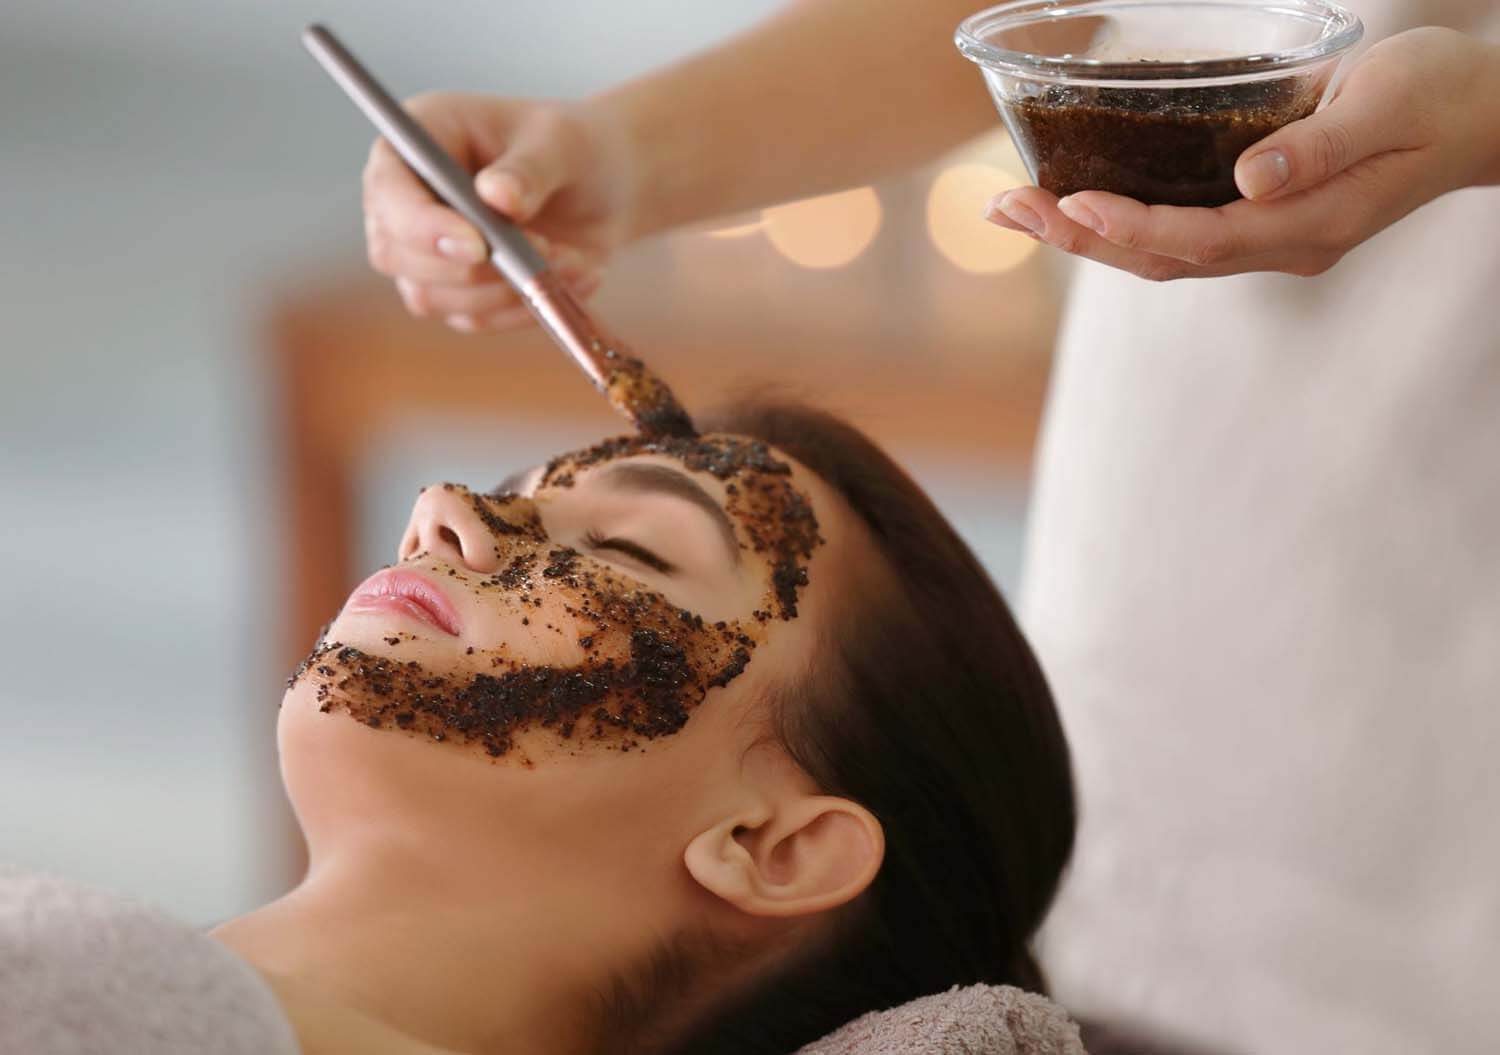
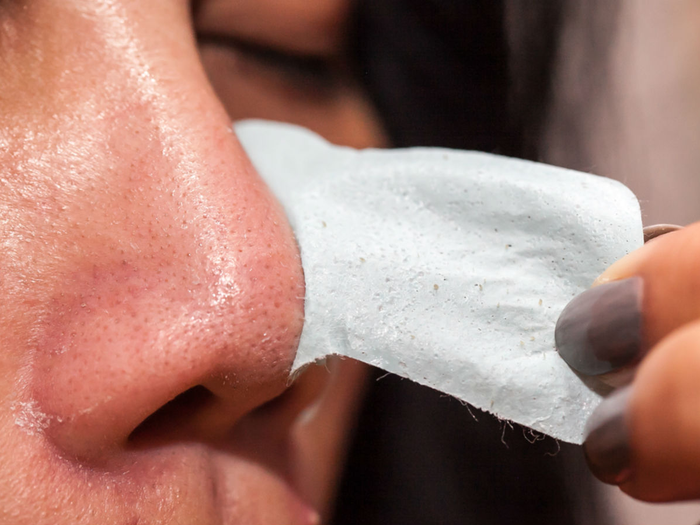
 4. Coffee Scrub for Skin Whitening

Gram flour used in this recipe can be aa very good remedy for acne. It contains a good amount of zing and can fight various skin infections causing skin darkness and dullness.

Honey is nothing less than nature’s blessing when it comes to skin problems. Due to its antiseptic and antibacterial properties, honey can promote skin whitening, especially on acne-prone skin. Being a very gentle and effective humectant, honey can also maintain your skin’s moisture, preventing it from being too oily.

We have used aloe vera gel as well in this recipe. And aren’t we fond of this commonly-found gel? After all, it can help you to overcome a myriad of skin problems, including burns, blemishes, and acne scars.

The combination of these three amazing ingredients can get rid of almost all the skin problems causing unnatural skin darkness.

Recipe

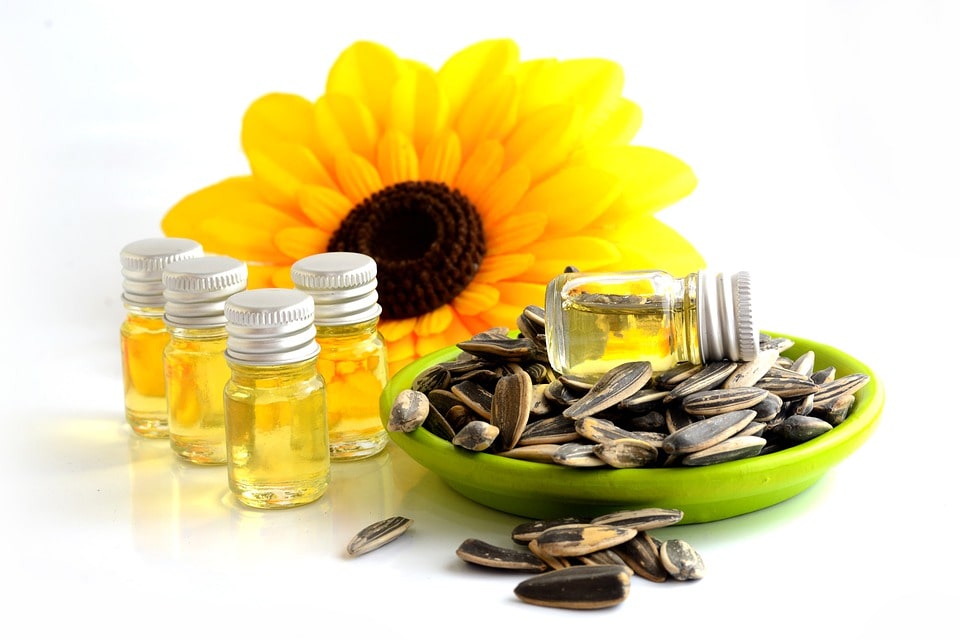
  • Add 2 tbsp. coffee powder, one tbsp gram flour, two tbsp aloe vera gel, and three tbsp honey to a small bowl.
  • Now, add a few dips of essential oil of your choice.
  • Mix well to make a coarse paste.
  • Cover your face with paste and scrub in a circular and upward motion for about fifteen minutes.
  • Then, wash the paste off with lukewarm water and pat dry.
  • Repeat this method once daily for a positive outcome.

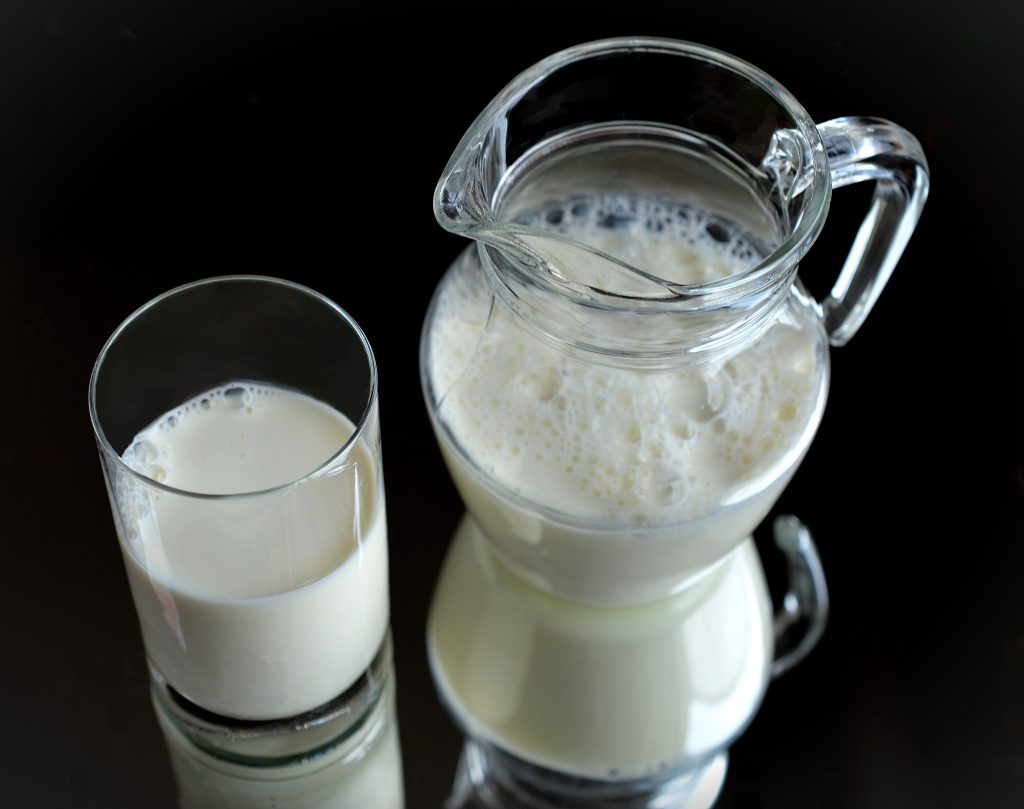
 5.Coffee and milk for skin whitening

You simply can’t ignore the skin whitening properties of milk. Raw milk can have surprising cleansing effects on your face as well as body. Thanks to the great amount of vitamin A, D, E and K, lactic acid, and protein, milk works as a powerful exfoliating, cleansing as well as hydrating agent. Combine all these properties of milk with great exfoliating abilities of coffee powder, you can easily get rid of dark circles, and can finally have clean, hydrated, and glowing skin.

  • Add one cup of coffee powder to one cup of whole milk and mix properly.
  • Add ¼ cup of cocoa powder (if available).
  • Mix again to prepare a smooth, lump-free paste.
  • Apply the mixture on your rinsed face and wash after about twenty minutes.
  • Pat dry and finish with a gentle, natural skin moisturizer.
  • Doing this once a week for about five weeks should be enough for skin whitening.

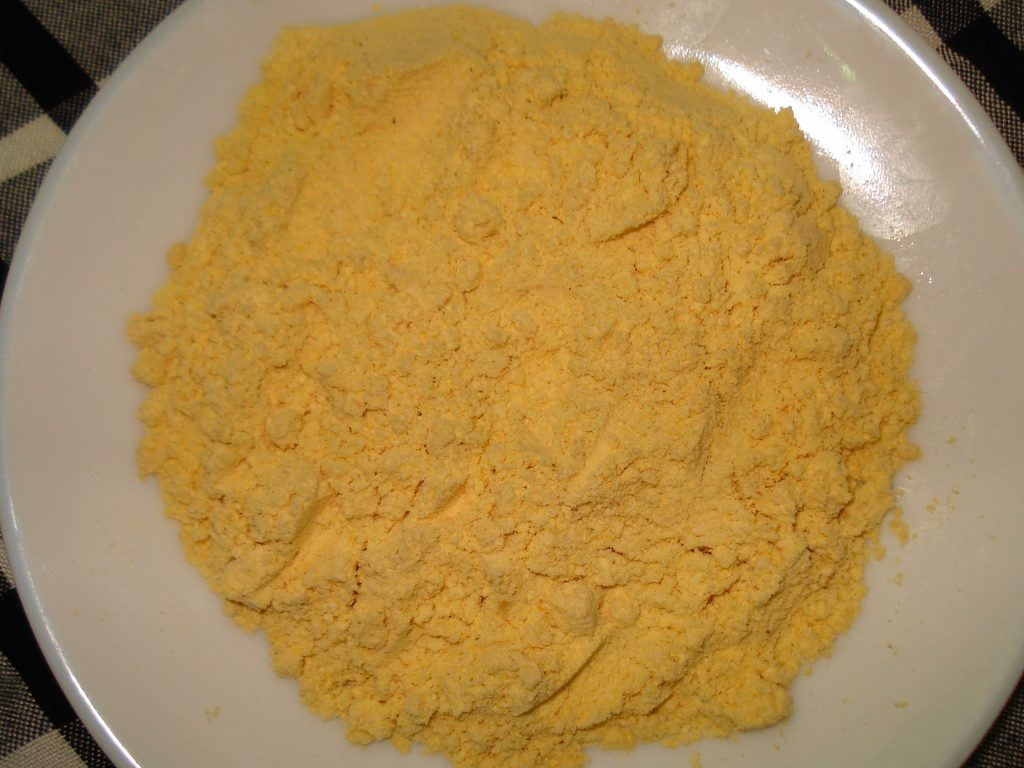
 6. Rice Flour and Coffee Face Pack for Skin Whitening

Surprisingly, rice flour can help you with a wide range of beauty benefits, including skin whitening. Adding rice flour to your beauty regime can assist you to remove acne, pigmentation spots, and other causes of skin darkness. Rice flour is a very good source of vitamin B and may help in the production of new skin cells. While rice flour can promote skin whitening, coffee can get rid of various types of skin impurities by improving the blood flow.

Recipe

  • Take a small dish and add one tbsp each of instant coffee powder and rice flour.
  • Add lukewarm water according to the requirement to make a lump-free, smooth paste.
  • Apply on the face, focusing more on dark spots.
  • Let the paste stay for about fifteen minutes before washing with cold water.
  • Repeat this method twice a week for desired results.

7. Brown Sugar and Coffee for Skin Whitening

Brown sugar doesn’t only work to hydrate your skin, it also exfoliates and get rid of dead skin cells from under the skin layers – and gives your skin a hydrated, natural, and glowing look. It also prevents from ageing and tanning of the skin. Applying brown sugar on your skin can also diminish different types of scars due to sunburn, acne, pimples, and hyperpigmentation etc. Using brown sugar with the coffee can give you moisturized, firmed, smooth, and glowing skin within a few weeks.

Recipe

  • Mix three tbsp each of brown sugar and coffee powder.
  • Add enough coconut oil to moist the mixture and make a granulated paste.
  • After dampening, scrub your face with this mixture.
  • Ensure scrubbing in circular motions for about twenty minutes.
  • Wash your face off with gentle soap and pat dry.
  • Repeating this treatment twice or thrice a week will start showing great results.

Some Important Tips to Have Clean, Glowing Skin

Yes, using coffee for skin whitening can be a great idea, but you can follow these important tips and tricks to avoid unnatural skin darkness and to show off your natural skin color and tonicity.

  • Get enough sleep of about eight hours to ensure proper blood supply to your skin cells.
  • Gulp enough water throughout the day to keep your body as well as skin hydrated.
  • Wear sunscreen every time you go out in the sun.
  • Keep your skin moisturized by using a gentle, natural moisturizer.
  • Massage your face regularly with a combination of coffee powder, honey, and olive oil.
  • Use rose water to keep skin inflammation at bay.
  • Exfoliate your skin with brown sugar/coffee powder and coconut oil.
  • Always have a healthy, balanced diet with loads of fruits, vegetables, and juices.

You can, of course, get amazing results of using coffee for skin whitening. And there is myriad of different ways of using this mood booster for your skin, and we have shared some of the most effective of them. Hopefully, you can finally have glowing, clean skin after combining these coffee recipes and some dietary adjustments. Do share your skin whitening story with our readers to encourage them to use coffee or other natural ingredients instead of using harmful, chemical-induced whitening creams.

Does coffee have any benefit for your skin?

The first thought in our mind when we hear COFFEE is the beautifully brewed drink with smell that is enough to waft our sleeps away. A cup of coffee is more than enough to make our mornings bright and lively.

But is the use of coffee is only limited to as drink or is there is anything more to it.

The answer is YES, Coffee is a rich source of anti-oxidants, anti-inflammatory  agents and nutrients that benefits skin, scalp and hair. It can be used in a versatile manner.

In this article you can know about some amazing and versatile use that coffee holds and then implement them in your life.

Is coffee for good for skin?

This versatile natural ingredient is not just exclusive as a morning energy boosting drink.

Coffee is rich in antioxidants, anti inflammatory property and of course caffeine al together making it a skincare loving wonder. Use of coffee in face masks, body scrubs and other skincare products give you amazing beneficial effects.

How can coffee benefit your skin?

Apart from being a popular source of caffeine that helps you kick start your day full of energy.

Coffee holds many more benefits when consumed in forms other than drinks. When thinking about using coffee for skincare, people tend to get a little skeptical thinking about skin dehydration as caffeine is a mild diuretic agent.  But there is more to Coffee than just caffeine, here is how you can benefit from coffee for your skin,

Rich source of antioxidants: it has multiple anti-oxidants which act as defense layer on your skin against harsh environment factors and pollutions.

Protection from harsh UV radiation:  we all are aware of the negative effects that ultra violet radiation can cause to our skin. Caffeine inhibits the DNA damage that the UV rays might cause and thus helps in protecting skin multiple reactions and problems.

Improves skin elasticity and collagen production: its tissue repair and cell regeneration properties improves collagen growth and skin elasticity making skin smooth, bright and hydrated.

Enhances circulation: coffee improves blood circulation and help in reducing puffiness, and tissue swelling there by keeping your skin energized.

Here are few basic ways in which you can benefit from coffee:

  1. As face scrub component: coffee grounds make an excellent exfoliator for skin and help to get rid of dead skin cells efficiently.

Mix a tablespoon of coffee grounds in olive oil and brown sugar. Rub it on your face and then rinse it off. This will help in detoxifying your skin and removes the dead skin cells.

  1. As cold compress to reduce puffiness: you can make ice cubes from brewed coffee and use them as a cold compress to reduce puffiness around your eyes
  2. As a facemask : using coffee in your face mask help you instantly brightening your skin.

Make a paste using coffee and few spoonful of milk and apply it to your face. Leave this mask for 10-15mins and then wash it. This mask will help to remove the dirt and leave you with glowing skin.

  1. Foot bath: coffee stimulates the blood flow and scrapes the dead skin cells.

Brew a few cups of coffee and add it to a pedicure basin. Once it become lukewarm soak your feet in it for 15-20mins. This will help in protecting your feet from dead cell buildup and keep them soft.

Benefits of coffee scrub on skin:

Caffeine is the key ingredient that makes your coffee scrub beneficial for your skin.

  • Improved circulation: caffeine simulates the blood circulation and help in giving your skin even tone.
  • Anti aging effects: The antioxidants in coffee get absorbed in the skin  help to avoid premature aging problems.
  • Radiant skin: The scrub exfoliates the dead skin cells leaving your skin rejuvenated and fresh.
  • Anti inflammatory effect: coffee has anti inflammatory properties that help you in getting rid of inflammation and breakouts.
  • Reduces cellulite: as caffeine is a diuretic agent, when you use coffee scrub for areas with cellulite the fat cells underneath the skin shrinks.

Coffee for skin whitening:

Using coffee topically definitely helps you in lightening your skin tone. The antioxidants, phenols and other nutrients does wonders to the skin.

Here is how you can whiten your skin using coffee

  • Coffee, turmeric and yoghurt facemask:

Coffee-1tbsp

Turmeric-1tbsp

Yoghurt-1tbsp

Mix all the ingredients in a bowl and makesure it is lumps free.

Apply it to your face and neck  in downwards direction and leave it on for 20minutes.

Wash it with lukewarm water. You can use this mask twice a week.

  • Coffee sugar scrub:

Coffee 1cup

Brown sugar ½ cup

Jojoba oil 1 ½ tbsp.

Green tea leaves  2 teabags

Apply the mixture gently and in circular motion before stepping in to the shower. Pat dry your skin and use a moisturizer.

  • Coffee and lemon juice face mask:

This mask is good for tan removal. Vitamin C and caffeine both the ingredients have excellent skin lightening and whitening properties.

Coffee powder -1tbsp

Lemon juice – 1tbsp

Make a lump free paste of coffee powder and lemon juice. Apply this to your face and neck and leave for 15mins. wash it off with cold water.

Apart from face masks and scrubs, using an eye cream containing caffeine helps to de-puff your eyes and get rid of those under eye bags.

Caffeine in the cream constricts the blood vessels and reduces lymphatic drainage there by reducing the puffiness.

You can also use coffee ice cubes for instant effect.

Freeze a cup or more of your brewed coffee in an Ice cube tray, massage your under eye area using these and you will notice an instant change.

Using coffee body scrub helps you in getting  rid of cellulite, fine lines and marks on your skin. coffee unclogs the pores and leaves it with even finish and smooth texture.

Coffee also help in giving your hair extra shine, it also help in stimulating the blood flow to your scalp and make your hair healthy.

Make a paste of coffee grounds and water. Apply it to your freshly shampooed hair. Let it rest for 10mins and rinse it.

Benefits of using coffee grounds for skin:

The leftover coffee in the filter after your usual morning cup of energy is called coffee ground and has lots of benefits for your skin.

Coffee grounds has caffeic acid, free phenols and antioxidants that help in skin brightening, cellulite reduction, premature anti-aging and removing dead skin cells.

Incorporating these grounds in your skincare regimen products and routine help you improve your skin health drastically. Here are few ways in which you can incorporate and use coffee grounds to benefit your skin.

  • Make an scrub:

Take six tablespoon of coffee grounds and add four tbsp. of either olive oil or coconut oil make a paste. Apply this paste to your face in circular motion and gently scrub.

This helps to remove the dead skin cells and dirt, leaving your skin soft and fresh.

  • Make a body polish:

Mix used grounds in sweet almond oil and granulated brown sugar and make a paste.

Massage your body with this especially on the rough and areas of skin before going for shower. Rinse your body well. This polish will make your skin softer and smooth.

  • Under eye mask:

Make a paste using ½ tsp. of coffee grounds and olive oil. Apply it to the under eye area in gentle manner. Leave for 5-10 minutes and then rinse it.

  • Make a face mask:

Mix coffee grounds in coconut oil and apply gently to your face in circular motion.

Leave this mask on for 30-60minutes and then rinse off with lukewarm water.

You can also mix coffee grounds in a tablespoon honey and apply this to your face and let it dry for 15-20minutes and then rinse your face with cold water followed by a mild cleanser.

 In the end you can say, coffee is multitasker ingredient which can do wonders to your skin and give you many more benefits than just waking you up and helping you survive the day.

Always makesure you are doing a patch test before using any new skincare product or trying any new skincare remedy to ensure you dont get an adverse reaction or develop an allergic response to the products being used.

Gram flour for dark circles – Recipes and Tips to Use

Also known as chickpea flour and besan, gram flour is a very common flour used to cook a variety of dishes in India and Southeast Asia. For your surprise, gram flour is not only used for that, but it can also be a potent ingredient for your daily beauty regime too! In fact, people from India, Pakistan, and Bangladesh are obsessed with gram flour for various skincare purposes. It can help you to fight common skin problems including pimples, blemishes, dull and lifeless skin, and more importantly, those annoying dark circles. In this guide, we will tell you some fantastic and very effective ways of using gram flour for dark circles.

How does Gram Flour work for Skin Whitening?

  • Thanks to its powerful bleaching and exfoliating properties, gram flour improves the skin tan, and makes your skin toned, lighter, and replenished.
  • Gram flour gives your skin the much-needed radiant glow and also maintains the even tonicity.
  • Gram flour effectively works against hyperpigmentation and fights problems like dark circles.
  • It is equally befitting for all types of skin, and hence, becomes an ideal home remedy for dark circles.
  • You can use gram flour alone or with other natural ingredients to deal with dark circles as well as a host of other skin conditions.

Homemade Gram Flour Recipes for Dark Circles

1. Gram Flour and Aloe Vera

Aloe vera is a widespread skin remedy. It nourishes and soothes your skin naturally. Aloe vera contains a wide range of antioxidants, minerals, polysaccharides, and vitamins, and can help you get rid of dark circles within a few weeks. You can easily get clear, healthy, soft, and supple skin by adding aloe vera to your daily skincare regime. And to get the best out of aloe vera, you have the option of combining it with extraordinary benefits of gram flour.

Recipe

  • Mix one tbsp each of gram flour and fresh aloe vera gel to get a fine paste.
  • Apply on the dark circles evenly and leave for ten minutes.
  • Wash off with cold water and pat dry.
  • Repeating this method thrice a week should be helpful.

2. Gram Flour and Turmeric for Skin Whitening

Turmeric is one of the most productive ingredients for skin whitening. Thanks to its antimicrobial properties, it can be beneficial for people with acne-prone skin. You can successfully improve your skin complexion by applying gram flour and turmeric for the face.

Recipe

  • Add a pinch of turmeric powder to 2 tbsp gram flour.
  • Now, add enough rose water to ensure proper consistency.
  • Apply the even layer of this paste and wear for about fifteen minutes.
  • Splash some water to clean your face.
  • You can use gram flour and turmeric for fairness regularly even if you don’t have dark circles.

3. Gram Flour and Fuller’s Earth for Dark Circles

Fuller’s earth is very good at absorbing extra oil and other impurities out of the skin. That’s why it is prevalent for its skin-cleansing properties and is added in a lot of skin creams and different whitening formulations. Fuller’s earth gives your skin a calming effect, and also clears the clogged pores. A combination of gram flour and Fuller’s earth can help you to overcome dark circles without causing any harmful effects on your skin.

Recipe

  • Combine two tbsp of Fuller’s earth, one tbsp of gram flour and enough rose water to prepare a smooth, lump-free paste.
  • Now, apply the paste under your eyes and leave for about twenty minutes.
  • Use some fresh water to remove the paste and pat dry.

4. Gram flour and honey face pack

Honey is packed with exceptional antibacterial properties and can improve various skin conditions including pimples, blemishes, acne, as well as dark circles. Honey, primarily when used with gram flour, can cleanse, soothes, as well as tones your skin. Also, it works as an effective natural moisturizer too.

Recipe

  • Microwave one tbsp honey for about ten seconds, avoiding overheating.
  • Now, add two tbsp gram flour and mix evenly for better consistency.
  • Keep aside the mixture for a couple of minutes.
  • Now, apply to the areas under your eyes and give enough drying time.
  • Wash off with slightly warm water and finish with a towel or soft cloth.
  • Follow this treatment twice a week for desired results.

5. Gram flour and banana for dark circles

Banana can be an amazing home remedy for dark circles. It contains a decent amount of moisture and potassium and can make your skin soft, supple, and hydrated. Thanks to its vitamin A content, it can restore skin’s moisture and also improves the roughness of skin. Rich fats and deep nourishing qualities of banana can boost the collagen production miraculously when combined with bleaching prowess of gram flour.

Recipe

  • Mash 3 to 4 ripe banana pieces and add two tbsp gram flour to them.
  • Now, add enough milk or rose water.
  • Mix these ingredients properly while adjusting the quantity of milk or rose water.
  • You will get a fine paste with even consistency.
  • Apply this paste on your face and wear for about fifteen minutes.
  • Wash off with slightly thermic water and pat dry.
  • Repeat this recipe twice a week for good results.

6. Gram Flour and Baking Soda for Skin Whitening

Are you annoyed so much due to dark circles? Baking soda can come to your rescue. Thanks to its powerful bleaching properties, baking soda is a powerful ingredient for skin lightening and skin whitening. It can help you fade away almost all types of dark spots, including dark circles. Yes, there is no doubt about the bleaching properties of banking soda, but it can be a bit harsh for your skin. Solution? Of course, you can combine it with gram flour to prepare a fine, effective, and mild mixture for dark circles.

Recipe:

  • Add ¼ cup of water to two tbsp baking soda, 2 tbsp of gram flour and a pinch of turmeric powder.
  • Adjust the quantity of water to get the suitable consistency.
  • Cover the areas affected with dark circles and leave for about ten minutes.
  • Now, remove the paste with lukewarm, not hot water.
  • Pat your face dry with a soft, cotton towel.
  • Repeat this recipe once or twice a week to see dark circles fading away.

7. Gram Flour and Rose Water Face Pack

If you have dark circles coupled with hyperpigmentation, rose water can come to your aid. Rosewater is known for restoring the PH balance of the skin and removes the dirt and other impurities from skin layers as well. Rosewater is a wonderful skin toner too and nourishes your skin, especially when mixed properly with gram flour.

Recipe

  • Prepare a smooth paste by mixing two to three tbsp of rose water with two tbsp of gram flour.
  • Cover the dark circles with this calming paste and give a drying-out time of twenty minutes.
  • Wash the area with lukewarm water in a circular motion.
  • Apply a gentle moisturizer after patting your skin dry.

8. Gram Flour Exfoliating Pack

Gram flour exfoliating pack has been an age-old treatment for skin whitening and other skin problems, including dark circles. Exfoliating your skin with gram flour pack can cleanse your skin and improve the complexion while working effectively on dark circles.

Recipe

  • Add enough water to ½ cup of gram flour to make a consistent paste.
  • Smear the dark circles with the paste and rub very slowly and gently in circular motions.
  • Upward circular motion for about ten minutes is recommended.
  • Wear the face pack for about ten more minutes.
  • Ensure avoiding complete dry out by splashing a few drops of water every minute or so.
  • Rinse the pack off with lukewarm water.
  • Pat your face dry and finish with a gentle, natural skin moisturizer.
  • You can use this face pack/scrub four to five time a week for a clean, spotless face.

9. Gram Flour and Papaya for Dark Circles

Combining papaya with gram flour for dark circles is another smart idea. Papaya is packed with multiple skin-friendly enzymes and is capable enough to remove dead cells from the skin layers. Papaya works very effectively to remove dark circles and makes your skin brighter and radiant. This tender and soft fruit can also shrink and unclog the clogged skin pores. Use papaya with gram flour to finally get rid of those annoying, bad-looking dark circles.

Recipe

  • Mash a four to five cubic pieces of ripe banana
  • Add one tbsp gram flour to it and mix well.
  • Mix a few drops of rose water.
  • Apply the besan-papaya mixture on dark circles.
  • Wash the mixture off after ten minutes.
  • Pat the skin dry with a soft, cotton cloth.

10. Oatmeal and Gram Flour for Dark Circles

Oatmeal is not only a very healthy breakfast for you; it can easily get a respectable place in your weekend’s beauty regime too. Oatmeal is known for its cleansing properties and can remove all the dirt, grime, and other impurities from your skin. In addition to cleansing your skin, oatmeal can soothe and moisturize your skin as well. And using it along with gram flour will be proved handy to make your skin free from dark circles finally.

Recipe

  • Add one tbsp ground oats to one tbsp gram flour.
  • Now, add one tbsp honey and enough rose water to make a granulated paste.
  • Apply the paste carefully on dark circles and keep it on for about fifteen minutes.
  • Wash your face off with lukewarm water and pat dry.
  • Repeat these steps twice a week for surprising results.

11. Yogurt and Gram Flour for Dark Circles

Thanks to its natural oils and enzymes contents, yogurt is an amazing skin moisturizing and cleansing agent. And the lactic acid content of yogurt exfoliates and remove dead skin cells, and improve the overall skin complexion. On the other hand, zinc found in yogurt can help you to remove the zits. Combine all these qualities of yogurt with magnificent bleaching properties of gram flour, and you will get very effective treatment for dark circles.

Recipe

  • Add 2 tbsp of gram flour to 2 tbsp of gram flour.
  • Mix both ingredients well to get a smooth face pack.
  • Wear the face pack covering the skin affected with dark circles.
  • Keep the face pack on for about ten to twenty minutes.
  • Wash off with lukewarm water and finish with a gentle moisturizer.
  • You will start noticing the difference after applying this face pack regularly.

12. Gram Flour and Almond for Dark Circles

For your surprise, almond can be another beneficial home remedy for dark circles. It is packed with numerous minerals and vitamins and can effectively nourish your skin.  Thanks to its vitamin E contents, almond can improve your skin’s health and overcome hyperpigmentation. In addition, it can refresh and rejuvenate the facial skin, especially under your eyes. Due to its generous bleaching properties, almond can be a good option if you are tired of trying different treatments for dark circles.

Recipe

  • Grind four to five almonds in a grinder and add one tbsp gram flour.
  • Now, add one tbsp milk and one tbsp lemon juice to prepare a thick paste.
  • Adjust the quantity of milk to get a suitable consistency.
  • Apply the paste properly under your eyes and leave for about fifteen minutes.
  • Wash the paste off with cold water before patting your face dry.
  • Repeat this method three to four times a week for best results.

NOTE: If you have acne-prone skin, you can use rose water as a substitute in the recipes we have suggested milk as an ingredient.

ANOTHER IMPORTANT REMINDER: We have discussed natural ingredients only, and are safe for almost all types of skin. But some of these ingredients might not be suitable for your skin. So, you can perform a patch test before trying these ingredients.

We have helped you with a lot of different and effective ways of using gram flour for dark circles. You can opt for anyone according to your choice and availability of ingredients. If you have listened to other ways of using gram flour to fight dark circles from your grandma, you can always share with us in the comments section. Because grandmas are always right! No?

Baking Soda to lighten underarms

Having dark underarms is not the worst thing, but it can be a reason for embarrassment for some people. You may think twice before flaunting your body in those sleeveless dresses if you have dark underarms.

You might feel nervous while enjoying the much-awaited beach vacancy. In short, dark underarms can stop you from being who you are! Then,

what’s the last-minute solution? How can you start wearing your favorite dresses with confidence again? Well, you may find a dozen answers, but baking soda for dark underarms can be the ultimate solution.

How to Lighten Underarms Using Baking Soda?

Honestly speaking, there is no scientific proof of baking soda as an effective remedy for dark underarms.

However, being skin-friendly and alkaline, baking soda can help your skin whitening, that too, without disturbing your skin’s PH level. Instead, baking soda works effectively on your skin and soothes it naturally.

It is often used as an exfoliant to get rid of dead skin cells from under the skin. And these are enough reasons to make baking soda an effective dark underarms treatment.

Baking Soda Recipes for Dark Underarms

  1. DIY Baking Soda and Water Scrub

As said earlier, baking soda can be handy to lighten your dark armpits. It can quickly fade dark spots away and other marks from the skin due to its bleaching properties. Here is how you can use baking soda with water.

Ingredients You Need

  • 2 tbsp of baking soda
  • 1 tbsp of water

Steps to Follow

  • Add water to baking soda to form a consistent paste.
  • You can adjust the quantity of water according to requirements.
  • Apply the paste evenly under your arms and massage for a couple of minutes.
  • Baking soda and coconut oil for dark underarms

You may have dark underarms due to prolonged skin dryness. And coconut oil is considered among the best skin moisturizer.

Also, thanks to its antibacterial and antifungal properties, coconut oil can keep skin infections away. You can easily overcome the problem of dark underarms by applying it with sodium bicarbonate.

Recipe

  • Stir together 2 tbsp each of coconut oil and baking soda to get a fine paste.
  • Apply properly under the arms and leave for about ten minutes.
  • Splash with fresh water before drying off with a clean cloth.
  • Follow these steps every day for a month to see the results.
  • Lemon and Baking Soda to lighten underarms

The bleaching prowess of lemon is very well known. Not only that, lemon juice is packed with other skin benefits too.

Regular use of lemon juice alone can help you to start flaunting your armpits again. And when you use it with baking soda, the effectiveness just gets doubled.

Recipe

  • Add one tbsp lemon juice to one tbsp baking soda.
  • Prepare a fine paste by mixing correctly.
  • Apply on the dark areas under your arms and leave for fifteen minutes.
  • Wash off with fresh water and pat dry.
  • Both lemon and baking soda are slightly acidic. Hence, we recommend you to use a gentle moisturizer.
  • Repeat this treatment twice a week for desired results.
  • Baking Soda and Orange Juice

Orange juice is very good at maintaining your skin’s pH level. Thanks to high vitamin C concentration, orange juice also improves the collagen production, which improves your skin’s appearance.

Combining these properties of orange juice with the cleansing and exfoliating prowess of baking soda can be proved a decent dark underarm treatment.

Recipe

  • Add two tbsp freshly squeezed orange juice to one tbsp baking soda.
  • Mix properly to ensure suitable consistency.
  • Lather your armpits and pat dry with a towel.
  • Massage the dark areas with the mixture and leave for five minutes.
  • Wash and pat dry again.
  • Repeat these steps thrice a week for great results.
  • Tomato and Baking Soda for Dark Underarms

Tomato juice is packed with a decent enough amount of vitamin C and different antioxidants. It works as a natural bleaching agent and can help you to get rid of the darkness of your armpits.

Applying tomato juice with baking soda can make your armpits brighter and radiant. Besides, the combination can also control excessive pigmentation, dark spots, and dullness of the skin.

Recipe

  • Mix one tbsp each of baking soda and freshly squeezed tomato juice.
  • Rub under your arms for a couple of minutes before leaving for about ten minutes.
  • Remove the mixture with cold water and pat your underarms dry.
  • Repeat this method twice a week to notice the difference.
  • Turmeric and baking soda for dark underarms
Baking Soda

Turmeric is very good at restoring your natural glow as well as improving the tonicity of the skin.

Turmeric contains potent anti-inflammatory and antioxidant known as “curcumin,” which is known for its skin benefits, including skin complexion and skin brightening.

Using turmeric powder with baking soda can be proved mighty effective if you are struggling with dark armpits

Recipe

  • Mix two tbsp each of turmeric powder and baking soda.
  • Add enough water to make a fine paste.
  • Now, apply gently under your dark arms.
  • Leave for ten minutes, splash some water, and pat dry.
  • Repeat this process regularly until you see some improvement.
  • Baking Soda and Honey

Honey is one of the best natural antioxidants being applied to the skin for centuries.

Thanks to its powerful antibacterial and anti-inflammatory properties, honey can also be one of the most potent dark underarm home remedies.

It is also among the most capable natural moisturizers and can enhance your skin’s complexion. And you can always double its efficiency of honey by combining it with baking soda.

Recipe

  • Merge one tbsp honey with one tbsp sodium bicarbonate.
  • Blend uniformly to get a stable mixture.
  • Spread under your armpits and keep it on for about fifteen minutes.
  • Flush with fresh water and take a towel to pat dry.
  • If you have itching under your arms, you can use honey as a mild scrubber.
  • Ensure the repetition for a few days for best results.
  • Epsom Salt and Baking Soda to Lighten Underarms

If you have inflammation with darkness under your arms, Epsom salt can be the best option.

Epsom salt penetrates your skin very easily and removes the dead cells from under the skin. As a result, it can improve the skin darkness quite effectively.

Applying Epsom salt with baking soda can help you overcome hyperpigmentation, one of the apparent causes of dark underarms.

Recipe

  • Prepare a fine paste by adding one tbsp each of baking soda and Epsom salt with enough water.
  • Apply evenly on the dark spots and wear for about twenty minutes.
  • Cleanse with lukewarm water before patting your skin dry.
  • Adding some Epsom salt to your bath water can be very useful as well.
  • Cucumber and Baking Soda Scrub for Dark Underarms

Thanks to its caffeic acid and vitamin C contents, cucumber is used as a scrub for various skin problems. It contains a lot of water and can reduce irritation and inflammation of your skin.

Cucumber improves your skin’s hydration and helps you fight abnormal skin darkness. Preparing a scrub with cucumber and baking soda might be useful to manage dark underarms.

  • Cut a small cucumber into thin slices.
  • Grind these pieces in a grinder, ensuring you still have some tiny cucumber pieces.
  • Now, add two tbsp of baking soda with enough water to get a thick consistency.
  • Cover your armpits with this mixture and leave for about half an hour.
  • Go for the shower like you usually do.
  • You can try this treatment every other day for half an hour before going for a shower.
  1. Olive Oil and Baking Powder for Dark Armpits

Extra virgin olive oil is packed with decent skin lightening effects. Olive oil is effective in controlling over-pigmentation, as well as controls tissue damage due to various external factors.

If used regularly, olive oil can also reduce skin wrinkles, darkness, as well as inflammation. What more? Olive oil is among the best natural bleaches, antibacterial agents, and skin exfoliator.

Using olive oil with baking powder can be proved surprisingly effective to eliminate the darkness of armpits.

Recipe

  • Mingle 4 tbsp olive oil with 2 tbsp baking soda.
  • Make a fine paste by mingling them properly.
  • Apply under your arms with black areas.
  • Keep the mixture on for about one hour before washing off with fresh water.
  • Use this formula thrice a week to see the results.
  1. Carrot Seed Essential Oil and Baking Soda to Lighten Underarms

If you are annoyed with dark underarms for quite a while now, carrot seed oil may be proved handy. It contains a lot of beta-carotene and can assist you in your efforts to deal with hyperpigmentation. Using carrot seed essential oil with baking soda may help you get your natural skin color back.

Recipe

  • Make a fine paste by combining these two ingredients with the required water.
  • Massage your armpits with the mixture before leaving for about half an hour.
  • Remove the mixture with fresh water and pat dry.
  • Repeat these steps for a few weeks or until you see improvement.
  1. Baking Soda and Sandalwood Essential Oil

Sandalwood essential oil is popular for its miraculous skin lightening, skin clearing, and skin whitening properties.

It contains numerous skin lightening agents and can successfully overcome abnormal skin darkness.

Thanks to its other prospects like anti-inflammatory, antiseptic, and astringent properties, sandalwood essential oil may help you get the best out of baking soda to lighten underarms.

Recipe

  • Make a fine paste by adding enough water to two tbsp baking soda.
  • Add together 10 to 12 drops of sandalwood essential oil.
  • Now, apply gently under your armpits and leave for around twenty minutes before going for a shower.
  • Apply this aromatic composition for three to four months and start expressing the best of you again.
  1. Baking Soda and Rose Water

Due to its remarkable anti-inflammatory properties, rose water can be proved handy in various skin conditions, including dark armpits.

Rosewater can control hyperpigmentation, dermatitis, and other causes of the darkness of underarms.

Hence, it can be a potent companion for baking powder for dark armpits.

Recipe

  • Add two tbsp baking soda to a few drops of rose water.
  • Make a decent paste by adjusting the rose water quantity.
  • Cover your armpits with the paste and leave for ten to fifteen minutes.
  • Splash some water to remove the paste and pat the armpits dry.
  • Finish with rose water as a gentle moisturizer.
  • Follow the process twice a day for three weeks and assess the change.
  1. Baking Soda and Glycerin for Dark Underarms

As we said earlier, dryness of the skin may be among the prominent causes of dark underarms. And glycerin can go a long way when it comes to retaining the moisture.

Glycerin also heals tissue damage due to different reasons, including bacterial infection, prolonged sweat, and other external stimuli.

You can elevate the effectiveness of glycerin by combining it with baking soda to lighten dark underarms.

Here is How

  • Prepare a thick paste by mixing these two ingredients in a bowl.
  • Apply the paste to dark armpits and leave for fifteen minutes.
  • Wash off with freshwater or go for the shower.
  • Try repeating this method twice a week for promising results.
  1. Baking Soda and Milk Scrub

Topical application of raw milk can help to overcome unwanted tans and hyperpigmentation.

Thanks to its lactic acid content, milk can’t only lighten your skin but can also remove the dead cells from under the skin.

And combining it with baking soda can give you a potent remedy for dark underarms.

Recipe

  • Add one tbsp baking soda to enough fresh, raw milk, and make a consistent paste.
  • Apply the paste under your arms.
  • Scrub it for a while and let dry for ten minutes.
  • Flush some lukewarm water for proper and gentle removal of the mixture.
  • Repeating this gentle dark underarm treatment four times a week should be helpful.

Having dark underarms is not a huge concern, and you don’t have to sweat out heavily to get rid of it either.

These are some very effective, as well as safe baking soda treatments for dark underarms. Hopefully, you now have multiple ways of finally overcoming dark armpits.

Share your journey of treating dark armpits to inspire a lot of other people.

Reference Links

https://www.cookist.com/12-ways-to-lighten-your-underarms-with-baking-soda/
https://www.stylecraze.com/articles/can-baking-soda-whiten-underarms/
https://www.healthline.com/health/underarm-lightening
https://www.femina.in/beauty/skin/benefits-of-baking-soda-for-your-skin-77418.html#:~:text=Baking%20soda%20can%20come%20to,it%20suitable%20for%20skin%20application.
https://www.besthealthmag.ca/best-looks/skin/turmeric-benefits-for-skin/
https://www.indiaaromaoils.com/miraculous-benefits-of-sandalwood-oil-for-skin-whitening.html

How to Remove Blackheads with Duct Tape

Blackheads are tiny bumps that usually affect the skin of your face or nose due to clogged hair follicles. They occur on your face or nose when different types of impurities like dirt and pollutants trap inside your skin pores. Natural oil under your skin gets more rigid and make your facial and nasal skin dark. These tiny black, dots are very tough to remove. Some people find exfoliation as an effective way to remove blackheads. However, if you want to remove them immediately, duct tape for blackheads can be the best bet.

In this guide, we will address everything about blackheads and duct tape. Is it safe to use duct tape for your skin? Is duct tape a useful blackheads removal trick? Are there some other alternatives? And more. But before talking in detail about duct tape, let’s talk about some crucial aspects of blackheads first.

What Causes Blackheads?

Sometimes, blackheads are confused with other skin conditions like acne, follicles, staph, and rosacea etc. But to ensure correct blackheadsremoval, you have to identify them correctly.

Blackheads are formed due to the development of a clog or plug in the hair follicles’ opening of your skin. Each follicle homes one hair and an oil-producing sebaceous gland. The oil, known as “sebum” is vital to keep your skin soft and supple. Your skin follicles regularly collect the dead skin cells and oils, and produce a very common facial or nasal bump known as “comedo”. When the skin covering this bump is closed, it is known as “whiteheads”. On the other hand, it is called as “blackheads” when the bump is opened and exposed to the air and other foreign particles.

Some factors that are known for increasing the chances of developing blackheads are:

  • Excessive production of oil under your skin.
  • A constant build-up of the Propionibacterium acnes bacteria on your facial or nasal skin.
  • Excessive oil production due to various hormonal changes. Your body may undergo hormonal surge during different conditions, including teen years, menstruation, pregnancy, among others. Birth control pills are also responsible for rapid hormonal fluctuations.
  • Certain drugs like androgens, corticosteroids, and lithium etc. also cause different skin appearances, including blackheads.
  • When the dead skin cells don’t leave your skin for a long time, your skin may get irritated and develop blackheads.

Are there Blackheads Symptoms?

Spotting or identifying blackheads is very easy, as they look dark in color with very tiny, dotted bumps. There is no specific symptom of blackhead, as they don’t cause any inflammation or pain on the affected skin. Rarely, when different bacteria invade the hair follicles’ blockages, you may notice inflammation and redness of the skin.

Duct Tape for Blackheads

There can be a wide range of options when we talk about treatment for blackheads. And various researches back duct tape as an effective way to remove blackheads. Duct tape is not something Alien – it’s a simple adhesive tape placed on the skin surface and removed after a while. Using duct tape is not only safe but very easy as well. And the best thing is, you can use it without any assistance from your family or friend. 

Is it Possible to Remove Blackheads Using Duct Tape?

A lot of people don’t give much attention to duct tape as an effective blackhead remover. But if you go through some researches, you will find that it is more than just possible to remove blackheads with the help of duct tape. As we said earlier, duct tape is not something alien; it is a simple, skin-friendly adhesive tape that is placed on the skin affected with blackheads and removed after sometime to remove blackheads with it. Here is how you can use duct tape for blackheads.

How to Remove Blackheads with duct tape?

Many people are still not aware of black tape as a very effective blackhead remover. But you will be surprised by the results. Here is a simple yet result-oriented technique you should know to finally get rid of blackheads without going through complicated and painful procedures.

  • Wash your face with clean, cold water.
  • Use a gentle, chemical-free face wash containing at least 3% of salicylic acid.
  • Apply the face wash properly on your face, focusing mainly on blackheads.
  • Now, massage the blackheads-affected area for a few minutes, working on the tiny pores, ensuring the face wash can properly get inside the pores.
  • Dab your face dry with a washed, soft cloth – cotton cloth will be the best option.
  • Avoid rubbing your face harshly.
  • Now, cut the duct tape according to your requirement.
  • Place the duct tape very gently using your fingers for proper, correct placement.
  • Start removing the tape after five odd minutes. Ensure pulling the tape very quickly to avoid prolonged suffering.
  • Using duct tape for blackheads can be a bit painful. But with promising results, it worth giving a try.

Using Duct Tape for Blackheads Does Not Cause Capillary Breakage

There is a big misconception about duct tape that it breaks down the blood capillaries. But it’s far from the truth because you can remove the duct tape very quickly without causing any damage to your skin or tissues.

Duct Tape Doesn’t Even Increase Your Nasal Pores

If you are hesitant before using duct tape thinking that it may increase the size of pores, you should not be. Because there is nothing like that with duct tape at all, if you feel some discomfort, some other conditions may be responsible. You should not blame duct tape for it.

When Should You Not Use Duct Tape for Blackheads?

Duct tape is usually safe for your skin, but you should not use it if blackheads are accompanied by some other skin conditions such as:

  • Acne: Acne commonly affects your face, chest, neck, shoulders, and upper back. At times, acne can be a condition in which you may get blackhead, whiteheads, deep and painful cysts, pimples or nodules etc. If acne is left untreated, may leave dark skin or scars for a very long time.
  • Rosacea: Rosacea is a chronic skin disease with symptoms like red, raised bumps, facial redness, skin sensitivity, facial flushing, and skin dryness etc. It goes through various cycles of fading and relapse and is usually triggered by alcoholic beverages, stress, spicy foods, sunlight, and Helicobacter Pylori bacteria.
  • Cold Sore: Sometimes, a cold sore is also mistaken for blackheads. Cold sore may cause similar-looking fluid-filled blisters around lips and mouth. But cold sore is usually accompanied by other symptoms like low fever, swollen lymph nodes, body pain etc.
  • Hives: Raised, itchy welts usually caused due to an exposure to allergens. Hives are warm, pinkish-red, and are painful to touch. They can be of varied sizes and shapes but are usually round, and ring-shaped.
  • Actinic Keratosis: They are usually of size less than 2 cm, form crusty, scaly, and thick patches. Usually pink in color, but may appear gray, brown or tan etc.
  • Measles: Red rashes affecting the face as well as other parts of the body. Symptoms may include cough, runny nose, loss of appetite, sore throat, and watery eyes etc.
  • Lupus: Characterized by ring-shaped, red, scaly patches commonly affecting the face, neck, forearms, shoulders, and upper torso. Other symptoms may include headaches, fever, fatigue, and painful joints etc.
  • Seborrheic Eczema: Skin under mustaches is commonly affected by seborrheic eczema, characterized by scaly, white, flaky patches. The skin may get red, oily, greasy, or itchy. Rashes may cause loss of hair if left untreated.

These skin conditions are sometimes mistaken for blackheads. If you are planning to use duct tape to remove blackheads, or for any other treatment, identifying them correctly is very important.

Also Read: Is Apple Cider Vinegar Really Good Against Shingles?

Some Other Tips to Remove Blackheads

Although duct tape is a useful option to get rid of blackheads, some people may find it intimidating as peeling; it indeed can cause a bit of pain. If you are also one of them, we have some other blackheads best treatment for you.

Exfoliate Your Skin

If you haven’t exfoliated your skin yet, it might be the best time to give it a try. Removing the dead skin cells from under your skin should be the ultimate goal to remove blackheads finally. And exfoliating your skin with a suitable natural rub can be immensely helpful. We recommend you to exfoliate your skin once a week to use it as a blackhead remover.

Facials

Regular facials can also help get rid of blackheads. But you have to ensure using the right product. We recommend using only non-comedogenic products which are mainly made for not clogging the pores.

Baking Soda

Baking soda can be perfect for blackheads below eyes. Compose a paste with water and baking soda, and apply evenly on the areas affected with blackheads. Scrub the paste on the skin for a few minutes before washing off. Repeat baking soda treatment twice a week for best results.

Egg White Mask

Thanks to the skin tightening qualities, egg whites can be proved as a decent blackheads’ remover ingredient. Egg whites can shrink your pores when you apply them directly and can force the blackheads out without any harsh effect on the skin. As they are rich in nutrients, egg whites can improve skin texture and remove excessive oil.

Lemon, Honey and Salt

Lemon is known for its astringent qualities. On the other hand, fine granules of salt make it an excellent, non-abrasive skin scrubber. And honey will maintain the much-needed moisture of the skin as well as, it will also keep the harmful germs away.

  • Add these natural ingredients to prepare a paste.
  • Apply on blackheads and scrub gently in a circular motion for a minute or so.
  • Now, wear the mixture for about five minutes before washing with warm water.
  • Repeat a week thrice regularly to see the difference.

Steaming

Steaming is not only known for removing the blackheads effectively, but it can also be surprisingly useful to avoid blackheads formation in the future. When you steam your face, your face starts removing toxins thanks to an increase in sweating. Steaming also starts softening your facial and nasal pores and removes blackheads easily.

Tomato

Tomatoes are a notable source of vitamin A and C and are also packed with skin brightening, pore shrinking, and oil-absorbing properties. Tomatoes can be beneficial for oily skin, as the tomato pulp can remove the extra grease without any harsh effect.

  • Cut a medium-sized tomato into thin, round slices.
  • Rub one slice on blackheads-affected skin.
  • Alternatively, try using tomato pulp to rub the area gently.
  • Leave for a few minutes before splashing with freshwater.

How to Avoid Blackheads

If you have successfully used duct tape for blackheads or removed them with a natural treatment, you would love to avoid a recurrence. Following are some tricks to ensure they don’t scare you again in the future. 

  • Never try to pup the blackheads out as it may leave a deep scar on your skin.
  • Don’t use tweezers or any other pointed object as blackheads remover. Doing this can cause severe tissue injury to your face or nose.
  • An exfoliation is undoubtedly a good option, but always avoid using harsh chemicals or other beauty products.
  • Wash your face regularly to avoid the accumulation of dirt or any other impurity.
  • Always apply a gentle moisturizer to avoid dryness of the skin. We recommend using only non-comedogenic moisturizers for good results.
  • Try using skin products containing salicylic acid. It is a common chemical used in acne and pimple creams and can help you to prevent blackheads.

If you are planning to use duct tape for blackheads, we will suggest you go ahead. There is almost no drawback except potential pain while removing it. And if you want to avoid that, we have helped you with some other effective alternatives as well. Hopefully, we have busted all the myths related to duct tape, and you are now well assured of using it to remove those annoyingly unattractive tiny dots finally. If you have successfully removed blackheads with some other tricks, hit the comments section to share with our readers.

References

https://beautyhealthtips.in/how-to-remove-blackheads-with-duct-tape/#:~:text=Using%20duct%20tape%20does%20not%20lead%20to%20breaking%20the%20capillaries&text=You%20might%20have%20heard%20about,could%20not%20be%20the%20reason.

https://www.healthline.com/health/blackheads#treatment

https://www.cedars-sinai.org/blog/skin-conditions-look-like-acne.html

https://www.femina.in/beauty/skin/get-rid-of-blackheads-naturally-69949.html

https://www.healthline.com/health/skin-disorders#pictures

How to get rid of cellulite on thighs? – Home Remedies

Cellulite is a dimple-like appearance that affects your things’ skin. It is a very common, harmless skin condition that causes dimpled, lumpy flesh, mainly on thighs. It can also affect hips, abdomen, and buttocks and is more commonly seen in women. According to an estimation, more than 85 percent of women over 21 have cellulite. Although it is not harmful, it can be a problem for those who are always extra careful about their looks. If you are also one of them and want to know “how to get rid of cellulite on thighs,” we will help you with the best possible solutions.

Unlike most other skin conditions, cellulite may develop with no connection to age or weight but is more commonly noticed in advanced life stages. Medically, it is also known as “gynoid lipodystrophy” and can be reduced by combining some lifestyle adjustments, home remedies, exercises, etc.

This article will focus on every aspect of cellulite, including the possibility of disappearance, home remedies, required time duration, and much more. Let’s have a look.

Can You Get Rid of Cellulite Once You Have It?

Getting rid of cellulite entirely is almost impossible. Honestly speaking, it’s not necessary at all to fix cellulite from a medical point of view. At a certain stage of life, cellulite becomes a common and absolutely normal feature of your body. To your surprise, “cellulite” wasn’t even a part of common, daily life vocabulary until the late 1800s when French doctors first coined the word.

Famous magazine Vogue in the late 1960s even called it “body fat you couldn’t lose before” and highlighted with the line “a trendsetting, fashionable, unique way for women to hate their bodies.”

These days, cellulite is considered more as a “personality problem” than anything. And getting rid of it completely is not as straightforward as usually thought. There is simply no “magic treatment” for it because the exact cause for it is still unknown, and you may get it due to an array of factors, even without one! If you are still worried about those lumpy, inconsistent thighs, you can get some improvement with a balanced diet, healthy and active lifestyle, adequate hydration, proper exercises, and no smoking.

How long does it take to get rid of cellulite?

This question’s answer depends entirely on different factors, including age, body weight, how long since you have them, and the treatment method. In some cases, no treatment, including natural methods, work.

According to some research, cellulite can be improved within a month or so with proper treatment combined with specific lifestyle changes. But if you have them for very long, you may have to opt for other alternatives, including supplements and topical creams. If we talk about a specific time frame, cellulite may go away in a month or may never go without surgical methods.

How to reduce cellulite in a week – Is it possible?

It is not quite practically possible, at least not within a week. Because cellulite is an appearance of an accumulation of fatty tissues underneath the affected skin, it is very much possible to reduce the appearance within as little as a week. A combination of a diet rich in vegetables, less salt, and sodium, proper hydration, exercising with this simple home remedy can help you reduce the lumpy appearance of cellulite.

Note: Here, we are talking about “reducing the appearance of cellulite,” not the “cellulite” itself.

Steps to Follow:

  • Add a quarter cup of olive oil to your morning’s coffee ground in a small bowl
  • Warm the mixture in the microwave for about 10 seconds
  • Lie down comfortably and apply the mixture on the areas affected with cellulite.
  • If you cannot lie down due to any reason, use a plastic wrap to secure the mixture on your skin.
  • Ensure proper massage of the mixture on the skin and leave for fifteen minutes.
  • Wash the mixture off with warm water and pat dry.

How does it work?

Caffeine in the coffee mixture can help shrink pores and maintain the firmness of your skin.

  • For better results, repeat this process at least twice daily for a week.
  • Don’t forget to apply this mixture when you decide to spend some time on a beach – or any day you are going to show more skin.

Tips to Follow Throughout the Week

  • In addition to this one-week treatment, we recommend you to up your water intake. Water reduces the toxins from your body and makes your skin soft, supple, firm, and toned.
  • Increase the intake of whole foods like vegetables and cut down salt and sodium consumption as much as you can. Why? Salt is known for retaining water and won’t allow the flushing out of toxins.
  • Add lower body exercises to your regime. Exercises like lunges, cycling, squats, and other exercises involving thighs can also help you combating cellulite.

Does running get rid of cellulite?

Only a multidisciplinary approach, including a healthy diet, proper thigh exercises, lifestyle adjustments like avoiding smoking, etc., can help you have a good chance of improving cellulite appearance.

A diet containing enough fruits and vegetables can be effective against inflammatory markers and maintain ideal body weight to reduce the dimply appearance. Quitting smoking can have a surprisingly positive effect on your efforts.

Also, regular, and moderate physical exercises, including running, can help. How? Practicing regular physical exercises increases and improves your body’s blood flow and increases the elasticity of tissues. Also, running can help burning extra fats accumulated onthe thighs. A combination of running and resistance training may attack cellulite from two sides – a decrease in fat mass and an increase in muscle mass, making it practically possible to reduce cellulite appearance.

Not only running, other aerobic activities, mainly aquatic exercises, can have amazing effects. In short, exercises involving the rapid and constant movement of thighs and legs can have a decisive effect on how your cellulite look.

Also Read: Is Apple Cider Vinegar Really Good Against Shingles?

Home Remedies and Exercises for Cellulite

NOTE: As already said, these home remedies and exercise reduce the “appearance of cellulite” and are not the “treatment” for cellulite, as it is not considered a skin problem or disease.

Exercises for Cellulite

1. Massage

Massage is a promising remedy for the lumpy appearance of skin due to cellulite. You can do it yourself or get some help from a professional massage therapist.

Massage can be usefulin improving lymphatic drainage and hence may help reduce the appearance of cellulite. Also, regular massage of affected areas can stretch skin tissues.

You can use various massage creams and oils readily available in the market. But following a better massage technique is essential to have the best effects. So, we recommend you get some help from a professional therapist to learn the correct massaging technique.

2. Shed Some Body Weight if you are overweight or obese

Being overweight or obese can also be a specific responsible factor for cellulite. If you are overweight, you should think of losing some pounds even if you don’t have cellulite! Losing excess body fat will help you properly shape up your body and get rid of cellulite appearance.

So, follow a healthy lifestyle themed with a balanced diet, appropriate physical activities, enough sleep, stress management, etc., to get your body in the best possible shape. Cellulite appearance around your thighs will automatically start getting better.

Exercises for cellulite

Specific exercises targeting leg and glutes muscles can also improve skin’s texture around the thigh. As a result, the impression of cellulite will be improved too.

While exercise is not the proven treatment for cellulite (there is no other treatment either), exercises can improve the tonicity of thigh muscles and surely make your thighs look better. Here are some exercises to improve the appearance of your thighs.

3. Side Lunges

  • Stand straight and tall, keeping your hip-width away.
  • Take a decent step out, bend your knee, pushing the hips back.
  • Don’t remove any of the feet while lunging.
  • Return to the starting position by pushing off the same leg.
  • Now, repeat with the other leg.

4. Leg/Glute Kick-bags

  • Put both hands and legs on the floor, keeping the rest of the body up.
  • Kick one leg upwards (behind the body), engaging upper thighs and glutes.
  • Lower the involved leg and start again with the other.

5. Step-Ups

  • Step up can be one of the most effective exercises to improve cellulite if you are looking for quick results.
  • Stand steady in front of a bench.
  • Step up on the table with one foot at a time,
  • Step back, keeping the body shape intact.
  • Repeat with other foot.

6. Squats

  • Stand firmly, keeping your feet parallel to your shoulder.
  • Ensure keeping your toes pointing forward.
  • Lower your glutes, assuming you are sitting on a chair.
  • Don’t place your knees to go over your toes.
  • Squeeze the glutes while rising to the starting position, and repeat.

7. Jump Squats

This is a step ahead of the regular squat and is considered one of the best exercises for cellulite (of course, improving appearance).

  • Start with a regular squat.
  • While getting back to the starting position, increase your pace and jump.
  • Don’t try landing very hard on your feet.
  • Repeat these steps.

Apple Cider Vinegar for Cellulite – Does it Work?

Finding different ways of using ACV for cellulite on the internet is as easy as having a stroll in the park. A lot of websites are flooded with different ACV recipes to treat cellulite – both orally and topically! There are many”before and after” photos to somewhat “back” ACV for cellulite. But does it work? Should you use ACV for cellulite? Let’s find out.

Various studies and research claim different health benefits of apple cider vinegar. Yes, there is some scientific backing too. From the prevention of free radicals’ formation to increasing microcirculation flow, ACV is believed to be an effective treatment for various conditions, not surprisingly, for cellulite as well. But there is not enough medical evidence backing these claims.

In fact, there are some risks involved in using ACV for cellulite or for any other condition for that matter. Let’s have a look at some potential risks of oral or topical usage of ACV.

ACV is highly acidic and can cause skin irritation if used undiluted.

ACV can have harmful effects on your body if you are using diuretics or insulin.

It is known for eroding the tooth enamel.

Like other acidic foods, ACV can also intensify acid reflux.

ACV, when used orally, may increase acidity. And if it’s not diluted, it can even harm your kidneys.

It might be very tempting to use apple cider vinegar for cellulite, especially after reading numerous articles online. And if you are also thinking of it as an alternative therapy, we recommend you decide against it. Or at least ask your doctor before using so that you can get the correct suggestion depending on your health condition and medications you are using (if any).

Takeaway

Cellulite is not a problem at all, at least not a severe one. You can enjoy a perfect life even if you have them. But if you are one of those highly conscious people, we have tried our best to give you the best possible solution. Hopefully, we have busted all your confusion related to cellulite, and you are now well prepared to deal with that “assumption” making cellulite a problem.

If you look around, people are struggling with a lot of serious problems, and you are fortunate whatever you have – from your healthy body to all other things. Nevertheless, find reasons to be happy, love yourself, and be thankful; you will learn how to combat or even ignore something that is not even a problem.

References:

https://www.healthline.com/health/how-to-get-rid-of-cellulite-on-thighs#Exercises-that-may-help-get-rid-of-cellulite

https://www.medicalnewstoday.com/articles/326509#_noHeaderPrefixedContent

https://www.huffpost.com/entry/cellulite-dermatologists-treatment_n_5b3b8078e4b05127ccec90fd

https://www.refinery29.com/en-us/what-is-cellulite-definition-fat-shaming-history

https://patch.com/connecticut/guilford/how-long-does-these-treatments-take-to-get-rid-of-cellulite

https://www.mirror.co.uk/lifestyle/health/how-rid-cellulite-workouts-diets-12013928

https://www.leaf.tv/articles/how-to-get-rid-of-cellulite-in-a-week/

https://www.technogym.com/int/wellness/how-to-naturally-get-rid-of-cellulite/#:~:text=Conclusion,training%20and%20a%20wellness%20lifestyle.

https://www.healthline.com/health/apple-cider-vinegar-for-cellulite#takeaway

Home Remedies for Sensitive Skin

Having sensitive skin is very common, and there is usually nothing serious about it. However, in some cases, skin sensitivity may get severe, and you may find it extremely difficult to cope up with it.

Some people have sensitive skin by birth, while others may notice a sudden change in how their skin reacts to different external stimuli. Like a lot of causative factors, there is a wide range of treatments available. However, home remedies for sensitive skincare the best option, especially if your sensitivity is still new and is not very severe.

In this article, we are trying to touch every point related to sensitive skin. From various causes to sudden triggers and home remedies to self-care, we will try to cover everything tomanage your skin sensitivity successfully.  Let’s find out some possible causes of sensitive skin first.

Why is my skin so sensitive to touch?

– Causes

Like we have discussed earlier, you may have sensitive skin due to a lot of different causes. Here are some very common of them all

  • Natural Disposition

Sometimes, you may develop an allergy without any skin or other underlying health condition. If that’s the case, your skin can become irritated very easily and quickly.

You may get sensitive after exposure to:

  • Heavy winds
  • Sudden atmospheric changes
  • Frigid temperatures
  • Scorching temperatures
  • Sunlight

Additionally, if you have sensitive skin, you might be prone to skin reactions from skincare products, makeup, and even certain types of fabrics.

The symptoms of overly sensitive skin may include:

  • Red, irregular patches all around the body
  • Rashes or hives
  • Breaking out of the skin
  • Sunburns
  • Burning or stinging sensations, with or without noticeable skin changes
  • Allergic reactions

Allergic dermatitis is one of the common types of contact dermatitis and can be a prominent cause of sensitive skin. And you may develop an allergy to a wide range of stimuli, including:

  • Fragrances
  • Latex, especially in gloves
  • Nickle and jewelry prepared from nickel-containing substances
  • Certain chemicals in skin, beauty, and hair products
  • Colouring and dyes
  • Reactions to pollen, certain plants like poison arsenic, poison oak, poison ivy, stinging nettle, etc.

Symptoms of sensitive skin due to any of these factors may include:

  • Rashes or hives
  • Redness with or without inflammation
  • Dry, flaky skin
  • Dark, irregular, leathery patches on the skin
  • Blisters on skin
  • Cracked, oozing skin

If you have an allergy to a known substance, eliminating it from your regimen is the best way to avoid complications. However, identifying allergic products is not very easy, and one should contact a dermatologist for help.

  • Contact Dermatitis

“Contact dermatitis” is a term used for skin reactions after touching a specific substance or product. It may also be one of the causes of sensitive skin. Contact dermatitis symptoms are redness, swelling, and itching of the skin, sometimes accompanied by blisters, dryness, cracks, etc.

  • Dryness of Skin

Sometimes, dryness is also linked with sensitive skin. Your skin contains protective moisture and fat that protects your skin from dryness. Prolonged dryness of skin can make your skin sensitive to some specific stimuli.

Dryness usually affects the body parts that are regularly exposed to the external environment, i.e., hands, face, arms, legs, etc. You can maintain your skin’s moisture by using a natural moisturizer. Some selected creams are also very effective at keeping your skin moisturized, especially on the face.

  • Photo dermatoses

It is an abnormal condition in which there is a reaction to sunlight already in your skin itself. People with this condition may have a very sensitive immune system that is easily triggered by UV rays.

A sunlight reaction in people with photodermatoses may reflect various sensitive skin symptoms including blisters, rashes, and scaly patches. The response usually gets worse with more and more exposure to sunlight. 

Why is my skin so sensitive all of a sudden?

Sometimes, people develop sensitiveness of skin all of a sudden, without having any history. Suddenly you start noticing that your skin is responding differently to particular products or stimuli. The majority of people are not sensitive by birth and develop sensitivity over time. And there are a lot of potential culprits that can make your skin sensitive all of a sudden.

We suggest you do some detective work to find the exact causative factor or agent before finally opting for the treatment method. There may be one or multiple factors affecting your skin. But the good news is, if you successfully find the exact cause of sensitive skin, you can prevent it from affecting your skin again. Here are the different potential factors you should check to underline the culprit accurately.

  • Botanicals and essential oils: You should always be optimistically cautious when using botanicals and essential oils. Usually, essential oils are not considered as a responsible factor for sensitive skin. However, that’s not reality. Essential oils cause sensitivity,mainly when they are used undiluted or in large quantities. That said, different people have a different tolerance level, and it’s possible that your skin doesn’t love botanicals and essential oils.
  • Different hormonal changes: Ageing is one of the most significant factors responsible for a plethora of skin problems, including skin sensitivity. Rapid hormonal changes can directly impact your skin’s appearance, texture, and how it responds to different external stimuli.
  • Your Skin is Sensitive to a Particular Agent: It’s not very common, but possible. And if that’s the case, you may have to do an extended investigating work. We recommend you to do the charting of products you add to your skincare routine. It will be easier to narrow down the potential culprits.
  • Exfoliating, overuse of active ingredients, lifestyle and sudden change in season, etc., can also be responsible for suddenly making your skin sensitive.

Home remedies for sensitive skin

Finding and eliminating triggers is the best possible way to overcome sensitive skin. However, some home remedies and over the counter medications are also useful. Let’s discuss some of the most effective home remedies for sensitive skin.

1. Avoid heat in your room

Isn’t it always tempting to increase the room’s temperature when the air outside is icy? And there is nothing wrong with that! Some people, especially if they have sensitive skin, get irritation from dry and overly warm air. Keep the air inside a bit cooler. You can also use a humidifier to maintain moisture around. Wearing warm clothes during the cold season is better than maintaining a warm temperature inside.

2. A tepid Shower is a go-to option

Who doesn’t like those long, warm showers? A warm shower, specifically of shorter duration, is also useful to relieve sensitive skin. Avoid taking warm showers for more than ten minutes.

3. Give Away Scented Skin Products

It would help if you started going with “scented-free” and “hypoallergic” skincare products instead of those with fragrance. Scented lotion or cream might be very tempting to use, but you might get some discomfort after applying it to your skin. And while you may find it amazing to inhale the smell of a particular detergent, your skin might not agree. Deodorant soaps should also be avoided as much as possible.

4. Wear Gloves While Cleaning or Washing

If you are confirmed that you get sensitivity from soaps or soap water, you will have to be extra careful while using cleansing agents, washing powders, and detergents. Cleansing products with fragrances are often prepared with strong chemicals, can be abrasive to your skin. Instead of cleaning and washing with bare hands, use a pair of long, thick rubber gloves to avoid direct contact with cleansing agents.

5. Use A Gentle Moisturizer Regularly

Keeping your skin moisturized is another effective way of eliminating the sensitiveness of the skin. Slathering a gentle moisturizer layer after washing your hands or bathing can help you keep your hand healthy, soft, and insensitive. We recommend you to opt for fragrance-free moisturizers, as they are usually good for the skin. If you are prone to dry skin and don’t develop acne, using petroleum jelly is also a handy idea.

Home remedies for dry skin on the face

The skin on your face is very soft, gentle, and is always exposed to different harmful external stimuli. And, it is always prone to various skin problems, including dryness. But the good news is, you can tackle this with some readily available yet very useful home remedies. Let’s find out a bit about them.

1. Sunflower Seed Oil

Dehydration can be the culprit when we talk about dry skin on the face. And according to a study, the sunflower seed oil is very good at maintaining skin moisture. So, you can apply a few drops of sunflower seed oil once a day to keep your face’s skin soft, supple, moisturized, and attractive.

2. Coconut Oil

Coconut oil is one of the most effective natural oils used as a moisturizer. A study suggests that there are many similarities between coconut oil and petroleum jelly when it comes to improving skin dryness. Coconut oil is believed to effectively improve hydration of the skin and increase the much-needed lipids on the skin surface.

A 2016 research highlighted that coconut oil is packed with healthy, saturated fats with emollient properties. And emollient works as a skin moisturizer by effectively filling the tiny gaps in dry skin, making the skin smooth and soft.

3. Drinking Milk

Drinking milk could also give you some relief from dry, flaky skin. We recommend you to drink milk instead of applying it superficially. Research from 2015 suggests that adding milk to your diet can improve your skin’s overall health.

The study underlined that milk contains a fat known as “phospholipid,” which improves skin barrier. More research is required to confirm milk’s effectiveness on skin health.

4. Oatmeal Bath

Oatmeal is another effective natural remedy for dry skin. You can get the best oatmeal treatment for your skin by adding it to your bath. Oatmeal works as a skin moisturizer and improves dry skin within a few days.

A study of 2015 found that oatmeal extracts are packed with anti-inflammatory and anti-oxidant properties, backing oatmeal baths as an effective treatment for dry skin.

5. Honey

A team of researchers found in 2012 that honey can be an excellent home remedy for a wide range of skin problems. Honey is packed with anti-inflammatory, healing, and moisturizing properties and can treat skin dryness within a few weeks. And the best part is, honey is free of any harsh effects on the skin. Hence, you can apply honey directly to your skin to keep it soft, supple, and moisturized.

6. Petroleum Jelly

Also known as mineral oil, petroleum jelly has been used as a moisturizer for a long time now. According to research in 2017, petroleum jelly proved useful in maintaining moisture in older people’s skin. These findings back petroleum jelly as an effective treatment for dry skin, mainly due to aging.

Sensitive skincare tips

In addition to using home remedies, you can also follow these tips and tricks to avoid sensitivity and maintain overall skin health.

  • Use micellar water to clean your skin
  • Always keep a gentle moisturizer handy to avoid dryness of your skin
  • Add a soothing face mask to your skincare routine
  • Don’t expose yourself to sunlight for very long
  • Start showering in lukewarm water, instead of cold water
  • Keep your showers and baths to less than 10 minutes
  • Avoid using harsh chemicals, detergents, and fragrances on your skin
  • Always pat your skin instead of rubbing
  • Always perform a skin sensitivity test before using a new skin product.

Skin sensitivity is not a severe complication, and you can overcome it by bringing some positive changes to your lifestyle and regime. It was all about sensitive skin and its treatment. Hopefully, you have found this article helpful to understand all about skin sensitivity.

If your skin is overly sensitive to one or multiple stimuli, we recommend you to talk to a dermatologist for proper treatment. Don’t forget to share your thoughts in the comment section. We will love to get back to you. Have a happy, healthy, and safe life.

References:

https://www.medicalnewstoday.com/articles/sensitive-skin#causes

https://www.webmd.com/beauty/sensitive-skin-20-questions#1

https://www.youglowgal.com/we-know-why-your-skin-is-suddenly-sensitive-and-how-to-fix-it/

https://painresource.com/tag/skin-sensitive-to-touch/

https://www.medicalnewstoday.com/articles/sensitive-skin#treatment

https://www.healthgrades.com/right-care/skin-hair-and-nails/9-at-home-remedies-for-sensitive-skin

https://www.medicalnewstoday.com/articles/319555#home-remedies-for-dry-skin

https://www.lorealparisusa.com/beauty-magazine/skin-care/skin-care-concerns/sensitive-skin-tips-for-spring.aspx

How to Use Sesame Oil for Skin Lightening

What is sesame oil?

Sesame oil is widely recognized as the edible oil that is originated from sesame seeds. It is not only used as oil but also it is used as a flavor enhancer in many cuisines, which has a very nutty aroma and wonderful taste. This sesame oil is popular in Asian cooking varieties. The dishes are also made using sesame seeds in different ways.

Mostly Chinese, Indian, Japanese, middle east, south Indian cuisines use sesame seeds in dishes in different ways. Sesame oil is of two types where light sesame oil is used as cooking oil and toasted sesame oil is used for flavoring in sauces and soups.

Sesame oil has a flavor that is neutral and blends with all types of dishes easily. It adds better taste and good aroma to the dish in which sesame oil is used.

This oil also has several health benefits on consuming but at the same time it is also a common allergen, where many people are allergic to sesame seeds the same happens with oil too. Though seeds are present in oil it affects the person who is allergic to sesame seeds.

Not only for cooking the sesame oil is also used for many beauty reasons. It helps in skin lightening upon daily application on the face. If you are looking for some instant brightening skin try using sesame oil.

Sesame oil benefits for the face:

Let us know some of the benefits of using sesame oil on skin:

Sesame oil has many original properties that help to make it a most beneficial oil which can be used on the skin.

Sesame oil is packed full of antioxidants which means that the oil has the ability to fight the damage that is caused by free radicals which can cause harm to the skin.

It is antimicrobial means that it has the power of killing microorganisms and in some cases, oil can stop the growth of microorganisms.

This oil has anti-inflammatory properties that can reduce inflammation and swelling.

Sesame oil upon using on your face won’t clog any pores and it was determined in a research conducted in 1989. Oil is a good option for all skin types. Having said that the oil does not clog pores so it can even work well on acne-prone skin too.

Not only the above-given data but there are several things to be noted about the usage of sesame oil.

The application of sesame oil can reduce oxidative stress, which can cause cell damage if ignored. This oil is also helpful in healing second-degree burn wounds. If a person is suffering from limb trauma apply sesame oil and massage it sometimes which gives instant relief in case of emergency.

Nutrients present in sesame oil:

Sesame oil contains vitamin E, as this vitamin helps in protecting skin cells from damage that is caused by environmental factors such as pollution and toxins present in the air while we go out.

This oil contains essential fatty acids that are effective moisturizers that can help in keeping your skin supple, soft, and hydrated.

sesame seeds oil for skin lightening

Many people may think that edible is safe for use on the skin. Here we say that using sesame oil on the skin is safe for most people. As we may not know what substance can cause a reaction on the skin. So, a patch is recommended before you use it directly on the skin.

Several steps included in doing a patch test:

  • Wash and pat dry part of the inner arm which is near the elbow.
  • Take a small amount of sesame oil and apply to the dried area with the use of a cotton ball.
  • Try covering it with a gauze pad for 24 hours.
  • If you feel any irritation, tingling, or itching sensation at the applied part remove the pad and it is not safe for you to use the oil further.
  • If you don’t notice any sensation it is safe for you to use the oil.
  • Leave it on for 24 hours and then clean after the desired time.
  • The skin looks clearer, this is the sign that you can use oil-free and your skin is not allergic or not sensitive to your skin.

These are the steps that are needed to follow while you go for a sesame oil patch test.

When in doubt about what to use on your face for glowing skin. No doubt, go with sesame oil which helps in rejuvenating your skin.

Sesame oil also has some health benefits which help to protect us from cardiovascular diseases, diabetes, and arthritis as such. Not only this oil is used for cooking it can also be used for skin and hair and many people have been using this oil for skin and hair for more than thousands of years now.

Sesame oil for skin brightening:

The sesame plant is often referred to as the Queen of oilseeds for its wide range of benefits that will help you to deal with all kinds of skin issues and makes you achieve the perfect skin which is naturally radiant.

Here are some of the tips on how sesame oil will give you flawless and glowing skin.

This oil helps in cleansing and exfoliating the skin clear by removing all the dirt and dead cells present on the face.

Having said that the sesame oil is very sure in that it won’t clog pores on your skin rather it keeps the pores clear by removing all the dirt present in it.

It is naturally rich in fatty acids and some fat-soluble vitamins, which can be a great alternative for your moisturizer keeping the skin plump, hydrated, and healthy glowing.

This oil is absorbed into the skin very easily, nourishes the skin from deep layers thus leaving it a silky smooth appearance.

All the antioxidants combinedly helps in fighting the damage that is caused on skin due to external factors. This oil is very essential in keeping your signs of aging at bay making the skin to rejuvenate the skin faster than ever. It helps in getting rid of wrinkles and fine lines on face.

Sesame oil comes with extraordinary skills that can heal dryness, infections, rashes, swelling, and reduces inflammation. This oil is suitable for all types of skins and the oil can be used as a cleanser, moisturizer, sun protector, anti-aging agent, and an acne fighter.

Oil can be used in many different ways. Try with the best combinations using the oil that helps your skin in healing.

many people may not prefer using oil directly on the skin or face then you can mix the oil with other items that you are comfortable with and apply it and leave it on the skin overnight.

At night the skin is free of dust and pollution which is the best time to heal the skin and make it feel alive. If you are not comfortable using the oil on your face at night use it when you are free from duties.

This is how the sesame oil comes with the great benefits of helping in skin and hair issues. After all, everyone cares about their beauty when it comes to a matter of looks. Try out each and every possibility to make your skin look beautiful.

Wishing you glowing skin and happiness for a lifetime.

Stay safe!! Stay healthy!!

Use Corn Flour Face Mask

From delicious dishes to cleaning blood stains, corn flour has a bunch of benefits for daily use. Interestingly you can use cornflour face masks to have an attractive look.

Corn flour is obtained from maize grain and is extensively used in making sauce, soups, syrups, and chicken nuggets. Proteins and vitamins in cornflour make it a great remedy for brightening skin.

Due to our stressful lives and the pollution that we bear, we face a lot of problems with dust and skin. Mainly when it comes to stress and pollution, we should assume that we will be attacked by facial skin problems likewise sunlight tan, acne, uneven skin tone, etc.,

I’ve seen people who’re after expensive cosmetic creams because they claim to give glowing skin. Failing, they jump to the next newly launched product.

Beauty products include refined and chemical ingredients that have less nutritional value. They use chemicals to increase the shelf-life of the product. So why not just try a simple home available face mask to see how it works.

corn flour mask

Benefits of Corn Flour Face Mask

Nutrients in this face mask help to enhance collagen production, which improves skin’s elasticity and prevents aging signs.

Vitamin A has antioxidants that fight free radicals, fade brown spots, and reduce wrinkles.

Cleansing the property of this face mask, removes dead cells, impurities, and excess oil off the skin.

Vitamin E protects your skin from harmful UV rays and prevents dryness.

Vitamin B1 and B2 hydrate your dry skin and stimulate the healthy functioning of the skin.

The bleaching activity of this face mask lightens the appearance of dark patches and improves your skin tone.

It effectively absorbs excess oil preventing acne blemishes.

Assorted vitamins and amino acids in cornflour make your skin supple and healthy.

1. Corn flour for skin whitening

As mentioned impurities and prolonged exposure to sun rays result in dark patches. The cleansing property of this face mask will wipe them off and the bleaching effect helps to obtain glowing skin.

Take 2 tablespoons of cornflour, 1 tablespoon of raw honey, 2 tablespoons of orange juice, and 1 egg white in a clean bowl. Mix thoroughly and apply the mask over the prewashed face.

You can apply this mask regularly or twice per week. If your skin becomes dry, apply jojoba oil to it.

2. Corn flour face scrub

Your skin sheds millions of dead cells. Along with pollutants it gets accumulated over the skin blocking skin pores. Using cornflour face scrub you can exfoliate them and make a clear complexion.

Mix 1 tbsp of cornflour, 1 tbsp of coffee powder, 1 tbsp of finely grounded oats, and 3 tbsp of coconut oil in a bowl. Wash your face with lukewarm water and apply this face scrub evenly, massage gently in a circular motion.

After 15-20 minutes rinse it off using a wet cloth.

3. Corn flour face mask for glowing skin

Dark spots, acne scars, dry skin, freckles, and other skin issues ruin your physical appearance. Natural remedies penetrate deep into the skin and remove the root cause of the problem.

Blend 2 tbsp of lemon juice, a pinch of turmeric powder, 1 tbsp of cornflour, a few drops of rose water, and 1 tsp of baking soda. Mix thoroughly to form a thick paste. Wash your face with water and apply the mixed face mask evenly all over the face. Rinse it off after 15-20 minutes.

Optionally apply moisturizer to hydrate the skin. I recommend applying lavender oil, as its aroma will lift your mood.

4. Corn Flour face mask for blackheads

Blackheads are types of acne that are black or dark. These are formed due to the clogging of hair follicles. This will spoil our physical appearance as well as these can be identified as dirt. Therefore, with the help of cornflour, blackheads can be reduced.

vinegar will help in removing blackheads as it helps in healing sunburns, flaky skin, etc. Because the acid contained in the vinegar helps in maintaining the pH of the skin and will not let the skin dry or to become oily.

Take 1 spoon of cornflour, 2 spoons of vinegar and make it as smooth paste. Apply it on your face as a face mask with a thick consistency, mainly concentrate on blackhead parts. Leave it for 15 minutes and clean it with cold water. Repeat this process three times a week. This will help in losing blackheads.

5. Corn Flour face mask for skin lightening

To lighten the skin tone, we can use cornflour combined with papaya and banana. Papaya has papain that will help in lightening skin and nourishing. Banana helps in avoiding itchy, flaky, and dry skin and produces bright skin by nourishing it from deep.

To prepare a facemask, take 1 ripe banana and ripe papaya. Smash them together in a bowl making sure that no lumps should be found. After smashing add cornflour to it two tablespoons. Mix them all together and make it into a smooth paste. Apply it on the face as a face mask and also remember to avoid it keeping near sensitive places like under the eyes. Leave it for 20 minutes and then clean it with the help of cold water. If you want to get good results, you should use it twice a week.

6. Corn Flour face pack for skin lightening

To make this face pack, we use rice powder as the main ingredient. Rice powder has been given importance from ancient times because of its skin whitening skills. It is suggested mostly for people who suffer from oily skin and acne. Because by absorbing oil, it also makes skin brighter for immature skin tone too. It is suggested to use rice powder to utilize these benefits.

To prepare this face pack, take 2 tablespoons of cornflour, 2 tablespoons of rice powder, 3 tablespoons of milk, and 1 tablespoon of honey in a bowl and mix all of these into a paste. Apply this face pack after cleaning your face. Keep it until it dries. Then, clean the face pack with cold water.

Conclusion:

As cornflour has oil-absorbing agents as well as reducing sunburns, it is advised to use it for the face to get glowing skin. It nourishes the skin if it is immature skin and makes the skin in an even tone. Not only for the face, it can reduce sunburns for skin rashes as well as it is used in sweating places to reduce dry skin and also used as a deodorant for underarms. It can be used by combining with additional items in the use of it.

Other than using for making food, corn starch is used for face and skin in this process so that it has abilities to reduce skin burns, itching, and rashes. As well as removes skin tan and makes skin tone even. Therefore cornflour is preferred.

Apple Cider Vinegar for Toenail Fungus

Is toenail fungus harmful? What are the different treatments for it? Is apple cider vinegar for toenail fungus a good idea? What are different ways of using ACV for toenail fungus? Let’s try to answer all these questions.

Fungal infection is one of the most common problems affecting toenails, and sometimes, fingernails as well. Factors like moist, warm and dark environments, improper hygiene etc. are usually responsible for the infection of toenails. The nails start looking extra white or yellow with irregular patches all around. It is not a serious problem, but if left untreated, can cause various problems like discolouration of surrounding skin, pain, toenail edges, and even crumbling of nails.

You can treat toenail fungus in a lot of different ways. Still, apple cider vinegar can be a very potent remedy, especially if used with some other natural remedies with powerful bleaching properties.

In this guide, we will tell you everything about the fungal infection of toenails, what are the causes, and how you can use different natural remedies for toenail fungus in different effective ways.

What are the causes of toenail fungus?

A wide range of fungal organisms or fungi can cause toenail fungal infection. But dermatophyte is responsible for most of the cases along with yeast and moulds being other secondary causes of infection.

Irrespective of what causes toenail fungus, older people are more affected than the adults because their nails get brittle and dry with time. Fungi get entry underneath the nails through breaks and pores and cause the infection. Some other responsible factors are disturbed blood circulation due to thrombosis and weakened immune system.

Foot fungus or athlete’s foot usually paves the way for infection, and it can affect multiple nails within a few weeks. It very rarely transmits from one person to another.

You Are at Risk of Developing if:

  • You are older and have been exposed to fungi for so many years
  • Sweat heavily and frequently
  • History of athlete’s foot
  • Skin conditions like injury, eczema and psoriasis etc. are left untreated
  • You walk barefoot usually in damp areas, gyms, washrooms, and swimming pools etc.
  • Have diabetes, weakened immune system, and blood circulation problems for so long.

Also Read: Is Apple Cider Vinegar Really Good Against Shingles?

Complications of Toenail Fungus:

Toenail fungus very rarely gets severe, especially if left untreated. And complications of toenail fungus can be permanent damage to affected nails, painful toes and fingers, discomfort while walking, and very brittle and soft nails etc.

How can Apple Cider Vinegar be effective against toenail fungus?
  • Fungi usually thrive in an alkaline environment. Being acidic in nature, ACV can increase the pH of skin surrounding your nails and can effectively kill the fungi.
  • Thanks to the anti-inflammatory properties, ACV can also improve pain and inflammation caused by infection.
  • Anti-bacterial prowess of apple cider vinegar can kill bacteria, germs, and other infection-causing micro-organisms.
  • ACV can also prevent the further development of infection.

How to Use Apple Cider Vinegar for Toenail Fungus?

Using diluted apple cider vinegar for toenail fungus can be as effective as it gets. But you can get even better results by combining ACV with different home remedies. Here are some DIY ACV recipes to get rid of the infection of toenails.

Toenail Fungus

1. ACV with Water

  • Add equal parts of diluted ACV to water
  • Take water in a wide pot and soak your feet in the solution for about half an hour
  • Remove your feet and pat dry with a towel or a soft cloth
  • Repeat this method every day for three to four weeks and notice the difference

2. ACV and Cotton Swab

  • Dip a cotton swab into one tbsp diluted ACV
  • Apply the swab onto the infected nails
  • Leave for a few minutes to dry out
  • Repeat these steps a couple of times a day for a few weeks

3. ACV with Baking Soda

Using apple cider vinegar and baking soda for toenail fungus is another smart idea. Thanks to its fungistatic properties, baking soda can gel very well with ACV to get rid of fungal nail infection

  • Add one cup ACV and one tbsp baking soda to one cup of water
  • Mix well and soak your nails for about fifteen minutes.
  • Take your foot out and pat dry with a soft cloth.

Alternatively,

  • Make a fine paste by mixing diluted ACV with baking soda
  • Apply the paste on infected nails to cover them completely.
  • Leave for about twenty minutes before washing with freshwater and pat dry.
  • Repeat the process twice every day to get back your shiny, pinkish, healthy nails.

4. Apple Cider Vinegar and Manuka Honey

Manuka honey is also one of the most effective home remedies to treat nail fungus. Various researches suggest that honey can kill fungus and other infection-causing bacteria. Being a natural antiseptic and high in hydrogen peroxide, honey can effectively get rid of toenail fungus.

  • Add one tbsp manuka honey totwo tbsp diluted apple cider vinegar
  • Mix well, and add one glass of warm water, and mix again
  • Drink this mixture to effectively attack fungi from inside

5. The mixture of ACV, Lemon Juice and Listerine

In addition to strong detoxifying properties, lemon is also known for powerful anti-fungal prowess too. Lemon can stimulate the action of fungi and can be even more effective if used with apple cider vinegar for toenail fungus. On the other hand, Listerine is a very potent antiseptic and can easily kill bacteria, germs as well as fungus.

  • Add one tbsp each of diluted ACV, lemon juice and Listerine, and mix properly.
  • Soak your toes in the water for about half an hour.
  • Remove your feet and gently scrub to remove the leftovers.
  • Pat your feet dry completely with a towel.
  • Repeat these steps twice a day for three to four weeks to get the desired results.

6. Apple Cider Vinegar and Epsom Salt:

Epsom salt is another one of the most effective home remedies to treat nail fungus. It has been used to treat fungal infections and wounds for a long time now. It is used specially to draw out the infection and make it easier for antibiotics and other infection medications to work on infections. Epsom salt can make the environment difficult for fungal growth by drawing out the moisture. You can increase its effectiveness by using it with apple cider vinegar. Here is how:

  • Add 1/3 cup of apple cider vinegar to 1/3 cup of Epsom salt and 2 cups of hot water.
  • Stir the mixture well and wait for a few minutes until water is at a comfortable temperature.
  • Soak your nails in the water for about half an hour.
  • Repeat these steps two times a day continuously for a few days.

7. Apple Cider Vinegar with Hydrogen Peroxide and Borax

What is the most effective treatment for toenail fungus?

If you are looking for the most potent way of treating toenail fungus, this mixture can be the answer for you. Hydrogen peroxide is very good at killing fungus on your foot surface, and can even kill other infection-causing bacteria.

On the other hand, borax or boric acid is a capable remedy, especially for yeast infections of the feet. You can even try borax as a second-line treatment when other medicines don’t work. If you are annoyed with recurrence of infection from Candida fungi, you should give a try to borax at least once.

In short, using ACV with hydrogen peroxide and borax is surely a compelling way of treating toenail fungus.

Ingredients

  • Two tbsp borax
  • Equal parts of diluted ACV and water
  • A little amount of 3% diluted hydrogen peroxide

Directions

  • Dissolve borax into hot water for a couple of minutes.
  • Add a little more water along with ACV and mix again.
  • Add hydrogen peroxide and keep stirring the mixture.
  • Now, soak your toenails for about 45 minutes.
  • Repeat these steps every day until you get rid of the infection.

Some Prevention Tips

Prevention of toenail fungus is quite possible as well as easy. Here is how you can adopt some habits to prevent toenail fungus

  • Don’t forget to wash your hands and feet regularly.
  • Keep them moisturized by applying a good quality moisturizer.
  • Try wearing sweat-absorbing socks.
  • Wear shoes made with breathable material.
  • Don’t go in water or damp areas without footwear.

Toenail infection is more of a lifestyle problem than anything. And if you had the question “can apple cider vinegar heal toenail fungus?”, hopefully, you have now got the answer. Yes, ACV does help in treating the infection and can be even more potent if used with some other natural disinfectants. Use ACV according to your ease and choice and get rid of this infection within a few weeks. If you have anything to ask or suggest, don’t forget to hit the comment section. We will catch up with you pretty soon.

References:

https://www.healthline.com/health/food-nutrition/top-raw-honey-benefits#:~:text=Research%20has%20shown%20that%20raw,for%20these%20kinds%20of%20infections.

https://www.healthcentral.com/slideshow/10-foods-combat-candida

https://www.healthline.com/health/home-remedies-for-athletes-foot#otc

https://www.medicalnewstoday.com/articles/325518#:~:text=Boric%20acid%20is%20an%20effective,is%20available%20as%20vaginal%20suppositories.