Is Apple Cider Vinegar Really Good Against Shingles?

Is apple cider vinegar good for shingles? Easily one of the most debatable and underestimated questions related to shingles – probably, among the appalling skin conditions.

To be honest, shingles are more about management than the treatment, as there is still no cure for this annoying infection. Your doctor may prescribe a combination of antiviral medication to reduce the severity of symptoms. And several home remedies can also reduce discomfort and pain. 

ACV is also “assumed” as a very effective treatment for shingles, more by netizens than medical experts or researchers. Apple cider vinegar for shingles is a topic of debate, and the internet is flooded with a lot of content backing ACV as an effective home remedy for shingles. But what is reality?

In this article, we will try to know in detail about shingles and apple cider vinegar. Also, we will find out whether ACV is good for the skin condition or not.

What is Shingles?

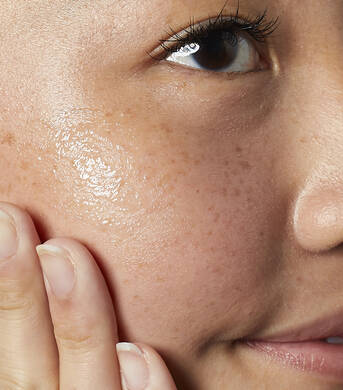
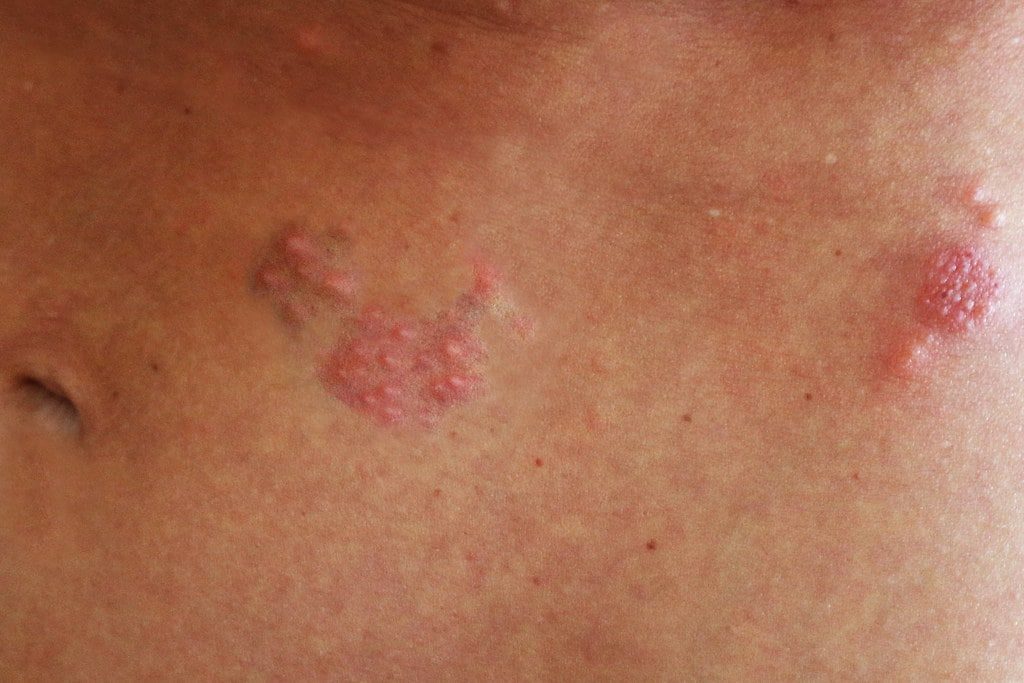
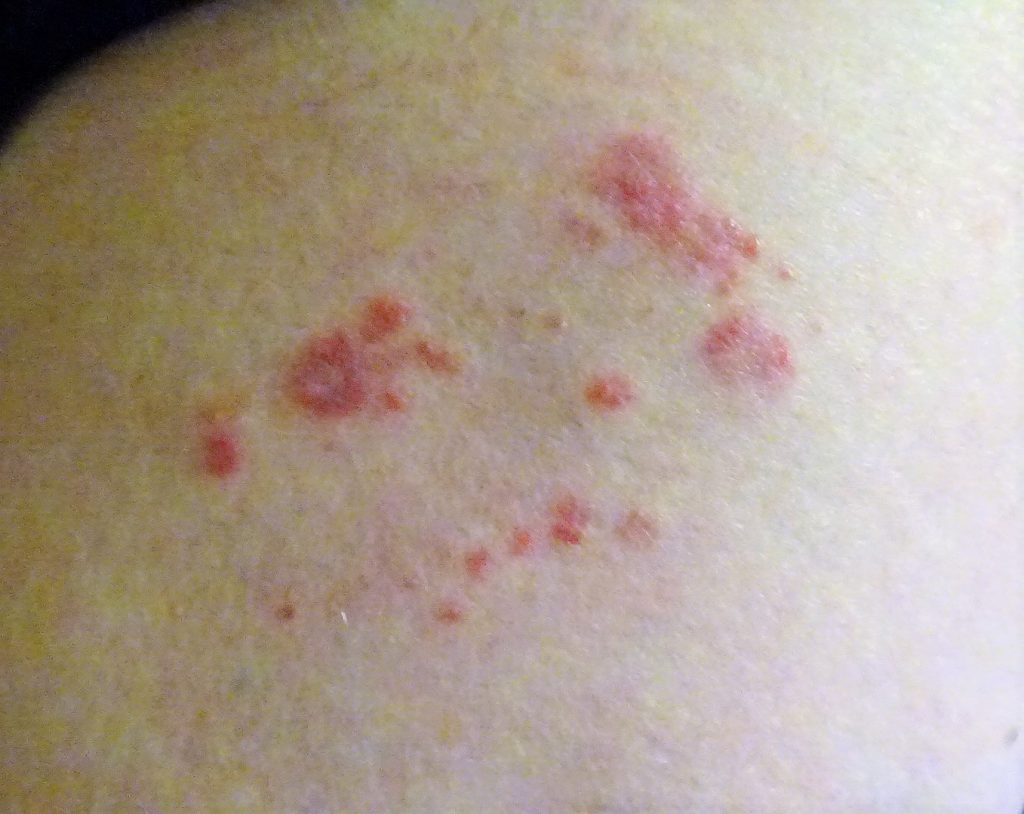
Also known as herpes zoster, shingles is a common viral infection characterized by painful red rashes. It is caused by the Varicella Zoster virus, which is also responsible for causing chickenpox. If you developed chickenpox in childhood, the shingles virus remains dormant in your body. It can get reactive anytime to cause red, painful, itchy rashes at any part of the body, typically small and covered parts.

Although it is not a life-threatening infection, it can surely make you feel very uncomfortable, as the rashes are very painful, and at times, itching as well. Postherpetic neuralgia is one of the most common shingles complications and may develop if shingles are ignored or not treated properly.

How are Shingles Developed?

When the virus varicella-zoster invades your body, more often than not, you suffer from chickenpox. It is usually a childhood condition, but the chances of adults suffering from it can’t be discounted.

Once the chickenpox course is completed, the virus changes its place, travels to the nerve tissues around your spinal cord and brain, and remains dormant.

We are still not sure about this, but, in some people, the virus becomes active again and starts moving from nerve fibers to skin. And that’s how you suffer from the second and more painful punch and develop herpes zoster. And we can say that “reactivity of dormant varicella-zoster is the sole cause of shingles.”

Also Read: Glycerin for Lips – Benefits and DIY Recipes

Image source: https://www.google.com/url?sa=i&url=https%3A%2F%2Fcommons.wikimedia.org%2Fwiki%2FFile%3AShingles_rash%2C_thigh._Caused_by_the_herpes_zoster_virus.jpg&psig=AOvVaw0OT-l9niDeDaQ8xE7hqDQb&ust=1603030149827000&source=images&cd=vfe&ved=0CAIQjRxqFwoTCMDjhevmu-wCFQAAAAAdAAAAABAJ

Risk Factors

Not everyone with a history of chickenpox is at risk of developing shingles. However, you are more likely to get it if you are

  • 50 years old or more
  • Suffering from stress quite often
  • Having immune-disturbing health conditions like cancer, chronic diabetes, gonorrhea and HIV infection, etc.
  • Suffering from chronic, serious physical injury.
  • Habitual of taking steroids or other immune-disturbing medications.

Possible Complications

You may suffer from various shingles complications even after rashes are gone, including:

  • Inflammation of brain cells
  • Paralysis, especially if ignored for a few weeks
  • Loss of vision in case of rashes around the eyes
  • Postherpetic neuralgia pain in one out of five people with shingles

Is Shingles Contagious?

Yes, the spread of shingles is possible from one infected person to other healthy people, even people who never had chickenpox or shingles. And patients remain contagious until all the sores are crusted. Until then, patients should maintain distance, especially from pregnant women with no history of chickenpox.

Vaccine for Shingles

Two common vaccines for shingles, approved by the Food and Drug Administration are Shingrix and Zostavax. Doctors recommend that over 50 people get this vaccine even if they didn’t have chickenpox or shingles.

How Shingles is Diagnosed

Diagnosing shingles can be a bit tricky, as similar symptoms are noticed in other skin problems. Your doctor may take a detailed medical history with symptoms and do a physical exam to confirm the diagnosis. The doctor may also send a small number of fluids for laboratory examination.

Treatment for Shingles

There is still no proven treatment for shingles, but some antiviral drugs are very effective in reducing the complications and favoring the healing process. But patients should get these drugs within a couple of days of a shingles outbreak. So, visiting a doctor very early becomes really important.

Medications for shingles may include:

  • Acyclovir
  • Famciclovir
  • Valacyclovir
  • Antidepressants
  • Anticonvulsants
  • Medicated locations
  • Prescription painkillers
  • Numbing medications etc.
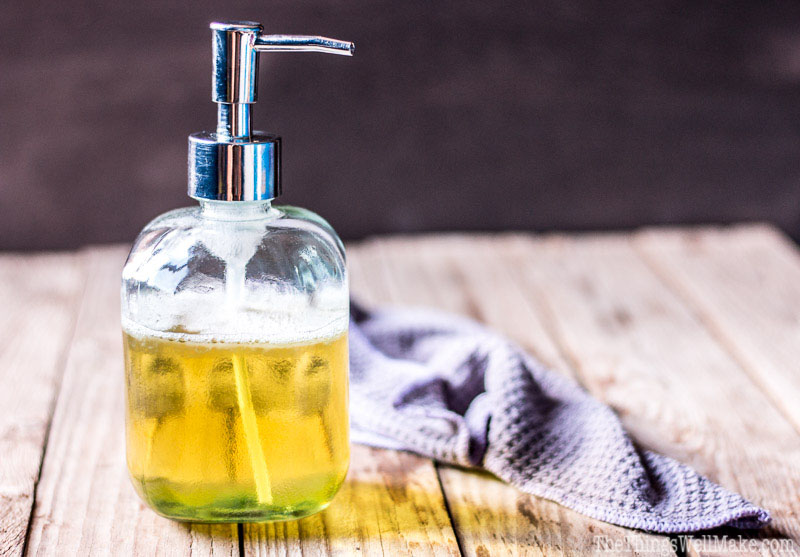
Apple Cider Vinegar – Surely an effective treatment for various skin conditions

Apple cider vinegar is no short of a miracle. It can be very useful for a lot of health and skin-related conditions. From managing your body weight to improving your skin’s health, ACV can do many things until it is used “correctly.”

Apple cider vinegar for skin is surely a nice idea, as ACV is packed with antibacterial, antiviral, and anti-fungal properties and can deal with numerous skin conditions. However, caution is very important while applying it to your skin or drinking. Only diluted ACV is recommended to use for any purpose. Even the diluted ACV can cause severe irritation on your skin, especially if you have an allergy. And undiluted ACV can cause severe problems like burns and blisters!

Why is ACV used for skin?

ACV is being used for the skin for so many years now. And that’s due to its numerous skin benefits.

  • ACV maintains your skin’s pH level and removes dead cells
  • Thanks to its anti-inflammatory properties and acetic acid and alpha hydroxy acid contents, ACV can be very effective against acne.
  • Its antibacterial and anti-fungal properties are effective against bad foot odor.
  • If you have bug bites, ACV can be the answer to it as well.
  • ACV can treat various skin infections, including paronychia.

Is ACV Effective against Shingles as Well?

If you think, “is apple cider vinegar good for shingles,” keep reading to find your answer.

As we have stated earlier, ACV for shingles is more of an “online concept” than anything. Yes, it has numerous antiviral properties, but we are nowhere close to having scientific or medical evidence to suggest that ACV can relieve shingles symptoms.

Why Should You NOT Use ACV for Shingles?

You can find many tips and tricks on using ACV directly on shingles rashes or combining it with other home ingredients like honey. People also recommend taking a bath with a small amount of ACV in water.

Some reports are suggesting that ACV can give some relief from painful itching and stinging of the rashes. But one thing is pretty sure that it can’t completely cure the condition.

Additionally, there is no medical evidence of ACV being effective in improving itching or pain, and you can’t use something topically or internally until doctors approve it. However, it doesn’t mean that you can’t use ACV for your skin at all.

Possible Risks of using ACV

Apple cider vinegar for shingles is associated with several risks, especially if used undiluted. ACV is highly acidic and can cause excessive burning and itching on shingles rashes. You may even suffer from a bacterial skin infection, along with an increase in rashes!

Whether you use ACV for shingles (if you want to use) or for any other skin problem, apply it only after diluting it heavily. A dilution of 1 tbsp (15 mL) ACV and 1 cup (237 mL) water is considered safe to add to your bathwater.

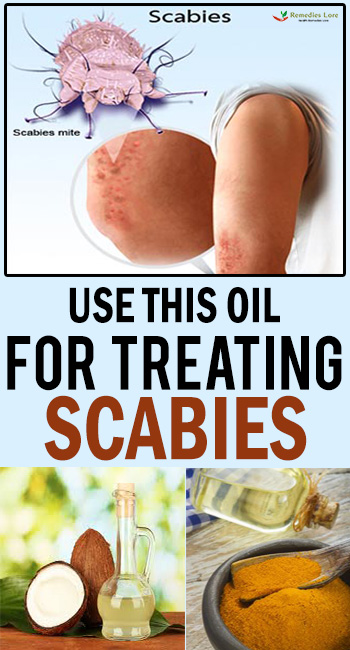
What about safe alternatives?

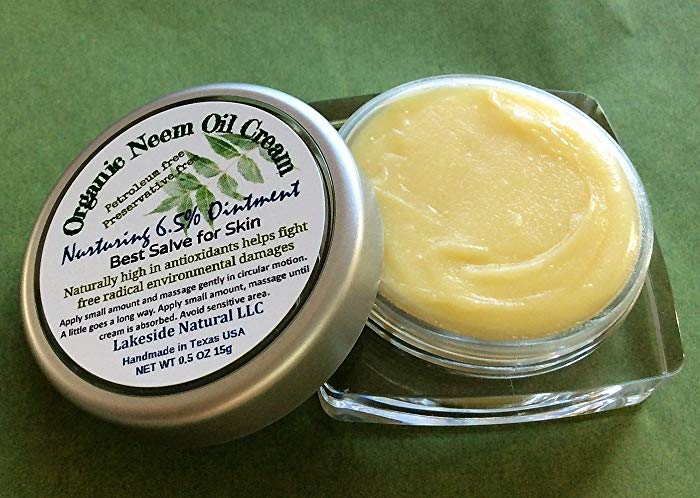
Working closely with a qualified doctor is one of the most important aspects of alternative treatment for shingles. Medicated creams for topical use are at least safe, if not effective against shingles. They won’t cause blisters or burning in already uncomfortable conditions.

You can try some other, safer treatments like cold compress and lukewarm oatmeal bath to reduce the severity of complications. Some over the counter medications like calamine lotion is also proved handy to induce a calming effect.

The Conclusion

There is no scientific or medical evidence of using apple cider vinegar for shingles. ACV is certainly recommended for shingles by “technical doctors” online, but you can’t make a mistake of believing them. Yes, ACV does have some antimicrobial and antiviral properties; you can’t use it to treat serious skin conditions like shingles.

What do we suggest?

Getting proper treatment for shingles is the only effective option to relieve the severity. There is no home remedy effective enough against shingles, and we strongly recommend you not to use them. A cold compress or oatmeal bath are some of the effective ways to relieve pain and burning. Everything other “home treatment for shingles” is nothing more than a “myth.”

Hopefully, we were successful enough to bust the myth about apple cider vinegar for shingles. Hopefully, you have no doubt whatsoever now. Bless us with your good words if we helped you even a bit. Take care of your health and skin, stay happy, stay healthy, and stay safe.

References:

https://www.webmd.com/skin-problems-and-treatments/shingles/shingles-skin#2

https://www.mayoclinic.org/diseases-conditions/shingles/symptoms-causes/syc-20353054

https://www.menshealth.com/health/a25846878/apple-cider-vinegar-skin-benefits/#:~:text=%22Acetic%20acid%20has%20keratolytic%20effects,balance%20your%20skin’s%20pH%20levels.

https://www.healthline.com/nutrition/shingles-pain-relief-apple-cider-vinegar#bottom-line

White vinegar for skin whitening

Skin whitening or lightening can be a very complex thing for many people, especially if there is no natural solution to it. Having dark skin naturally is surely not a big deal, and you should grow with this understanding that you are born different, and darkness is not always a bad thing whatsoever.

However, abnormal or unnatural discoloration or darkness of skin is an issue, and you should look for some effective, at the same time, safe options. And white vinegar for skin whitening can be that ultimate answer to all your queries related to your skin’s abnormal, progressive darkness.

Isn’t it very easy to find a bottle of white vinegar? You can find it in almost every kitchen! But very few people know that in addition to being a great flavor enhancer, white vinegar can be a blessing for skin! From getting rid of unpleasant body odor to bringing back the natural glow, it can singlehandedly solve dozens of skin problems. This article will discuss how a common kitchen ingredient can be an important part of your beauty regimen. Let’s find out.

Why should you use white vinegar for skin?

Your skin’s pH is the game-changer you seldom understand. pH plays many different and important roles to keep your skin healthy, attractive, and vibrant. A disbalance in pH level can invite a plethora of skin problems like acne, dryness, flakiness, and itching of the skin. Compared to those commercial soaps and face washes that are packed with harmful chemicals and preservatives, white vinegar for skin whitening is a much better and safer way to bring your skin to life again.

What are the benefits of white vinegar for the skin?

  • Thanks to its antifungal and antibacterial properties, white vinegar can eliminate harmful bacteria from your skin and is capable enough to protect from acne and blemishes.
  • White vinegar is a great source of hydroxy acids and can remove dead cells from skin layers, thus improving age-induced spots.
  • In addition to maintaining the pH level and avoiding excessive dryness or oiliness, white vinegar works as a pore cleanser.
  • It can be very effective in delaying the appearance of fine lines and wrinkles.
  • If you apply white vinegar to your face, it can make your face radiant and youthful by removing toxins.

In short, there are multiple skin benefits of white vinegar, and you should not be worried about its safety until it is used in diluted form.

What are the possible causes of abnormal discoloration of skin?

It can be tricky to underline the exact cause, as it can be completely different in different people. However, there are some common causes of abnormal skin darkness, and they are:

  • UV Rays: One of the most common factors directly affecting melanin.
  • Melasma: It causes tanned patches on the skin, common in cases of hormonal imbalances, and is frequently noticed in pregnant women.
  • Post-inflammatory hyperpigmentation: You may have dark skin patches after suffering from an injury, psoriasis, eczema, rosacea, acne, etc.
  • Aging: One of the biggest responsible factors and should not be taken very seriously.

Also Read: Simple Trick To Remove Brown Spots From Your Skin

Some important tips and tricks with recipes

Go through these recipes carefully, as we have scribbled different ones for different causative factors and conditions. Let’s don’t waste any time and finally know how to use white vinegar for skin whitening.

1. White vinegar is a skin cleanser

We have already talked about various skin benefits of white vinegar. And you can use it as a powerful skin cleanser as well. Here is how

Ingredients:

  • 1 cup each of white vinegar and water
  • The essential oil of your choice
  • Cotton balls

Procedure:

  • Add one cup of diluted white vinegar to an equal amount of water.
  • Add a few drops of essential oil of your choice for a pleasant smell.
  • Mix well and apply gently on affected parts using a cotton ball.
  • Follow these steps frequently for great results.

2. Home-mode moisturizer

If you want to use white vinegar for face whitening, this recipe is the way to go. Dryness of skin can also be responsible for discoloration of the skin; diluted vinegar can be a great moisturizer. You should use this moisturizer, especially if you have flareups due to different skin conditions.

Here is what you need:

  • One tbsp. diluted vinegar
  • ½ tbsp. honey
  • 30 ml lukewarm water

Here is how to make and use the moisturizer

  • Add white vinegar and honey to water and mix thoroughly.
  • Wash your face with cold water.
  • Apply on your face with both palms, and leave overnight.
  • You will start noticing the result after a couple of weeks.

3. White vinegar with aloe vera

Who’s not aware of the amazing skin benefits of aloe vera? It is packed with anti-microbial and anti-inflammatory properties and can be amazingly effective if used with white vinegar for skin whitening. Let’s find out how to combine and use them perfectly.

Ingredients:

  • 2 tbsp. freshly extracted aloe vera juice.
  • 2 tbsp. diluted white vinegar.

Recipe:

  • Add two tbsp. each of aloe vera juice and white vinegar.
  • Adjust the quantity according to the area affected by discoloration or improper tonicity.
  • Mix both ingredients continuously until you get lotion-like consistency.
  • Now, apply on the affected skin.
  • Prefer following these steps every night before going to bed.
  • The results will start following after a few weeks.

4. White vinegar with olive oil

Olive oil is surely one of the most extraordinary ingredients for a variety of skin problems. It is known for its anti-inflammatory and anti-oxidative properties and can decently complement your efforts to get rid of abnormally discolored skin. And it will only favor the surprising skin benefits of white vinegar. Here is how

What you need:

  • 2 tbsp. each of diluted white vinegar and virgin olive oil

Steps to follow:

  • Mix both the ingredients thoroughly.
  • Apply on the dark skin areas and leave for a few hours.
  • Wash very gently with lukewarm water and apply a natural moisturizer, as we have discussed above.
  • You will see dark patches go away within the first few weeks.

5. White vinegar with glycerine:

If discoloration is accompanied by dryness, you can use white vinegar for skin whitening with glycerine as well. It is one of the most effective skin moisturizers out there and can perform great cleansing work and moisturizing, especially if mixed with white vinegar.

Ingredients you need:

  • 1 tbsp. diluted white vinegar
  • 2 tbsp. glycerine
  • Cotton balls

What to do:

  • Mix both white vinegar and glycerine, and mix for a few seconds.
  • Apply on the dark spots using cotton balls and leave for about an hour.
  • Wash with lukewarm water and pat dry.
  • Repeat these steps regularly for a few weeks and see the results.

6. White vinegar with strawberries

Strawberries can increase the effectiveness of vinegar to another level, especially if you aim to use white vinegar for face whitening. They are packed with vitamin C and folic acid and can favor the process of cell generation. In addition, strawberry can help in the synthesis of collagen, removing harmful toxins from the skin. The absorbing capacity of white vinegar will make it easier for a strawberry to work on your skin pores and get rid of tissue-damaging factors like blackheads.

You will need:

  • Two ripe, fresh strawberries
  • One tbsp. diluted white vinegar

Method:

  • Mash the strawberries to get a thick and smooth paste.
  • Add vinegar and blend for a couple of minutes.
  • Apply the paste on dark or saggy skin.
  • Massage in a circular motion for a few minutes and then wash off.
  • Repeat once a week for desired results.

Some Important Points to Remember

Yes, there is no doubt about the effectiveness of white vinegar for skin whitening. But we recommend you to keep these points in mind while using it for the skin.

  • Always use diluted vinegar only, as you may develop a burning sensation.
  • Don’t forget to perform a patch test before using white vinegar or any other such ingredient. If you feel irritation or burning, avoid using it.
  • Don’t use strong soaps or perfumes before or after using white vinegar to avoid possible skin irritation.
  • If you have skin problems for a long time, talk to a dermatologist for proper and specific treatment.
  • Avoid using vinegar if you are already using some medicines prescribed by a qualified doctor.
  • Whether you want to use white vinegar for skin whitening or any other purpose, get only organic for better results.
  • NEVER apply white vinegar or any other untested substance if you get your skin burn. Take immediate medical advice for proper treatment.

White vinegar can be a quick as well as affordable solution to abnormal skin darkness. And if you use it with caution, you will get the desired results. Follow these tricks keeping other important points in mind, and let us know, which one helped you more. Stay healthy, beautiful, and safe.

References:

https://www.stylecraze.com/articles/10-ways-to-use-vinegar-for-your-skin/

https://www.skindiseaseremedies.com/white-vinegar-for-skin-whitening/

How Oil Cleansing Benefits Rosacea, Acne, And Aging Skin

Many people are born with oily skin while some face the trouble of oily skin due to an unhealthy lifestyle. There are many products available online that help us to keep our skin clear and gorgeous.

Cleansing the face may sound easy however; one wrong product can cause skin problems. Many women have turned to oil cleansing as an authentic way to gently remove makeup, soothe delicate skin, and tame remorseless breakouts.

For the majority of people, cleansing of the face means washing the face with suitable soap or face wash and rinsing with lukewarm water.

Nowadays, there are many pre-made oil cleansers suitable for every skin type available in the market. These premade oil cleansers are easily available; however, nothing beats the power of natural homemade cleansers.

Unbelievably, oil cleansing can be enormously beneficial for treating rosacea, blemishes, and even acne-prone skin. However, many people have the same question – is castor oil good for rosacea?

Castor oil is antibacterial and acts like a harsh cleaner that thoroughly cleans the skin. However, due to the astringent action, castor oil causes skin dryness. Therefore, use a small amount of castor oil while making your own DIY oil cleanser.

Other oils that can also be used for oil cleansing are:

·        Olive oil

·        Castor oil

·        Almond oil

·        Avocado oil

·        Sunflower oil

·        Argon oil

·        Jojoba oil

·        Apricot kernel oil

Benefits of oil cleansing

·        Oil cleansing is one of the gentlest and best ways to cleanse your skin properly. It does not upset the natural Ph level of any skin type and it never leaves your skin feeling tight and dry. Instead, your skin feels clean, fresh, and glowing.

·        Oil cleansing helps in regulating the skin and controls the oil production that helps in reducing or getting rid of acne and pimples. Natural oil has the ability to bind the dirt on your skin and gently lift them away. Natural oil also balances the Ph level of your skin without clogging your pores.

·        Oil cleansing deeply cleanses your skin and removes any impurities, bacteria, and dead skin cells. Moreover, there is no need for double cleansing as the oil cleansing leaves no remains.

·        Oil cleansing gently removes all makeup, even waterproof makeup.

·        It is recommended to clean your skin at night and follow the normal routine in the morning. Splash water on your face and let your own natural oil sits on the skin in the morning. This helps your skin to self-regulate and within a few weeks of oil cleansing, you’ll notice that your pores are becoming balanced and less oily.

·        According to a study, cleansing your face with plant-based oil is incredibly beneficial for your skin. Plant-based oil is ideal for those skins that are prone to Acne, Psoriasis, and Rosacea. It is recommended to do a patch test to make sure which plant-based oil is suitable for your skin.

·        The plant-based oils are rich in antioxidants that help fight the free radicals, which cause premature aging.

At first, you may feel a little uncomfortable using oil on your face, however, after some time you’ll get used to it. This technique is one of the best and great ways to cleanse and nourish the skin.

Using nurturing biological oil to clean your face helps in breaking up the grime and gets caught in your skin’s natural sebum.

Step One: Select a base oil

One of the best base oils for oil cleansing is jojoba oil. Many people may not know but jojoba oil is a liquid plant wax and not an oil. Being a liquid plant wax makes its shelf life and stability significantly higher than many other actual oils.

Some other base oil choices are:

·        Organic avocado oil

·        Pumpkin seed oil

·        Sunflower oil

·        Sweet almond oil

·        Olive oil

Step two: modify according to your skin type

One of the great things about oil cleansing is that you can customize the mixture that perfectly fits your specific skin type. In case, you have normal or marginally oily skin, then using only base oil might be perfect for you. If you tend to have dry skin, a mixture of nourishing oil to some base oil can help you to balance your skin complexion.

Some of the best nourishing oils

·        Argan oil

·        Borage seed oil

·        Pomegranate seed oil

·        Tamanu oil                         

·        Shea nut oil

·        Sea Buckthorn oil

·        Rosehip seed oil

Other oils you can mix with nourishing oil

·        Castor oil

·        Grapeseed oil

·        Hazelnut oil

·        Hemp seed oil

·        Pumpkin seed oil

Is castor oil good for rosacea, is one of the common questions asked by many beauticians as castor oil has the tendency to make your skin look dry.

Step three: check your mixture

You may not know, however, you can be allergic to any oil or doesn’t suit your skin. Therefore, it is recommended to start with small batches and test them on your arms or legs. In case, you don’t see any reaction of a mixture of two-three oils then apply it on your face. Once you find the perfect combination, stick to it, get a fresh, and glowing look.

Nourishing homemade oil cleanser recipe

Ingredients

·        One teaspoon of rosehip seed oil

·        Three teaspoons of jojoba oil or any other basic oil

Directions to follow

·        Use a small funnel to combine rosehip and jojoba oil

·        Properly mix these two oils

·        Wash your face with warm water before using this mixture

How to do oil cleansing

·        Wash your face with warm water

·        Carefully apply one to two teaspoons of oil cleanser to your face

·        Gently but firmly massage the oil into the skin for approximately two minutes

·        Let it stay on your skin for at least 30 to 40 seconds

·        Gently run a washcloth under hot water and squeeze out the excess water

·        Place the wet towel on your face for 15-20 seconds

·        Slowly wipe away all oil and keep on doing it until all the oil is removed from your skin

·        Or else, you can simply wash your face with warm water and gently dry your skin with a towel As with this is a big change to your beauty routine, it may take your skin a week or two to get habitual with a new practice. Some skin type takes a long time to adjust with this change, therefore, try to follow the routine for a month. In case, you don’t see a change then try to change the combination of oils. It takes a few tries to find the perfect mixture that suits your skin type.

How to Get Rid Of Brown Spots in 5 Easy Steps

Brown spots, dark spots, or hyperpigmentation mainly caused by age, sun exposure. These may not be harmful to your health; however, thy sure make you feel ugly. Almost everyone wants to get rid of them sooner than later.

Major factors that contribute to dark and brown spots are:
  • Constant exposure to peak sunlight
  • Hormonal imbalance
  • The certain medication also causes brown spots
There are many ways to get rid of these brown spots such as:
  • Home remedies
  • Cosmetics
  • Professional treatments

However, all these treatments take weeks to months depending on the darkness level of spots.

How to Get Rid Of Brown Spots in 5 Easy Steps
Here are five simple ways to easily get rid of brown spots.
1. Lemon juice

Lemon juice contains natural bleaching properties as well as it also contains vitamin C that helps with depigmentation. In some cases, lemon juice doesn’t remove the brown spots, however, lighten the dark areas. Rub the freshly squeezed lemon onto your dark spots and leave it for roughly 10-12 minutes before rinsing. Keep in mind; never step out in sun with lemon juice on as it might result in opposite results.

2. Mask of Papaya with Lemon juice and Honey

Papaya contains alpha hydroxyl acid and this element is used in many acne and spots cleansers available in the market. Follow the steps given below to use papaya for your brown spots:

  • Cut a papaya
  • Remove seeds and skin of papaya
  • Cut a little less than half and put it in a blender
  • Add water so it blends smoothly
  • Once you blend it, add one tablespoon of honey and lemon juice
  • Apply the mixture on the spots and leave it for 30 minutes
  • Wash the area thoroughly with lukewarm water
  • Apply the moisturize (whichever you prefer) on the washed area
  • Do this for two-three times in a week for best results

Also Read: Simple Trick To Remove Brown Spots From Your Skin

3. Use a power cleansing brush

Nowadays, there are many special power-cleansing brushes to exfoliate your skin without any kind of chemicals. These brushes deeply clean and get the top layer of dead skin off, which leads to brown spots. Use this brush two-three times a week with a face cleanser, rubbing it over the area for two-three minutes. Keep in mind, to maintain the health of brush, clean its head with hot soapy water after every use.

4. Use sunscreen

You may be able to lighten or remove the spots using different methods. If you don’t use sunscreen to protect your skin, these spots might appear again. Therefore, it is necessary to apply a thin layer of sunscreen with SPF 30 or higher to those body areas that are open to sunlight, such as:

  • Hands
  • Arms
  • Face and Neck
  • Legs ( in case you wear shorts or knee-length dresses)

Apply a thin layer of sunscreen with SPF 30 or higher to protect your skin from harmful UV rays.

5. Use a Peel-Off Mask

Now, many peel-off masks are available in the market, depending on your face skin type. Such masks also come for every body part to remove brown spots. After use apply a thin layer of cream as your skin will be a little sensitive after the use of such masks.

Also Read: How to Treat Brown Spots on Fiddle Leaf Fig Leaves

How to Use Vaseline for Acne

One of the popular petroleum jelly brands is Vaseline. Vaseline is a mixture of minerals and beeswax that are easily spreadable and the main ingredient of Petroleum.

Vaseline is used for many things and recently has been discovered that Vaseline can be used to cure acne. It is safe to say that unlike other forms of petroleum jelly, Vaseline is safe to use on your skin and hands.

In case of acne, you need to lubricate your skin in order to help your skin barrier repair itself; otherwise, more acne and breakouts will emerge on your skin.

How to Use Vaseline for Acne

How to use Vaseline to remove acne from the face?

  • One of the easiest ways to use Vaseline to break acne is applying a thick layer of Vaseline on your acne and washed off your face after 10-15 minutes. It not only removes acne, however, it also smoothens your skin and reduces the pimple marks and redness.
  • Another way is by applying a layer of Vaseline on your acne and leave it overnight. Wash your face from lukewarm water, and you’ll see a reduction in acne and its redness.

Also Read: Colgate And Vaseline To Get Rid of Dark Spots on Skin

Additional benefits of Vaseline for your face

  • Removes eye makeup: Vaseline easily and gently dissolves almost any kind of makeup. Vaseline is also good at removing waterproof mascara.
  • Locks in moisture: To restore the natural level of moisture and softness of your face apply a layer of Vaseline before you go to sleep. Vaseline helps in locking the moisture on your face without harming your face skin.
  • Heal minor cuts and scrapes: Vaseline forms a protective layer that seals the area of your skin where you apply it. Moreover, it keeps the bacteria from attacking a wound that is working to heal.
  • Protects chapped lips: Vaseline is mostly used to heal and protects chapped lips, which usually happens due to change in weather. Vaseline protects the sensitive skin around the mouth and lips.
  • Grooms and style eyebrows: Apply a thin layer of vaseline to smoothen the hairs of your eyebrows as well as put them into place. This helps you to style your eyebrows in whatever shape you desire.

Also Read: Vaseline With 1 Vitamin E Capsule Can Change Your Skin Overnight

Vaseline for different skin tones

  • Dry Skin: Vaseline is very effective in dry skin because of its occlusive properties. Vaseline also helps to soothe the skin as well as it is safe to use in the area around your eyes.
  • Oily Skin: Even though, vaseline is effective on oily skin, however, the heavy and greasy feeling of vaseline may not be comfortable. Vaseline also seal soils that are one your skin whenever you apply it on your skin.
  • Sensitive Skin: A person with sensitive skin has to be extra careful while applying anything on their face or body. Vaseline is one such thing that people with sensitive skin can freely use, as it has no harmful effects when used on sensitive skin.

For a majority of people, vaseline is a safe and pocket-friendly way to lock moisture into your skin. Even if you suffer from some skin conditions such as psoriasis or rosacea, vaseline is safe to use.

Also Read: This Vaseline Trick Can Help You Remove Unwanted Hair

How to Lighten Dark Underarms Fast with 2 Natural Ingredients

Having dark underarms is not something serious health issue, but for some people, it can be a reason for embarrassment. If you have dark underarms, you think numerous times before wearing sleeveless tops, sports suits, bathing suits, etc. especially in public. You may start feeling underconfident about your look and appearance.

But here is an excellent solution for you! Here we are sharing with you a very natural, yet so powerful trick to improve dark underarms. The best part is, you have to use two natural ingredients for this combination – lemon juice and baking soda.

What causes dark underarms?

Before knowing more about the recipe, let’s talk about a few causes of dark underarms.

You may have dark underarms due to:
  • Regular shaving of your armpits.
  • Continuous usage of deodorants and antiperspirants.
  • Accumulation of dead cells around the armpits.
  • Hyperpigmentation.
  • Certain bacterial infections.
  • Acanthosis Nigricans – An abnormal thickness, roughness, and darkness of skin
  • Medical conditions like Smoker’s melanosis, melasma and Addison’s disease, etc.

Related: 7 Natural Ways to Lighten Dark Underarms

Why Use Lemon Juice and Baking Soda?

Both lemon juice and baking soda are known for their powerful bleaching properties. But it’s not only about bleaching. Here are a few more strong reasons, why you should use lemon and baking soda for dark underarms.

How to Lighten Dark Underarms Fast with 2 Natural Ingredients

Skin benefits of Lemon Juice:

  • Exfoliates the skin: Lemon is packed with vitamin C and ascorbic acid that make it a very powerful natural skin exfoliator.
  • Stimulates Collagen: Due to the presence of vitamin C, lemon can stimulate collagen (responsible for your skin’s natural color).
  • Powerful natural cleanser: Lemon is one of the most powerful natural skin cleansers, and can combat almost all types of abnormal skin darkness.
  • An excellent moisturizer: Skin dryness can also cause darkness around your armpits. Lemon can combat that by keeping your skin moisturized.
  • Lemon is packed with antiseptic and antibacterial properties: Due to these qualities, lemon can improve almost all types of skin infections responsible for the darkness of skin.

Related: How to Use Baking Soda to Whiten Underarms

Skin Benefits of Baking Soda:

  • Maintains the pH level of the skin: Hyperpigmentation can increase your skin’s pH level. Thanks to the amphoteric properties, baking soda can maintain the skin’s pH level and improves the darkness of armpits.
  • Natural Deodorant: Using commercial deodorants for very long can also make your underarms dark. What’s the solution? You can use baking soda as a natural deodorant. It will make sure better health and the color of your skin.

How to Use Lemon Juice and Baking Soda for Dark Underarms?

  • Add 2 tbsp lemon juice with one tbsp baking soda
  • Mix both the ingredients well to get a smooth paste
  • Apply gently around the armpits and leave for about twenty minutes
  • Wash off with fresh water and pat dry with a soft towel
  • Repeat this for a couple of weeks and see the result
  • Apply a gentle moisturizer because both baking soda and lemon juice are acidic in nature.

That’s the powerful recipe for dark underarms guys. Try it at least once if you are feeling embarrassed due to dark armpits. You will feel the difference within a couple of weeks, and you will get back your confidence and self-esteem.

Related: Apple Cider Vinegar for Dark Underarms – 5 DIY Methods

Colgate And Vaseline To Get Rid of Dark Spots on Skin

Your skin is the finest clothing you can ever wear. When it comes to representing your physicality, skin plays a very critical role. Every skin color and every skin type are beautiful and unique in different ways.

Skin is not only about defining your physical appearance; it is a vital sheath that protects your body from dozens of harmful external stimuli. Factors like prolonged exposure to certain external stimuli, hormonal imbalances, adolescence, puberty, particular health conditions, medicinal usages, etc.

can cause various skin problems. And dark skin spots are one of the most common of them.

In this article, we are talking about a very effective combination that can help you to eradicate the abnormal darkness of the skin. The best thing about this combination is, it is safe for almost all types of skin, and is very easy to prepare.

Ladies and gentlemen, we are talking about the combination of two of the most common products you can find in almost every Indian home- Colgate and Vaseline!

You must be familiar with both of these products, as both are part of our life for so many years now. Let’s find out why these two products are used to prepare the dark spots remedy.

Colgate And Vaseline To Get Rid of Dark Spots on Skin

Why Use Colgate and Vaseline for Dark Spots:

Colgate:

You might be surprised by the skin benefits of Colgate, as its primary action is on your teeth and it gets rid of most of the dental problems. But according to recent studies, Colgate can be effective in the case of dark spots and pimples, especially if they’re caused by the heat. Ingredients of Colgate including calcium carbonate and zinc can work positively on your skin.

Vaseline:

Who doesn’t know about this magical petroleum jelly? It seems we all grown up using Vaseline for different skin problems. It can singlehandedly combat dozens of skin problems.

  • Vaseline can quickly heal scrapes and burns (two of the major causes of skin darkness.
  • It keeps your skin moisturized and avoid darkness due to skin dryness.
  • Vaseline avoids skin rashes that sometimes convert into dark spots.
  • It prevents harmful skin strains from hair dye or nail polish.

There are plenty of other benefits that make Vaseline standout among a lot of beauty products. Let’s find out how to use the combination to remove dark spots.

Related: Vaseline With 1 Vitamin E Capsule Can Change Your Skin Overnight

How to use Vaseline and Colgate to Remove Dark Spots:

What Do You need?

Simple, easily available Vaseline petroleum jelly and Colgate

  • Use simple white Colgate toothpaste, instead of flavored or gel-based varieties.
Here is how to use:
  • Take a little amount of toothpaste in a bowl.
  • Now, add an equal amount of Vaseline.
  • Mix both the ingredients properly until they’re combined perfectly.
  • Now, apply the combination on the dark spots and spread it around.
  • Keep it on for five minutes and then wash off with plain water.

The trick is going to be very effective for dark spots. It can even help you to remove the blackheads from the skin.

Colgate can cause allergy to some people. Don’t forget to do the allergy test before using it.

Related: This Vaseline Trick Can Help You Remove Unwanted Hair

Complete 10-Step Korean Skincare Routine For Morning and Night


The 10-step Korean skincare routine has become a trend worldwide. It’s not only a routine, but it’s also a complete lifestyle based on Korea’s unique obsession with a healthy body and skin. The routine is not something that has coined incidentally. It is even backed by the decades of scientific advancements.

The routine is not about using a lot of skin products, rather it is about using the right products with the correct understanding of what product is used for what, and more importantly, using them at the right time and in the right order.

Here is the step-by-step guide on how to follow the wonderful Korean skincare routine.

Korean skincare

 1. Makeup Remover and Oil Cleanser:

Oil cleansers are used as the base of this skincare technique. Oil cleansers are not only easy to use, but they can also perfectly remove almost any kind of makeup you’ve used previously. If you want to remove the makeup or even oil-based impurities, makeup remover is the best option.

What it does:

It removes the oil-based debris easily

Preferred ingredients options:
  • Jojoba oil
  • Grape seed oil
  • Macadamia oil
What to follow:

Apply the makeup remover and massage your skin gently, use lukewarm water for emulsification, then wash off.

2. Water-Based Cleanser:

A water-based cleanser is the second step of a double cleanse. Aestheticians and dermatologists recommend for double cleansing because it can completely remove all types of impurities that can cause skin breakouts. Water-based cleaner can easily dissolve the water-based impurities and sweat that can be skipped by the oil-based cleanser.

How it works:

Water-based cleanser can effectively remove the water-based impurities and sweat.

Preferred Ingredients:
  • Green tea
  • Pearl extract
  • Rice extract
Steps to follow:

Apply the water-based cleanser on your damp face and neck, massage thoroughly in the circular motion, and wash off with lukewarm water.

Related: Vaseline With 1 Vitamin E Capsule Can Change Your Skin Overnight

3.Exfoliator:

Exfoliation is an important step in any kind of skincare routine. It can remove dead cells from the skin pores and can make your skin visibly brighter. Exfoliation also ensures the proper absorption of other makeup products.

What exfoliator does:

Exfoliation can remove the dead cells, debris and other impurities from the skin layers.

Ingredients to prefer:
  • Lactic acid
  • Salicylic acid
  • Black sugar
What to follow:

You should exfoliate your skin gently once or twice in a week. Give proper attention to the nose and visible pores on the cheeks.

4. Toner:

Toner is an extremely important part of this Korean makeup technique. It doesn’t only remove the leftover residue from the cleansers, it repairs your skin barrier so that your skin can effectively absorb the moisturizers.

What toner does:

Balances your skin’s pH and moisture.

Ingredients to love:
  • Aloe Vera
  • Citric Acid
  • Licorice
Steps to follow:

Take your favorite skin toner on a little cotton pad. Swipe the cotton all over your face and then pat gently with your hands.

5. Essence:

Essences are very good for your skin. They are not only soft, supple and lightweight, but they are also packed with combined quality of anti-aging, complexion-enhancing and hydrating.

 How it works:

It works even better for dry skin, aids in cell turnover, and hydrates the skin

Ingredients to look:
  • Birch juice
  • Hyaluronic acid
  • Rice extract
  • Yeast
What to do:

Sprinkle the essence of your choice on your hands and gently pat on the face and neck.

Related: Simple Trick To Remove Brown Spots From Your Skin

6. Treatments:

When it comes to the ingredients for skin treatment, boosters, serums, and ampoules are the ultimate options. They’re packed with very powerful ingredients and can fight some common skin problems including acne, hyperpigmentation, and fine lines etc.

What treatment does:

Treatment directly works on the problem areas.

Ingredients to prefer:
  • Tea Tree
  • Soybeans
  • Vitamin C
How to treat:

Apply the ingredient of your choice on the skin, targeting the problem area

7. Sheet Mask:

If essences are the heart of the Korean skincare technique, you can say that sheet masks are the soul. The sheet is the key to this step. The proper contact of these sheets ensures that your skin can correctly absorb the moisture and nutrients. In addition, they promote the meditative and quiet ritual of relaxation.

Why Sheet mask is important:

Sheet mask ensures the perfect infusion of concentrated essence.

Ingredients suitable as sheet mask:
  • Cucumber
  • Rose
  • Green tea
Steps to follow:

Apply gently on your clean skin, and leave for 15-20 minutes, and then apply the excess essence.

 8. Eye Cream:

The skin around your eyes is very soft as well as sensitive, and proper usage of a suitable eye cream can keep problems like puffiness, crow’s feet and dark circles etc. at bay. Eye creams are gentle and non-irritating, and are packed with beneficial ingredients.

What eye cream does:

Eye cream ensures the hydration of the skin around eyes, and improves the conditions like dark circles, crow’s feet and puffiness etc.

Preferred Ingredients:
  • Honey
  • Lily
  • Ginseng
Steps to follow:

Gently tap the eye cream around your eyes ensuring you don’t rub it.

9. Moisturizer:

You can get moisturizers in a lot of different forms i.e. gel, lotion, emulsion, and sleeping mask etc. They can improve the moisture of your skin, and can fight the annoying and harmful dryness.

What moisturizer does:

Moisturizer seals in the moisture, and makes your skin smooth and supple.

Suitable ingredients:
  • Hydraulic acid
  • Centella Asiatica (cica)
  • Green tea
  • Bamboo
  • Snail mucin
How to:

Pat the ingredient gently on your face. Follow it daily in the morning and night.

10. Sunscreen:

If you want to take care of your skin, you should make sunscreen a must. Use it even if you remain mostly inside. Sunscreen prevents premature ageing and can even protect you from the skin cancer. You should use sunscreen as a shield at the end of this Korean skincare routine.

What sunscreen does:

It gives your skin the much-needed protection from harmful UV rays

Ingredients you can use as sunscreen:
  • Titanium dioxide
  • Zinc oxide
How to:

Once you’re done with all other steps, finish your routine with sunscreen. Gently pat the sunscreen on face and the neck and re-apply throughout the day.

Related:  How to Remove Dark Circles with Cucumber?

There are plenty of benefits to the Korean skincare routine. It is themed mostly around the natural ingredients and is very easy to follow as well. If you’re annoyed with numerous other skincare techniques, you should at least give it a try. You will surely feel the difference

I Got Shocked With The Results Of This Magical Remedy, It Removed Dark Spot In 1 Day

Many women suffer from the situation from black spots due to the high exposure of the sun. Black spots usually occur on the face, back, shoulder, and back of the hand and these spots vary in size from person to person.

Even though dark spots usually fade away within time, however, many women prefer to lighten them for various reasons.

Causes of black spots:

  • Hormonal imbalance
  • Certain medication
  • Allergies
  • Psoriasis
  • Certain skin injuries
  • Specific skin disorder like acne, pimple

Depending on the causes of dark spots, each dark spot is classified into three categories.

  • Melasma – noticeable during pregnancy or menopause; caused by hormonal imbalance
  • Lentigines – caused by constant sun exposure
  • Post-inflammatory hyperpigmentation – produced due to skin conditions such as acne and burns, etc.

There are many treatment options available to lighten or remove the black spots; however, nothing beats the power of natural remedies. In case, you have mild to moderate dark spots, you can easily remove them in one day without harming your skin cells.

It Removed Dark Spot In 1 Day

Home remedies to remove Dark Spots in one day

1. Lemon juice

lemom juice

Lemons are filled with Vitamin C, which is a very effective antioxidant to lighten or remove the dark spots on your face. All you need to do is to take one teaspoon of lemon juice and one teaspoon of water and mix them well. Once you do so, dip a small cotton ball into the mixture, and apply the cotton balls to the affected area. Leave it for 20-25 minutes and rinse with cold water. You’ll see instant results.

Related: Simple Trick To Remove Brown Spots From Your Skin

2. Parsley

 Parsley

Parsley is rich with Vitamin C which helps reduces wrinkles and fine lines as well as helps the skin to look younger. Along with wrinkles and fine line, parsley also helps in removing dark spots without bringing any harm to the skin. Blend the parsley leaves in the blender and apply the paste on your face by cotton balls. Leave the paste on your face for 25-30 minutes and rinse with lukewarm water.

3. Aloe Vera

 Parsley

We all know that Aloe Vera has many health as well as beauty benefits such as moisturizing skin, healing wounds, etc. and one of them is to remove dark spots. Try to use fresh Aloe Vera from its leaf as it is available in the market and has many preservatives.

Simply apply the freshly cut Aloe Vera gel on the affected area and leave it for 20-30 minutes. Properly wash your face with cold or lukewarm water.

Prevention tips for Dark Spots

  • Use sunscreen before stepping out in the sun
  • Wear sunglasses to protect eyes from sun rays
  • Treat acne or pimple immediately to avoid dark spots
  • Try to avoid going out in the sun between 10 am to 4 pm as at this time sun rays are extremely bad for the skin.

Follow these tips while using the natural remedies for better results, however, you see no change in your face, then it is recommended to consult a doctor.

Related: How To Remove Dark Spots On Your Face With Lemon Juice

Use These Oils For Treating Scabies

The itchiness, rashes and redness caused by skin infection called scabies is not an easy thing to bear. This is caused by infestation of itch mite that called as sarcoptes scabiei. These mites burrow underneath your skin and deposit their eggs in to them which cause itchiness like hell. It can easily spread all over your skin if left untreated.

Do you know more than 300 million scabies cases occur each year throughout the world? If you’ve ever had scabies, you would probably know how disgusting and irritating they would be. It can even spread through personal contact with infected person or even by crowded communities.

The good news is you can treat scabies easily by using one of the wonderful and natural ingredients called Neem oil. Neem oil is effective in treating scabies easily and avoids spreading the infection all over your skin.

How Neem Oil Is Used For Treating Scabies

Neem oil has powerful antibacterial, anti inflammatory and anti septic properties that helps to reduce the production of scabies mites that underneath your skin.

It also contains two powerful compounds known as octadecanoic 3 and 4 tetrahydrofuren diester which are found to be extremely potent in killing scabies mites easily. These compounds interfere with metabolism of Sarcoptes Scabiei and leads to death.

According to a study published in tropical and geographical medicine involved 814 people to use mixture of turmeric and neem oil on the affected skin for few days. The infection was cure of about 97% within 3 to 15 days without causing or leading to any side effects.

Let’s see the different ways to use neem oil for treating scabies.

How To Use Neem Oil For Scabies Treatment

1. Topical Application On Skin

image_2d68fdb9-df03-4dea-8aef-2464e387cc26_1024x1024

(Image Source: www.lushgro.com)

You can directly apply little amount of neem oil that causes no side effects.

What You Need

  • 2 table spoons of neem oil
  • One cotton swab

What You Need To Do

  • Wash the affected area and pat dry. Apply little amount of neem oil using a cotton swab dipped in it.
  • Let it remain for half an hour and wash it off with water.
  • Repeat it several times in a day for complete relief from itchiness and to reduce the infestation completely.

Related: Preventive Measures For Bed Sores And Ways To Treat It

2. Neem Oil And Turmeric

aid1630790-v4-728px-Make-Fresh-Neem-Leaves-Paste-Step-8

(Image Source: www.wikihow.com)

What You Need

  • 1 table spoon of turmeric powder
  • 2 table spoons of neem oil
  • 1 tea spoon of coconut oil
  • 1 teaspoon of lemon juice
  • Few drops of any essential oil

What You Need To Do

  • Mix all ingredients in a small bowl until it forms a thick paste.
  • Apply the paste directly on the affected area of your skin and leave it on for 20 minutes.
  • Wash it off with water and do it 2-3 times in a week to reduce infestation completely.

3. Neem Oil And Coconut Oil

article-20161131312213644496000

(Image Source: www.bollywoodshadees.com)

What You Need

  • One table spoon of neem oil
  • One teaspoon of coconut oil

What You Need To Do

  • Blend two oils together and apply it on the affected area and allow it to absorb completely.
  • You can leave it overnight or wash it off after 30 minutes.
  • Do two times in a day

4. Neem Oil With Liquid Soap

easy-DIY-liquid-castile-soap-recipe-14WMeng

(Image Source: www.thethingswellmake.com)

What You Need

  • 4 table spoons of neem oil
  • 2 table spoons of liquid soap

What You Need To Do

  • Blend neem oil and liquid soap together and make sure the oil totally emulsified with liquid soap.
  • Add this mixture to your warm bathing tub and soak in it for at least 20-30 minutes to clear infestation.
  • Follow this process every day until you see no mites on your body.

Related:  Get Rid Of Dry And Scaly Elbows With These Home Remedies

5. Neem Oil Balm

81484z1l8xL._SX700_

(Image Source: www.amazon.com)

What You Need

  • 2 table spoons of neem oil
  • One table spoon of shea butter
  • 5 drops of lavender essential oil
  • ½ teaspoon of vitamin E oil

What You Need To Do

  • Melt the shea butter in a small jar and add lavender oil, neem oil and vitamin E oil in it.
  • Blend all the ingredients together and store it in a jar.
  • Apply it on the affected area regularly to reduce mite infestation completely.

Use This Oil For Treating Scabies