Home Remedies for Acidity

A lot of people, almost every one of us experiences acidity, acid reflux or heartburn every few days – at least once or twice a week. Commercial medications like omeprazole are used very frequently to deal with acidity. However, these medications are not a long-term solution and can have adverse effects, especially if overused. What’s the solution then? Simple lifestyle modifications and home remedies for acidity can have greater and surprising effects.

Bringing some very simple and easy changes to your diet, changing your sleep pattern, and changing your eating habits and timings can significantly improve acidity symptoms. This very important guide will help you with some amazing, easily practicable home remedies to effectively fight with acidity. Before discussing that, let’s know a bit in-depth about acidity.

What is Acidity and What Are Common Symptoms?

Commonly termed as “acidity”, acid reflux is a very common phenomenon due to stomach’s action of pushing the acid towards the esophagus – a tube that connects your mouth to the stomach and helps in movement of food from the mouth to stomach.

Some types of acid reflux are completely normal and harmless and don’t cause any symptom. But when they happen quite frequently, there is a burning sensation inside the esophagus.

According to an estimation, about 14 to 20% of all US adults have one or other forms of acid reflux. Heartburn is among the most common symptoms of acidity, which causes a burning, painful sensation around the chest as well as throat.

Acidity is not harmful until it is completely ignored and left to become a causative factor for some other, more serious complications. People who regularly feel heartburn for months, as many as 20 to 40% of them are diagnosed with gastroesophageal reflux disease (GERD), which is potentially the advanced and more serious type of acid reflux. And interestingly, GERD is among the most common digestive disorders in the US.

In addition to regular heartburn, some other common acidity symptoms include difficulty swallowing, acidic taste at the back of the mouth, asthma, cough, inflammation of the sinuses, tooth erosion, etc.

Here are some very easily practicable natural ways of effectively dealing with acidity.

1. Avoid Overeating

It’s very easy to conclude that overeating is the most common factor responsible for acidity or acid reflux. And you must have to control it if you want to have a long-term solution.

You have ring-like muscle near the opening of esophagus in the stomach, which is known as “esophageal sphincter”. It works as a valve and stops the acidic contents of the stomach from reaching the esophagus. It opens naturally when you swallow food or drink, belch or vomit. Otherwise, it is made to remain closed all the time.

If you have continued acid reflux, there is a weakness or even dysfunction of this sphincter. Too much pressure on the sphincter wall, especially due to overeating may also weaken the sphincter’s muscles, resulting in the quick squeezing of acids through the opening.

And that’s why, without any surprise, acidity is common after finishing your meals. And larger, uncontrolled meals make the case worse.

So, what’s the most important step to deal with frequent acidity and belching? Avoid eating large meals. It doesn’t matter how delicious they are! It would be even more intuitive if you can divide your three meals into five or six short meals.

2. Follow a Low-Carb Diet

Various evidences suggest that diets low in carbs may give some relief from the symptoms of acidity. Scientists believe that undigested carbs may cause bacterial growth in the gut and increase abdominal pressure. Some scientists even claim bacterial growth as one of the major causes of acid reflux. And, impaired digestion and absorption of carbs is usually responsible for unwanted bacterial growth.

Excessive accumulation of undigested carbs in your digestive system may cause you feeling bloated and gassy, and it forces you to belch quite frequently. And interestingly, various studies indicate that diets low in carbs can effectively improve the symptoms of acidity.

In another study, researchers asked participants with GERD to consume prebiotic fiber supplements and noted that there was a significant improvement in the growth of gas-producing bacteria. And as a result, the symptoms of acidity got worse.

So, instead of consuming excessive carbs, try adding low-carb foods such as lean meat, eggs, fish, cauliflower, broccoli, chicken breast, nuts, seeds, coconut oil, olive oil, apples, strawberries, and blueberries etc.
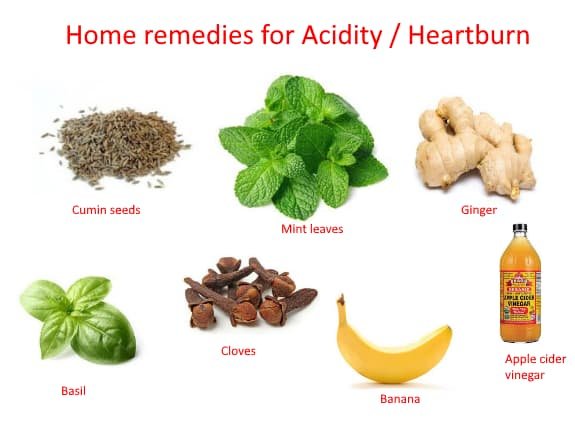
3. Basil Leaves

Carminative and soothing properties of basil leaves can help you with quick relief from acidity symptoms, including belching, heartburn, the fullness of stomach, and nausea etc. Whenever you get first signs of acidity, eat a handful of fresh basil leaves, or boil them in a cup of water to make basil tea. Sip the tea frequently throughout the day to ease the complications.

4. Fennel

Chewing fennel or “sauf” after every meal can be one of the best preventive measures to keep acidity at bay. Fennel is known for its amazing gastrointestinal benefits and can be among the most effective home remedies for acidity. In particular, Fennel tea is very useful to ease indigestion and bloating, especially after heavy meals.

5. Cinnamon

Cinnamon is a very humble spice known as a very good natural antacid. Adding cinnamon to your cuisines can also keep the acidity symptoms at bay. For quick relief, consume one or two cups of cinnamon tea to heal your gastrointestinal tract. In addition to its antacid prowess, cinnamon is loaded with additional nutrients too.

6. Buttermilk

Buttermilk is among the “Sattvic” food described in Ayurveda. So, whenever you feel heavy, especially after a spicy meal, try sipping a glass of our very own, desi chaas instead. Buttermilk is packed with lactic acid and is surely one of the most underrated home remedies for acidity. Hopefully, you will understand its effectiveness and will add to your diet quite regularly. To enhance the taste, add a pinch of black pepper or one tbsp ground coriander leaves.

7. Jaggery

Ever wondered, why our grandparents usually finish the meals with a piece or two of jaggery? Because it is high in magnesium and significantly improves intestinal health. Jaggery or gur improves digestion by making your digestive system more alkaline. Eat a short piece of jaggery after every meal, and notice the difference. You can also enjoy the “gur sharbat” in summers to keep your stomach temperature down and feel fresh throughout the day.

8. Cloves

Cloves have earned a prominent place in traditional medicines, especially in Ayurveda and Chinese. Cloves are among the top home remedies for acidity, as it is carminative in nature, and can prevent the excessive formation of gas in the gastrointestinal tract. Adding cloves while cooking especially to recipes like kidney beans and black gram, can greatly affect digestive health. You can also try eating crushed cloves with an equal quantity of cardamon to get quick relief from acidity. The combination of cloves and cardamon will also improve the odor from the mouth.

9. Cumin Seeds

Cumin seeds are among the most effective acid neutralizers and can ease digestion as well as stomach pain. Roast a handful of cumin seeds, crush them slightly and stir in a glass of water. Consume after every meal to have a feel-good factor.

10. Ginger

Ginger hides multiple health benefits beneath its knobby appearance. Thanks to its anti-inflammatory attributes, ginger can be among the best home remedies for acidity and a myriad of other gastric problems. Ginger has been a common folk treatment for problems like nausea and stomach ache. In addition to improving your digestion, ginger can also improve the flow of saliva.

To get the best results, try chewing a few thin slices of fresh ginger. Alternatively, squeeze one tbsp ginger juice by crushing, and consume twice o thrice a day. For even better results, steep a piece of fresh ginger in a cup of boiling water and drink after meals.

11. Cold Milk

If you are not intolerant to lactose, cold milk can also help you to deal with acidity easily. Like buttermilk, cold milk is also among the most underrated and ignored home remedies for acidity. It can be proved a blessing for those who are suffering from chronic acidity due to problems like a gastric ulcer or GERD.

Milk is loaded with calcium and can prevent the buildup of acid in the stomach when consumed cold. So, bust the myth that milk should be consumed warm or hot only, and try drinking cold milk right from your refrigerator next time when you feel acidic.

12. Coconut Water

Coconut water is a great natural solution for upset stomach. It works as an amazing detox and improves your digestion by soothing the stomach and preventing constipation. Additionally, drinking coconut water regularly can also improve your stomach’s pH levels and work on mucous production in the stomach. Mucous protects your stomach lining from acid production and its harmful effects. Since coconut water is rich in fiber, it also prevents the re-occurrence of acidity.

Like we said earlier, acidity is not a huge problem, but it may result in more serious complications if ignored or left untreated. Instead of loading your body with antacids, try one or more of these home remedies for acidity. If you get acidity quite often and for a very long time without any improvement in symptoms, talk to your doctor for an appropriate diagnosis for the exact cause(s) and suitable treatment.

Home Remedies to Fight the Bird Flu Virus with Some Effective Preventive Tips

Also known as “avian influenza,” bird flu is a very common viral flu that primarily affects poultry like chickens, ducks, turkeys, quails, and pigeons, etc. Bird flu spreads to other birds, animals, and even humans due to direct contact with the infected birds. Humans usually get the symptoms of bird flu after unknowingly consuming the infected poultry. Symptoms may take up to a week to appear and may become mild to severe depending on the amount of consumed poultry, stage of infection in the specific bird, and the consumer’s immunity.

The mild symptoms may include runny nose, fever, chills, headache, and sore throat, while some severe symptoms are diarrhea, bloody stool, shortness of breath, sleeping disturbances, and bleeding from the gums, etc. Doctors may prescribe a combination of anti-inflammatory drugs and antibiotics to ease the symptoms. However, home remedies to fight the bird flu virus are preferred, especially for mild symptoms.

Herbal remedies are safe for your body and can be very effective in improving the symptoms within a few days. Moreover, they can also improve your immunity to help you fight better with bird flu. Check out some very affordable yet surprisingly effective home remedies to fight the bird flu virus. Also, don’t forget to talk to a doctor if you get persistent symptoms, even if they are mild.

1. Turmeric

Curcumin is the active component of our very own turmeric. Curcumin is very well-known for its inflammatory and anti-infective properties. Regular use of turmeric, even with the recipes, may reduce the risk of avian flu inflammation by stimulating the immunoprotected agents in your body. Also, thanks to its antiviral properties, turmeric can be very effective in improving the mild symptoms of bird flu.

What to do: Adding half tbsp turmeric to your favorite cuisines is usually effective to keep bird flu symptoms at bay. You can add a bit of it to a glass of warm milk or water for even better results. Adding it to one tbsp honey is not a bad idea either.

2. Ginger

Various studies back the anti-influenza potential of ginger. Regular consumption of this spicy root is a sure shot solution for mild problems like cough, cold, and sore throat, etc. And, the active compounds of ginger, like gingerols and zingerone, may also prevent the growth of influenza in your body. Also, taking a few slices of ginger daily can also improve your immunity against common pathogens.

What to do: Find some interesting way of introducing ginger to your guts. It can be preparing healthy ginger tea, taking thin slices of ginger with lukewarm water, or adding it to your favorite dishes. Adding a few drops of lemon juce and honey will give you some added benefits and will also improve the taste.

3. Astragalus

Surprisingly, astragalus is still not commonly used as an edible root. This immune-boosting herb can be among the most effective home remedies to fight bird flu. Some studies (not concluded yet) also back astragalus’s ability to support the bone marrow by improving the interferon production. According to a study, astragalus can improve the overall immune response to bird flu by significantly reducing influenza replication. 

What to do: Adding astragalus roots to soups or boiling them for tea: both are very effective ways of dealing with bird flu symptoms.

Caution: Don’t start consuming astragalus roots without consulting your doctor. And, we strongly suggest that pregnant and breastfeeding women must avoid this root completely.

4. Echinacea

Echinacea is popular for its ability to purify the blood and also boost overall immunity. With these two powerful properties, echinacea can singlehandedly deal with a wide range of bird flu symptoms. According to a study, the ethanol extracts of echinacea can have great effects against the avian types of influenza.

What to do: Make a cup of tea by boiling fresh or dried echinacea flowers. Try consuming it twice or thrice a day regularly for very good effects. If you have discomforts like high blood pressure, low blood pressure, diabetes, or any other heart problem, we suggest you ask your healthcare provider before consuming echinacea.

5. Garlic

Haven’t we always the admirer of the antibiotic and antiviral properties of garlic? Garlic can effectively protect your immune system against a wide range of infections. Also, it can be one of the most effective home remedies to fight the bird flu virus.

What to do: Try consuming one or two cloves of garlic with one glass of water too early in the morning to bolster your immunity. You can add half tbsp honey as a taste enhancer. Adding crushed garlic to your meals is another very effective way of improving your overall immunity.

6. Green Tea

We can’t keep green tea out of our list when we talk about anti-inflammatory and anti-influenza beverages. Can we? In case you don’t know, green tea is not only about reducing your belly fat! Thanks to its active compound catechins, green tea is among the most powerful home remedies to fight the bird flu virus. The compound can effectively reduce the complications associated with bird flu.

What to do: Consume two to three cups of green tea every day to see the difference in your immunity.

7. Forsythia

Forsythia contains a phenolic compound known as “forsythiaside,” which is known for anti-inflammatory and antiviral properties, particularly against the avian strains of influenza. It may also enhance your immunity and help to fight the symptoms of bird flu.

What to do: Various types of health supplements are prepared with the dried fruit for the forsythia flower. However, we don’t have enough information related to the oral consumption of the forsythia herb. And, don’t start consuming forsythia supplements before asking your doctor.

8. Add Vitamin C to Your Diet

Vitamin C is an excellent antioxidant and can help eradicate many influenza symptoms, including those of the bird flu virus. Enough intake of vitamin C through natural sources can improve your immunity and the ability to fight against bird flu. A study even backs the ability of vitamin C to contain avian influenza.

What to do: Add vitamin C rich foods like lemon, spinach, broccoli, tomato, and other leafy green veggies to your diet

9. Cayenne Pepper

Cayenne pepper works to dilate the skin pores and induces sweating. This improves the release of toxins from the body and also eases bird flu symptoms. In addition, cayenne pepper is known for strengthening the immune system and can also be helpful in preventing bird flu.

What to do: Add a pinch or two of cayenne pepper daily in your diet to fight bird flu.

10. Olive Leaf Extracts

Olive leaf extracts are packed with both anti-bacterial and antiviral properties. And, they can improve your immune system. In addition, olive leaf extracts can also power the blood and lymphatic system to increase your ability to deal with the mild complications of bird flu. Although not available easily, fresh olive leaf extracts are among the best-known home remedies to fight the bird flu virus.

What to do: If you can somehow get olive leaf extracts from the market, you can ask your doctor for the instructions to use. Otherwise, you can also boil some dried olive leaves to prepare your won olive tea. Add honey or peppermint to enhance the taste, as olive leaves taste a little bitter.

11. Steam

You can also try stream if you have symptoms of bird flu, like nasal congestion or other respiratory troubles. Steam is very helpful to open up the respiratory passage and ease out the related symptoms.

What to do: Boil two to three cups of water, keep a good-sized boil in front of you and cover your head with a towel. Try inhaling the steam for a couple of minutes, and increase the duration according to your comfort. Repeat these steps daily for a few days to see the difference.

12. Oregano Oil

Oregano contains carvacrol as a primary component, which is popular for its antiviral activities. Regular use of oregano oil can help to deal with mild symptoms of bird flu. Studies suggest that oregano oil can effectively improve the symptoms but may not be good enough to kill the bacteria causing avian flu. Hence, you may have to complement it with other, more effective home remedies like turmeric or ginger.

How to Use Oregano Oil: Add a few drops of oregano oil to one cup of warm water. Add one tbsp turmeric and try inhaling for a few minutes. Avoid direct application of oral consumption of oregano oil to prevent possible irritation.

Blue-Green Dragon

Blue-green dragon is one of the most underestimated Chinese herbal formulas. But if used correctly, it can be an effective home remedy to fight the bird flu virus. The blue-green dragon is prepared by combining eight traditional herbs, and all of them have their own abilities to improve the immune system. Ephedra is one of the main herbs that may improve sweating by dilating the skin pores – and hence, it can help release the toxins out of the body. Unfortunately, Ephedra is banned in the USA by FDA due to insufficient records of its effectiveness or health benefits.

However, other ingredients of blue-green dragon-like Bai Guo, Gypsum Fibrosum, Rhizoma Zingiberis Officinalis, Semen Pruni Armeniacae, Ramulus Cinnamomi Cassiae, Radix Glycyrrhizae Uralenis, and Fructus Jujubae can have great effects on bird flu symptoms.

What to do: You can find the blue-green dragon supplement easily online. Combine the formula with cayenne pepper to improve the taste as well as efficacy.

Prevention of Bird Flu

We still don’t have a vaccine to prevent bird flu, and hence prevention measures become very important. Here are some preventive steps to control the spread of the flu virus.

  • Destroying suspected or infected birds: Once the flu is detected in birds, the priority must be to destroy them as soon as possible. It may sound a little cruel, but it’s better to destroy a bunch of infected birds instead of allowing the spread of infection to other birds, animals, or humans. Heating the birds at 56°C for 3 hours or at 60°C for 30 minutes.
  • Disinfecting the whole farm: Disinfecting the farm equipment, including clothes, gloves, boots, containers, nets, and even the vehicles used for transporting birds, is very important to control the possible outbreak. Disinfectants like iodine compounds and formaline are commonly used for disinfecting purposes.
  • Banning or Limiting the Transfer of Live Birds: Shipment of live birds for any purpose should be limited until the outbreak of bird flu is controlled completely. The bird flu virus transmits very easily, even from the droplets of birds. Hence, live birds’ transfer should be limited or even banned, especially in highly affected areas. Quarantine of bird farms also becomes a must to control the spread effectively.
  • Try to Get a Flu Shot: A flu shot won’t necessarily prevent the bird flu. However, it has shown some promise to prevent the human strains of influenza.
  • Avoid going too small or large farms where birds are grown in groups.
  • Avoid roaming around markets or crowded places, especially without any purpose.

Home remedies for the bird flu virus are effective only when there are mild symptoms. You can’t rely solely on home remedies if you develop some moderate to serious symptoms like throbbing headache, constant nausea, and vomiting, fever, especially with chills, body pain, diarrhea, loss of appetite, eye pain, etc.

You must get prompt medical attention if you feel any of these symptoms for more than a few hours. Isolation of the affected person becomes critical to stopping the spread of infection to others. Hopefully, you now have a decent list of home remedies to fight the bird flu virus. Take appropriate care of yourself and your family, eat healthily, have a simple lifestyle, and don’t be ignorant. Bird flu is not a massive problem until people take it very lightly. If you don’t become careless, you won’t find it very difficult to deal with bird flu.

Eye Floaters: Possible Causes, Treatment, and Home Remedies

Have you ever noticed unnatural, unusual spots right in front of your visual field? Do you find it demanding at times to see things clearly due to those cloudy, spluttery eye floaters?

You may notice them, especially when you try to see at some bright objects like a white wall, a blank white paper, or sometimes, a clear, blue sky.

Isn’t it very annoying?

Although you may find eye floaters very annoying, more often than not, they are not harmful to your eyes or vision. But being annoying is more than enough to find some practical and safe options to get rid of them finally.

This post will deal with some potential causes of eye floaters, their symptoms and complications, different treatment options, and some very effective home remedies. Let’s start with knowing a bit in detail about eye floaters.

What Are Eye Floaters?

Most people think that the small lines, circles, dots, cobwebs, and other shapes they notice in the visual field are in front of the eyes. But, interestingly and surprisingly, they are not! In fact, they are actually inside your eyes! And they are floating all the time!

They may often appear as gray or black flecks that seem to move around with your eyes’ movement or when you directly look at the specks. What you see are actually eye floaters, very tiny, at times irregular or cellular masses or clusters of gel inside the black part of your eye. Yes, eye floaters may look like some definite objects, but in reality, they are shadows casting by the clumps on your retina of the eye.

Different Common Types of Eye Floaters

Experts started to call them “floaters,” needless to say, due to their floating nature, especially how they keep drifting when you intentionally try to focus on them.

Everyone can have a completely different experience related to floaters, but some common types may include:

  • Grey dots
  • Black dots
  • Threadlike, transparent strands
  • Squiggly and uneven lines
  • Rings
  • Web-like structure

Once you start noticing eye floaters, they are less likely to go away completely. However, the appearance does reduce with the progression of time.

Potential Causes of Eye Floaters

Why do you get eye floaters? As we have already said, eye floaters are formed in the back of your eyes, known as “vitreous.” Most of the eye floaters are formed with very tiny, gel-like flecks of collagen – we all know that it’s a type of protein.

The vitreous in our eyes keep maintaining a gel-like disposition throughout birth and adolescence. The vitreous usually gets thick or shrink with the advancement of age, and sometimes, they even start dissolving and become more like liquid. Some of the gel-like particles may not dissolve completely, as they are protein fibers. Instead, they keep floating in the gel-like, watery center of the vitreous

These clumps, flecks, or strands keep forming in the area of vitreous and form shadows on your retina, and as a result, they appear as eye-floaters, especially when you try to focus on a white, blank background.

Since the movement of floaters is in sync with the movement of your eyes, you are unable to focus properly on these floaters completely and may never understand the exact shapes, sizes, or colors. And that’s why you keep experiencing the movement of these floaters in front of your eyes.

How are Eye Floaters Linked with Flashes?

Don’t you notice flashes in front of your vision fields at times? You surely do! You can name them “seeing stars” or “lightning streaks.” The frequency of noticing these flashes increases, especially when you feel dizzy or get an injury on your head.

If you notice the continuous appearance and disappearance of floaters regularly, that’s still fine. However, if you notice clusters of floaters at a time and that too with flashes, you shouldn’t waste any time before talking to an ophthalmologist.

Such type of sudden incidence may be caused by a pulling away of gel-like vitreous from your retina. And this condition is medically called “posterior vitreous detachment (PVD)” and is caused by dislodging of the retina from the innermost layer of the vitreous. However, it’s very rare; there might be a tear or hole in the retina that may lead to “retinal detachment.” Retinal detachment is one of the most serious eye conditions and calls for an immediate medical emergency.

PVDs are also rare but are common when compared to retinal detachment and are less serious. But you still have to get proper medical attention to assess the cause and possible treatment plan.

Conditions that May Cause Eye Floaters

You might have a predisposition of getting eye floaters, especially if you,

  • are aged between 50 to 75
  • have chronic headache
  • suffer from migraines very often
  • use prescription glasses, especially for nearsightedness
  • have swelling or inflammation in the eyes due to certain medical conditions
  • have bleeding from vitreous due to injury or trauma of the eye or head
  • recently had eye surgery, mainly after having a cataract
  • have a torn or detached retina
  • are suffering from diabetic retinopathy
  • are having an eye tumor for so long

Eye floaters are very common and don’t usually call for medical attention. However, they may sometimes indicate some serious health issues, especially when combined with some other, more serious symptoms or signs. It is very important to discount such possibilities after talking with an eye specialist.

If your doctor doesn’t diagnose a potentially harmful health condition as a cause of eye floaters, here are some home remedies you can try to manage.

Tips to Treat Eye Floaters

1: Don’t Treat Them at All!

Yes! If you and your doctor are sure about no other serious problems, “not treating the eye floaters at all” is the best way to deal with them. Why? Because floaters tend to fade away or even disappear with time. And even if that’s not the case, your brain starts adapting accordingly with time and learns easily to ignore them. And if your brain isn’t seeing something as a real problem, you don’t need to be worried at all.

Also, with time, eye floaters usually move and settle at the bottom of your eyes as the vitreous liquefies. The bottom of your eyes helps you with overhead vision, which is blocked due to eyebrows and eyelashes, and the eye floaters don’t remain bothersome and noticeable at all.

If you are annoyed with eye floaters constantly, and for a very long time, you can try shifting the fluid in the vitreous by moving your eyes up and down for a few seconds. With that, eye floaters won’t be visible in front of the field of vision anymore.

However, if the eye floaters start becoming a cause of major concern and start impacting your life massively, you can discuss with your doctor to have one of these treatments.

2: Get a Thorough Eye Exam

Even if you are not experiencing troublesome eye floaters, we suggest you go for a thorough eye exam. According to the American Academy of Ophthalmology, a regular eye checkup is recommended to people over forty, even without having any eye trouble. It becomes a must for people over sixty.

What’s the reason for it? Any underlying condition like diabetic retinopathy or a tumor in the eye may be responsible for eye floaters’ constant appearance, and interestingly, without causing a vision problem! So, you may not even be wary that you are already struggling with a potentially dangerous eye condition, and you are dangerously close to suffering from a compromised vision!

Since we have already discussed the potential causes of eye floaters, a lot of them may even go unnoticed due to the absence or lack of signs and symptoms. So, you must go for a thorough eye-checkup regularly to discount any eye condition that may hamper your vision for the rest of your life.

3: Get Yourself Tested for Blood Count

An abnormal and sudden increase in white blood cells, especially due to an inflammation or infection, may also lead to eye floaters. If your blood count is higher than the normal range, a combination of anti-inflammatory and antibiotics should be enough to improve the condition. However, don’t reach a conclusion or try medication without having a thorough discussion with a licensed medical practitioner.

4: Stay Hydrated

Without any doubt, water is very important for the overall growth and functioning of your body. Dehydration can be responsible for a wide range of health problems, including the eyelids’ excessive dryness. Dehydration or deoxygenation of the collagen in the vitreous may cause shrinking of the inner eyes, and hence, may lead to eye floaters.

Therefore, staying hydrated is not only required for you to stay physically healthy and active, but it is also essential for your eyes’ health. Furthermore, eye floaters may also be a result build-up of toxins inside the eyes. And you know, only water can remove the toxins thoroughly from your body!

Number 4: Detox from Molds and Heavy Metals

According to Homoeopathic Ophthalmologist Dr. Edward Kondrot, “An unhealthy diet with heavy metal toxicity may be responsible for eye floaters. And, he suggests a 6-hour urine examination to check out the heavy metals. Dr. Kodrot states that “we have seen a lot of eye floaters patients with an increased level of lead and mercury in their urine samples.”

According to a research, heavy metals get accumulated in the ocular tissues of humans, including the vitreous.

If you constantly have eye floaters, we also suggest you look out for molds at your home or workplace. Mold is a type of fungus that matures healthily in warm or humid conditions.

Constant moisture at home or workplace may be favorable for mold growth, especially if there is poor ventilation. Places like washrooms, window sills, AC vents, basements, fireplaces, attics, sinks, etc., are more than perfect for molds’ growth. Molds can be harmful and cause health problems, especially to those who have some respiratory problems like asthma or are allergic to molds. Molds are usually not responsible for eye-related problems but may be linked with blurred vision, red eyes, and eye floaters.

If you are sure about humidity inside your home or at the workplace, try some effective ways of getting rid of it.

5: Have an Anti-inflammatory Diet

Sometimes, people wrongly assume that inflammation is always visible through skin or physical appearance. However, internal inflammation, mainly at the cellular level, is never visible and doesn’t even show through signs until there is something serious. In fact, system-wide inflammation, if it remain unnoticed, may be responsible for serious health problems like heart disease, cancer, diabetes, Alzheimer’s disease, etc.

So, never, we repeat, never ignore the importance of a healthy diet in your life. And have an anti-inflammatory diet full of leafy greens, foods high in omega three fatty acids, and other very important nutrients. Get rid of unhealthy, processed foods from your diet as soon as possible.

Try to cook foods for yourself and your family instead of munching outside regularly and frequently. These are some foods you can add to your diet to deter eye floaters:

  • Tomatoes
  • Antibiotic-free eggs
  • Coconut oil
  • Whole grains and legumes
  • Citrus fruits like grapefruit and oranges
  • Extra-virgin olives and olive oil
  • Raw nuts like almonds, walnuts, flax seeds, pumpkin seeds, chia seeds, etc.
  • Tuna, wild Alaskan salmon, or other fatty fishes
  • Dark green veggies like spinach, collard greens, kale, and Swiss chard, etc.
  • Organic berries such as cherries, blueberries, and strawberries, etc.

Final Words

Eye floaters are not a problem until they are accompanied by some major signs and symptoms we have mentioned above in the write-up. You don’t really need to treat them at all! However, if they annoy you regularly and frequently, you can talk to your doctor and find the possible cause(s). “Removal of the cause” is a way to go ahead as far as treatment is concerned. Otherwise, we can tell you to “just chill”! They are not even a problem!

Type 2 Diabetes, Causes, Risks and Treatments

Type 2 diabetes is chronic and among the most common health conditions affecting approx. 463 million adults around the world! In this condition, the levels of sugar or glucose rise abnormally in the bloodstream.

The glucose in your blood smoothly travels into the body cells with the help of a hormone known as “insulin.” Body cells use the glucose for energy necessary for performing a wide range of body functions.

In type 2 diabetes, the body cells don’t respond to the insulin hormone as effectively as needed. And in later stages of type 2 diabetes, your body is even unable to make enough insulin required for glucose movement. Uncontrolled diabetes type 2 can cause chronically elevated blood glucose levels, resulting in several symptoms and, sometimes, life-threatening complications.

As the number of diabetic patients is only increasing dramatically, it becomes very important to have basic information about the condition at least. This may be proved very handy to avoid serious and life-threatening symptoms of type 2 diabetes. Also, by educating people about type 2 diabetes, you can play an important role in increasing the chances of controlling it and saving a lot of lives.

This guide will address some very important and basic aspects of diabetes type 2, including symptoms, potential causes, risk factors, diagnosis, investigations, and treatment.

Signs and Symptoms of Type 2 Diabetes

As we have already learned, the body of a diabetic patient is unable to use insulin effectively for the necessary movement of glucose in the cells. This scenario forces your body to be dependent on other sources of energy in organs, muscles, and tissues. This starts working as a chain reaction and may reflect with a myriad of symptoms.

Type 2 diabetes usually takes some time to develop. And the symptoms may be mild and easy to treat in the beginning. The early symptoms of type 2 diabetes may include:

  • constant hunger
  • a lack of energy
  • fatigue
  • dry mouth
  • itchy skin
  • blurry vision
  • weight loss
  • excessive thirst
  • frequent urination

If diabetes type 2 is not controlled in the early stages, the symptoms may become more severe with the progress of the disease. And that’s when diabetes becomes potentially life-threatening.

A high blood glucose level for a long time may cause some severe symptoms of type 2 diabetes, including:

  • Yeast infection
  • Foot pain
  • Slow-healing cuts or sores
  • Feelings of numbness in the extremities or neuropathy
  • Dark patches around the skin, also known as “acanthosis nigricans.”

Potential Causes of Type 2 Diabetes

Before concluding the causes, let’s talk a bit more about the insulin hormone. Your pancreas produces insulin, and it is released into your body every time you eat. Insulin ensures the proper transportation of glucose from the bloodstream to body cells, where it is used for energy needed for various body functions.

If you have diabetes type 2, your body becomes insulin resistant. This means your body is not using the hormone effectively anymore. As a result, your pancreas is forced to do a bit of overwork to produce more insulin.

If your pancreas remains in overwork mode for a long time, the pancreatic cells start getting damages. Eventually, your pancreas stops producing insulin completely.

What happens when your pancreas doesn’t create insulin?

If the pancreas is unable to produce the required insulin, or your body is not using the insulin as effectively as it should, there is a continuous build-up of glucose in the bloodstream. This results in the starvation of body cells for energy. Unfortunately, the doctors are yet to find the specific reason for all these events.

However, a lot of diabetes experts believe the dysfunction, incorrect cell signaling, or regulation as culprits. And we may have some very strange causes of type 2 diabetes too!

  • In some subjects, there is excessive production of glucose from the liver as well.
  • Some people are genetically susceptible to the development of diabetes type 2.
  • Genetic predisposition to obesity is almost obvious, which may be linked to an increased risk of insulin resistance.
  • An environmental trigger may also be responsible for some people.

More likely, a combination of factors, including improper production and usage of insulin, poor diet, prolonged lack of physical activities, hormonal imbalances, pregnancy, family history, etc., is responsible for a surge in blood sugar level.

Let’s focus a bit in detail on these factors

  • Genes: According to various studies, different bits of DNA also affect the way your body produces insulin.
  • Extra Body Weight: Being obese or overweight can also be responsible for insulin resistance, especially if the fat is predominantly in the mid-region.
  • Metabolic Syndrome: Although it is not linked directly, people having insulin resistance often get a group of health conditions like extra waist fat, high blood sugar, high blood pressure, triglycerides, and high cholesterol.
  • Excessive Glucose from the Liver: It may also be among the major causes of type 2 diabetes. When your body’s blood sugar level is lower than normal, your liver goes in a hyperactive mode and produces and sends extra glucose. Your blood sugar level increases when you eat, and your liver normally slows down and stores glucose for later use. But some people’s liver is unable to do so because of various health reasons. And, they continuously crank out for sugar.
  • Broken Beta Cells: If the insulin-making cells send out an inaccurate amount of insulin and your blood sugar level gets deranged at the wrong time. And high blood sugar can badly affect these cells as well.
  • Bad Communication Between Cells: Sometimes, cells don’t send the right signals or are unable to get the message rightly. When any of these conditions directly or indirectly affect the production or use of insulin, a chain reaction starts and may cause diabetes.

Type 2 Diabetes Risk Factors

Certain factors are responsible for increasing the chances of you getting affected with diabetes type 2. The more you fall under these categories, the higher are the chances of getting diabetes type 2.

  • Age – 45 or more
  • Family History: Diabetes type 2 in one or both parents and siblings
  • Ethnicity: Native American, African American, Asian American, Alaska Native, Pacific Islander American, or Hispanic or Latino.

Risk Factors Related to Medical History or Overall Health Condition May Include:

  • Prediabetes
  • Heart and blood vessel disease
  • High blood pressure, even if it’s treated and under control
  • Low HDL (“good”) cholesterol
  • Polycystic ovary syndrome (PCOS)
  • Depression
  • Having a baby who weighed more than 9 pounds
  • Gestational diabetes while you were pregnant
  • High triglycerides
  • Being overweight or obese

Some other but uncommon type 2 diabetes risk factors are:

  • Stress
  • Smoking
  • Getting very little or no physical exercise
  • Sleeping too little or too much

Complications of Type 2 Diabetes

If not contained at the right time, diabetes type 2 may affect various organs in various ways, including:

  • Heart and Blood Vessels: You are more than four times at higher risk of getting a heart problem or stroke. There are also high possibilities of you having chest pain (angina) and blocked blood vessels (atherosclerosis).
  • Kidneys: Prolonged diabetes may also cause damage to the kidney(s), even kidney failure.
  • Eyes: High blood sugar may be responsible for damaging blood vessels in the posterior of the eyes (retinopathy). It may result in blindness, especially if not given quick and proper medical attention.
  • Nerves: Blocked or damaged nerves may result in a wide range of problems, including numbness of hands or feet, inaccurate digestion, and insufficient sexual response.
  • Skin: Skin problems are among the common complications of type 2 diabetes. You may get a wide range of skin problems due to insufficient circulation of blood. Wound healing also gets hampered due to this.

Investigations and Diagnosis of Diabetes Type 2

Your doctor may perform blood tests to test the signs of diabetes type 2. Doctors usually perform two tests to confirm the diagnosis. One test is also enough in case if you have moderate to severe symptoms with sudden onset.

  • A1c: It’s an analysis of average blood glucose level over the last two to three months.
  • Fasting Plasma Glucose: The “fasting blood sugar test” checks the blood sugar level on an empty stomach. Your doctor will ask you to avoid eating or drinking anything except water for at least 8 hours before the test.
  • Oral Glucose Tolerance Test (OGTT): This test studies the blood glucose level before and two hours after drinking something sweet to check your body’s response after getting sugar from your diet.

Diabetes Type 2 Treatment

Management of diabetes type 2 is more important than the treatment. And a combination of medications, lifestyle, and diet adjustments can be very, very effective to ensure a very healthy and active life.

  • Weight Loss: Getting rid of extra pounds may help. Losing 5% of your total body weight is good. And it will be ideal if you can lose at least 7% of your body weight. That means someone with a total body weight of 180 pounds can effectively control their blood sugar levels by losing about 13 pounds. Weight loss seems very overwhelming, but a lot of people have done it with great success and can give you some surprising results.
  • Healthy Eating: There’s no particular diet for diabetes type 2. You can get some assistance from a registered dietitian to know about a healthy and suitable diet depending on your blood glucose level and other health conditions. Doctors and dieticians usually Focus on a diet with:
  • Lower calories
  • Cutting down the intake of refined carbohydrates, especially from sweets, even refined sugar.
  • Loading your diet with more fruits and vegetables.
  • Exercises: Physical exercises can have surprising results in your efforts to reduce your blood glucose levels. Daily physical exercises of 20 to 60 minutes per day won’t only reduce the glucose in sugar but also help you healthily manage your body weight.

Exercises like walking, jogging, cycling, weightlifting, strength training, yoga, etc., can effectively complement diabetes type 2 treatment.

  • Keep a note of your blood sugar levels: These days, it is very easy to self-check the blood sugar levels with the help of advanced glucose monitoring devices. You can ask your doctor whether you should continuously check your blood glucose levels or not.

Different Medications for Type 2 Diabetes

You may have to take some medications if you are unable to keep the blood glucose levels in check even after taking insulin and certain lifestyle changes. Depending on your overall health condition, your doctor may prescribe one or more of these medications:

  • Metformin (Fortamet, Glumetza, Riomet, Glucophage): It is among the preferred medication for diabetes type 2. It limits the amount of glucose produced by your liver and improves the body’s insulin response.
  • Sulfonylureas: This group of medications improves the natural production of insulin.
  • Meglitinides: Works to improve the production of insulin from the body but gives faster results than sulfonylureas.
  • DPP4 Inhibitors: These medicines, including Inaglipitin, Onglyza, and Januvia, are also good at reducing blood glucose levels but may cause inflammation of the pancreas and joints pain.

Prevention of Diabetes Type 2

Preventing diabetes type 2 is easier than a lot of people think. You don’t have to do much either! That old mantra of living a healthy and active lifestyle is enough to keep diabetes type 2 at bay. But you have to do it on a daily basis without giving up. Follow these easy and practicable tips to protect yourself from diabetes type 2.

  • Lose weight if you are overweight. This becomes a must if you are obese. (See the difference between overweight and obese)
  • Have a healthy diet with loads of fruits, vegetables, salads, grains, and nuts, etc.
  • Do at least thirty minutes of brisk walking every day. It would be great if you can complement it with some other exercises.
  • Avoid smoking and alcoholism: If you are habitual of smoking or drinking, quit before you face the consequences. Talking to a doctor can be very helpful.

Unfortunately, diabetes type 2 has become a very common health problem and is affecting more and more people every year. Having some important and basic information related to diabetes type 2 can be proved immensely helpful for prevention as well as treatment. Hopefully, we have helped you with a lot of important information related to diabetes type 2, and you are now well prepared to prevent it rather than following a restricted life after getting it.

Type 1 Diabetes, Causes, Risks, Diagnosis and Treatments

Type 1 diabetes has become one of the most common chronic diseases characterized by the destruction of insulin-forming cells in the pancreas and the body’s inability to make insulin.

Insulin is a very important hormone that aids your body’s cells in the proper usage of glucose for energy. Your body receives glucose from different food sources. And insulin ensures proper passage of glucose from the blood into the body’s cells.

Your muscle tissues and liver store the glucose left after proper usage from the cells. The extra glucose are also called “blood sugar” and are restored in glycogen. When your body is overly exhausted and requires more energy, the stored blood sugar is broken down and released in the bloodstream.

In the state of diabetes type 1, your body is unable to process the glucose correctly due to insufficient insulin. The glucose you get from your food can’t breakdown on its own. And this results in excessive circulation of glucose in the blood, and that’s why termed as “high blood sugar”. High blood sugar may cause a wide range of short-term and long-term problems. In this write-up, we will deal with various important aspects of diabetes type 1 to be informed and when you get symptoms of diabetes type 1. It will help you to get proper and timely treatment. Let’s read out to find more.

Diabetes Type 1 Symptoms

The patient may get some subtle signs and symptoms, but they may get severe if not managed properly on time. Some common symptoms include:

  • Extreme thirst
  • Increased hunger (especially after eating)
  • Dry mouth
  • Upset stomach and vomiting
  • Frequent urination
  • blurred vision
  • Frequent infections of your skin, vagina, or urinary tract
  • Crankiness or mood changes
  • Bedwetting is a child who’s been dry at night
  • Unexplained and sudden weight loss, even though you’re eating and feel hungry
  • Fatigue
  • Blurry vision
  • Heavy, laboured breathing (your doctor may call this Kussmaul respiration)

Signs of diabetes type 1 that usually call for a medical emergency

  • Rapid breathing
  • The fruity smell from breath
  • Confusion and shaking
  • Abdominal pain
  • Loss of consciousness

Causes of Type 1 Diabetes

Unfortunately, the exact cause of diabetes type 1 is still unknown. But here is a theory backed by a lot of doctors, especially diabetes experts.

Insulin hormone ensures proper glucose movement into different tissues around the body and used by them as fuel. Diabetes type 1 damages the beta cells and disrupts the process completely. Due to the lack or absence of insulin, the movement of glucose is completely deranged. Instead, there is a build-up of glucose in the blood, and your body cells start starving for glucose.

Complications of Diabetes Type 1

Unlike most other health problems, diabetes type 1 is linked with various other complications. If not controlled on time, a person with diabetes type 1 may suffer from a combination of health problems, including:

  • Dehydration: When the blood sugar level is elevated, you start peeing more. And that’s how your body tries to remove extra sugar from the blood for some time. A good amount of water gets out of your body through urine, causing excessive dehydration.
  • Weight Loss: The unnecessary removal of glucose through your urine also takes enough calories with it. And that’s why people with high blood sugar notice sudden, unexpected weight loss. Continuous and prolonged dehydration is also responsible for type 1 diabetes-induced weight loss.
  • Diabetic Ketoacidosis (DKA): If your body is unable to get the required glucose as fuel. It starts breaking down the fat cells instead. The unwanted breakdown of fat cells creates chemicals known as “ketones”. In response, your liver starts releasing the stored sugar for help. But your body is unable to use it due to absence or lack of insulin. And hence, the sugar builds up in your blood with the acidic ketones. This combination of dehydration, excessive glucose, and build-up of ketones is known as “ketoacidosis”, and can sometimes be lethal if not treated timely.
  • Damage to Your Body: Excessive glucose in your blood may also harm your body over time. It can affect the small blood vessels, nerves, heart, eyes, and kidneys etc. It may also result in hardening of arteries known as “atherosclerosis, ” resulting in strokes, and even heart attacks.
  • Cardiovascular Disease: It is among the major complications of diabetes type 1, especially if not given proper and timely attention. In fact, both types of diabetes increase the risk of high blood pressure, blood clots, and cholesterol. All these complications may lead to chest pain, stroke, heart attack, and even heart failure.
  • Skin Problems: Both types of diabetes are also responsible for a higher risk of getting a bacterial or fungal infection. Diabetic patients get affected by blisters and rashes very easily.
  • Gum Diseases: The combination of poor blood flow to mouth, excessive plaque, and a lack of saliva may be responsible for various gum problems.
  • Problems Related to Pregnancy: Women having type 1 diabetes are at high risk of pregnancy problems, including premature delivery, birth defects, and stillbirth etc.
  • Retinopathy: Retinopathy is an eye-related problem and affects more than 70% of people with 12 to 15 years of diabetes type 1. It’s not common before puberty. Keeping good control of blood pressure, blood sugar, cholesterol, and triglycerides is very important to maintain good eyesight in type 1 diabetes.
  • Damage to Kidney: Nephropathy is a condition affecting about 20 to 30% of people having type 1 diabetes. The chances of nephropathy increase if diabetes is not controlled properly on time. Nephropathy is usually seen after 15 to 25 years of onset of diabetes. Chronic and uncontrolled diabetes type 1 may also lead to some serious conditions like kidney failure.
  • Poor Blood Flow and Nerve Damage: Hardened arteries and damaged nerves are responsible for improper blood supply, especially to feet. This increases the chances of injuries and hampers the process of wound healing. In such a scenario, the person may also end up losing a limb, maybe both! Some other and unexpected problems like nausea, diarrhea, and vomiting may also affect the patient with damaged nerves.

Type 1 Diabetes Risk Factors

Risk factors related to type 1 diabetes are not yet understood properly. However, experts have identified some potential factors.

Diabetes type 1 is not common, as it affects only 5% of overall diabetic patients.

It affects both sexes equally.

Some Other Important Type 1 Diabetes Risk Factors

  • Family History: Family history may play an important role in some cases of diabetes type 1. If you have one or both parent(s) or sibling(s) with type 1 diabetes, you should be on high alert, and take proper care of yourself.

Some specific genes are believed to be linked with a familial transfer of diabetes type 1. However, not everyone with these “specific genes” is at risk. According to many researchers and doctors, some unknown trigger may be responsible for diabetes type 1 in some groups of people, and not others.

  • Race: Interestingly and coincidentally, white people are at higher risk of getting type 1 diabetes when compared to brown or black people.
  • Other Environmental Factors:

Surprisingly, rarely, but some viruses are also responsible for triggering type 1 diabetes. However, we are not yet assured about the specific type of viruses.

Similarly, people living in cold climates are at higher risk of getting type 1 diabetes. Doctors usually notice high cases of diabetes in winter in comparison to the summer.

Diagnosis of Type 1 Diabetes

Doctors usually recommend a series of medical investigations for a correct diagnosis of type 1 diabetes. Some tests are usually performed quickly, while some require lengthy preparation or observations.

The development of type 1 diabetes is generally quick. The diagnosis is confirmed when there are one or more of the following criteria:

  • Fasting blood sugar > 126 mg/dL on two separate tests
  • Random blood sugar > 200 mg/dL, with other symptoms of diabetes type 1
  • Hemoglobin A1c > 6.5 on two separate tests

Doctors follow the same criteria for diagnosing type 2 diabetes as well. In fact, due to very close similarities in symptoms, diabetes type 1 is misdiagnosed with diabetes type 2.

And misdiagnosis usually goes unnoticed until the doctor observes worsening of symptoms and some new or severe complications even after starting treatment.

When there is a severe rise in blood sugar level, causing diabetic ketoacidosis, the patient starts feeling severely ill. And that’s often the reason people end up getting admitted in a hospital or doctor’s office. That’s when the doctors get a better chance of making a correct diagnosis of type 1 diabetes.

Treatment of Type 1 Diabetes

If the diagnosis is confirmed, your body is surely unable to produce insulin on its own. And hence, you require artificially-prepared insulin to aid your body for correct usage of sugar in the blood. Although, doctors are still working on the proper cure for diabetes, a combination of insulin, medications, and lifestyle changes has been proved very handy to control the blood sugar level and a lot of major symptoms of type 1 diabetes.

Insulin

Doctors advise for the daily compulsory intake of insulin to diabetes type 1 patients. Both insulin injection and pump are advised depending on the physical condition and age of the patient.

The insulin pump has been used commonly in recent years. It is easier to use, and one can inject it through the port of skin. It is much better than the insulin injection and can also be helpful to calculate the blood sugar levels.

Your doctor can only decide the amount of insulin your body needs every day. Regular study of the blood-sugar level is very helpful to determine the amount of required insulin for diabetes type 1 patient.

There are different varieties of insulin, and your doctor may even have you try multiple varieties to check out which one is more suitable for you.

Some Common Medications

  • Metformin

Metformin is one of the most common diabetes medicines used orally. It was a go-to option for diabetes type 2 patients for many years but has recently been used for type 1 diabetes as well. However, some people may develop an unexpected resistance of insulin, which means, insulin is not effective to reduce blood-sugar levels anymore.

Metformin is effective in reducing blood sugar levels by reducing the production of sugar in the liver. Your doctor may also advise you to take both, insulin as well as metformin for better results.

  • Vaccines

It might sound very surprising, but tuberculosis vaccine has shown some promise to effectively treat type 1 diabetes. However, the study was performed on a very small scale and requires more observation. And that’s why, it is not marketed as a type 1 diabetes treatment, and is undergoing further testing.

  • Diet and Exercises

Proper diet and exercises with regular intake of insulin and prescribed medication can be very effective to keep blood sugar level in check. You can meet a certified diabetes educator cum dietitian to ask for a healthy and effective diet for diabetes type 1.

Several exercises are also effective to reduce the levels of sugar in the blood. A patient with type 1 diabetes should involve in at least 150 minutes of moderate to vigorous aerobic exercises every week. Cycling, walking, dancing, playing team sports, jogging etc. are some of the most suitable and result-oriented exercises.

However, you should ask your doctor or a diabetes expert if you can perform on or more of these exercises. Follow the proper instructions, along with precautions to get better results.

NOTE: Don’t take insulin, metformin or any other medication until and unless a licensed medical practitioner prescribes you. Sometimes, you may develop symptoms of diabetes type 1 even if you don’t have it!

Final Words

Diabetes type 1 is not very common, as it affects only 5% of all diabetics. And, it can be controlled easily if you are willing to be supportive of your doctor. Yes, there is still no full-proved cure, but a combination of insulin, medications, and lifestyle changes can help you lead a very healthy and active life. Hopefully, we have helped you with a lot of important facts related to diabetes type 1 and busted all the myths related to it.

DISCLAIMER: This writing piece is only for information purposes, not for self-diagnosis or self-treatment of diabetes type 1. We strongly recommend our readers to get in touch with a medical professional before concluding anything.

How to Bleach Your Hair with Hydrogen Peroxide?

Changing your hair color can give you a dramatic makeover without putting so much effort and in absolutely no time! Experimenting with various bold and vibrant hair colors is, of course, fun. However, people with dark hair may find it difficult to color their hair. What’s the solution for them? Bleaching the hair with hydrogen peroxide can be the ultimate solution! If you are not planning to go to a salon, you can opt for hydrogen peroxide as excellent hair bleach.

Hydrogen peroxide is a colorless liquid available in concentrated form – usually at 3 to 9 percent. It is used for a myriad of objectives, including disinfection and bleaching. That’s why hydrogen peroxide is a common ingredient used in various hair bleaching products. While it is usually safe for both skin and hair, improper usage or using it in pure form can irritate skin and eyes. This article will answerfor you all the “whys” and “how’s” related to hydrogen peroxide for bleaching hair.

What do You need to Use Hydrogen Peroxide for Bleaching Hair?

  • 3% diluted hydrogen peroxide
  • Baking soda (if mixing with hydrogen peroxide
  • Cotton balls
  • A dry towel
  • Hand gloves
  • Aluminum foil
  • A clean empty spray bottle
  • Hair clips
  • Shower cap
  • Natural shampoo and conditioner

A Detailed Tutorial on Bleaching Your Hair with Hydrogen Peroxide

  • Step 1: Wash Your Hair

Before applying hydrogen peroxide, remove dirt, grime, and excess oil from the scalp by thoroughly washing your hair. A shampoo containing botanical ingredients is usually very effective in removing excess sebum from the scalp. After shampooing your hair, opt for a nourishing and hydrating conditioner to avoid possible dryness of hair after bleaching.

  • Step 2: Air-Dry Your Hair

Instead of blow-drying, go for air-drying your hair. A blow dryer usually dries the hair quickly, but it may potentially damage your hair too. So, you should avoid it, especially when you decide to use hydrogen peroxide for bleaching hair.

Tip 1: Use a towel to pat your hair dry properly, comb it thoroughly and gently, and air-dry for about half an hour before finally administering hydrogen peroxide.

  • Step 3: Perform a Patch Test

Even 3% diluted hydrogen peroxide can have a harsh reaction on the skin, especially if you have an unknown allergy to it. To avoid possible burning and itching on your scalp or hairline, do a patch test first. Apply only one or two drops of 3% diluted hydrogen peroxide on a very small section of your hair. Wait for at least thirty minutes to conclude whether you are allergic to hydrogen peroxide or not.

  • Step 4: Apply Hydrogen Peroxide
  • Use hair clips to tie your hair in knots.
  • Dab a cotton ball in 3% hydrogen peroxide and gently apply it on a hair section; avoid touching your scalp by leaving at least half an inch from the hair roots.
  • Wrap the aluminum foil properly on bleached hair.
  • Repeat these steps on different other sections of hair.
  • Once you are done with applying hydrogen peroxide for bleaching hair, leave for about forty minutes without touching your head.

You can also adjust the waiting time according to your natural hair color and the result you wish for. For example, if you already have dark hair, you would want to keep the solution on for at least thirty minutes to lighten your hair.

If you want to color your entire head, combine equal portions of 3% hydrogen peroxide and water in a clean, preferably new spray bottle. Spray evenly on your hair with the help of your family member or friend. Wear a shower cap to ensure better results, and leave for about forty minutes.

  • Step 5: Wash Your Hair Thoroughly

Use a mild shampoo to lather your hair thoroughly to ensure all the chemical deposits are removed completely. Wash with cold water to minimize the potential hair damage and to restore decent shine. Give the finishing touch by using a gentle, natural hair conditioner.

Tip 2: Don’t opt for Heat or Blow Drying

Avoid using heat or blow-drying to ensure your hair is not damaged further after usinghydrogen peroxide for bleaching hair. If you are still willing to try blow-drying, only use a cool-shot or the lowest possible temperature. It is a suitable way to dry your hair evenly, reduce the potential damage, and restore the shine and moisture.

Baking Soda and Hydrogen Peroxide for Bleaching Hair

If you want better and faster results, you can combine baking soda with hydrogen peroxide. The combination of these two ingredients gives very effective and quick results. Thanks to its alkaline nature and cleansing properties, baking soda can be a perfect base for hydrogen peroxide.

Ingredients You Need

  • One cup baking soda
  • 3 tbsp 3% diluted hydrogen peroxide

This ratio of one cup baking soda and three tbsp hydrogen peroxide is considered very suitable for bleaching purposes. You can adjust the quantity according to this ratio keeping the length, thickness, and natural color of your hair.

Here is How to Use Baking Soda and Hydrogen Peroxide for bleaching hair

  • Mix both ingredients evenly and apply on your hair, working down the hair length.
  • Keep the mixture on for thirty to sixty minutes, depending on the desired color intensity.
  • Wash your hair thoroughly with cold water and a mild shampoo.
  • Finish with a gentle hair conditioner to ensure proper moisture.

Some Important Questions Related to Hydrogen Peroxide for Bleaching Hair

  • Is hydrogen peroxide safe for bleaching hair?

Using 3% concentrated hydrogen peroxide is usually considered safe for the skin as well as hair. Hydrogen peroxide can be very harmful if used undiluted or in pure form. 3% diluted hydrogen peroxide is available in the market, and you can only go for that instead of trying and diluting the chemical yourself.

Some people are also prone to get mild to severe skin irritation when hydrogen peroxide is applied topically. Hence, we recommend you to ask your dermatologist before finally using hydrogen peroxide for skin or hair.

You might feel some discomfort, including itching and irritation, while using hydrogen peroxide for your hair. You can prevent the irritation by applying a thick layer of petroleum jelly around the hairline. Avoid leaving hydrogen peroxide for so long on your hair to ensure bleaching your hair without skin irritation.

  • How Long Hair Remain Colorful After Bleaching with Hydrogen Peroxide?

Hair bleach using hydrogen peroxide is usually considered a permanent dye. It means the dye will only go away with the re-growth of hair. This is due to hydrogen peroxide’s action on your hair cortex – the innermost part of your hair that is known for holding the pigment responsible for giving hair the natural color.

Dyes made with hydrogen peroxide (almost all of them are) are usually enough to give your hair a light blonde look.

  • how long does it take for hydrogen peroxide to lighten hair?

It usually takes approx. 30 to 60 minutes to properly lighten your hair using diluted hydrogen peroxide. However, it may vary according to the color intensity and overall thickness of your hair. Hydrogen-peroxide-based dyes are pretty effective in removingthe old artificial color from hair.

How?

Hydrogen peroxide oxidizes the melanin (hair pigment) and keratin (structural protein of hair). The innermost part of your hair, known as the “cortex,” is packed with melanin and gives your hair the natural color. Hydrogen peroxide is one ingredient that can easily penetrate the hair cortex and break down the melanin pigment by releasing oxygen, thus lightening the hair.

Potential Side Effects Related to Hydrogen Peroxide for Bleaching Hair

Using hydrogen peroxide, especially constant use, may damage your hair in different ways. Keep these risks in mind before finally deciding to bleach your hair with hydrogen peroxide.

  • Loss of Hair: Hydrogen peroxide may be responsible for oxidative stress, and hence, loss of hair.
  • May Damage Hair Cuticles: Bleaching usually leads to the oxidation process, which may be responsible for damaging hair cuticles.
  • Scalp Irritation: Hydrogen peroxide, even in diluted form, is a potential skin irritant and may cause burning and irritation on the scalp, especially the hairline.

Conclusion:

Yes, it might be very tempting to use hydrogen peroxide for bleaching hair due to its very strong and effective bleaching properties. But it is also linked with possible risks of damaging your hair and irritating your scalp. As an even bigger concern, hydrogen peroxide damages the hair protein and makes your hair fragile and weak. Hence, we recommend you to be extremely cautious before applying even 3% diluted hydrogen peroxide on your hair.

Not only should you go for a patch test, but you should ask your dermatologist before bleaching your hair. Moisturizing your hair and nourishing it with a high-quality, chemical-free conditioner becomes a must.

Pineapple for Skin Whitening – Benefits and DIY Recipes

We all are in love with pineapple. Aren’t we? This tangy, juicy, and delectable fruit is the favorite fruit of people of all ages. After all, it is called “the king of tropical fruits”. This amazing fruit doesn’t only excite your taste buds but is also packed with multiple health and skin benefits.

Thanks to its health-friendly contents like copper, magnesium, folic acid, dietary fibers, beta-carotene, manganese, vitamins B and C, pineapple can be a blessing for your skin. There are so many skincare products that contain pineapple as an ingredient. However, if you want to get the maximum effects, you should go for fresh pineapple fruit instead of opting for skincare products made with pineapple. In this write-up, we will discuss how pineapple for skin whitening is no longer an alien concept. We will also share some very interesting and effective recipes for using pineapple for naturally clear, glowing skin.

Is pineapple good for skin whitening?

Yes! Eating or drinking pineapple/juice regularly can help you solve complex and mysterious skin problems. For better results, you can also think about applying pineapple juice with other skin-friendly ingredients. Pineapple juice can improve your overall beauty and can make your skin free from acne, wrinkles, fine lines, and pimples.

Using pineapple for skin can also help you get rid of blemishes, black spots, moles, and warts, etc. And the best thing is, you can blend pineapple juice with a myriad of other natural ingredients. If you have sensitive or inflamed skin, you can alternatively consume pineapple juice for similar results. Here are some amazing skin benefits of pineapple juice.

1. Pineapple Juice Improves Your Skin Complexion

Pineapple juice is very effective to improve overall skin complexion. Thanks to bromelain enzyme presence, pineapple juice can be proved mighty effective in treating various skin conditions including acne, hyperpigmentation, pimples, dark circles under eyes etc.

Mainly due to bromelain, pineapple juice improves the elasticity of the skin by improving collagen synthesis. The proper formation of collagen is also linked with the prevention of wrinkles and fine lines on the face. What more? Pineapple juice is also good at keeping your skin hydrated and deals effectively with dead skin cells.

2. Pineapple May Help in Treating Acne

Unlike most of the other skincare ingredients, pineapple juice is suitable for acne-prone skin too. Pineapple juice is packed with various powerful antioxidants, bromelain, and vitamin C, and can be surprisingly effective as a treatment for acne. In addition, using pineapple for skin can also improve skin toning and damage due to the sun. Bromelain is very effective against swelling and skin inflammation and can soften your skin within a few weeks.

3. Pineapple Juice Delays Skin Ageing

Abnormal and premature skin ageing has become a common skin problem for ladies all over the world. And using chemically prepared skin products can only make your skin worse. Thanks to its antioxidants and vitamin C contents, pineapple can be your new buddy to fight against premature ageing. If you use pineapple for skincare, you will be able to keep premature ageing at bay.

4. Pineapple May Help You in Pimples Prevention

Pineapple sits firmly on top when we talk about healthy, skin-friendly fruits that can also prevent pimples outbreak. As pineapple juice contains alpha-hydroxy acids, it may kill the pimple-causing bacteria, and help you to have pimple-free skin.

5. Pineapple May Heal Moles and Warts

The ability to deal with moles and warts is also among the top skin benefits of pineapple juice. The acidic nature of pineapple juice can remove moles and warts in a few weeks. However, avoid overusing it on warts, as it may penetrate through the open surface of warts and cause itching.

6. Pineapple Works as a Powerful Skin Exfoliator

Pineapple can be your ultimate, all-natural skin exfoliator. As we have already discussed, pineapple contains alpha-hydroxy acids that can exfoliate the dead skin cells without causing any harsh effect on the skin. Pineapple is also packed with proteolytic plant enzymes that can also work effectively to brighten the skin up by getting rid of dead cells.

7. Pineapple Reduces Dark Spots

Here is another reason why you should use pineapple juice for skin whitening! Pineapple juice contains ascorbic acid, and it can remove almost all types of dark spots from your skin. The ascorbic acid breaks down the dead cells under dark spots and gives your skin a natural, clear, and spotless look.

DIY Pineapple Recipes for Skin Lightening

We are pretty sure; you are now very well aware of how pineapple can be your best beauty buddy. Check this section out to find some amazing DIY skin whitening recipes powered by pineapple.

1. Pineapple Face Mask for Oily Skin

Are you annoyed due to your overly greasy skin? Are you so tired of finding a suitable, softer, all-natural face mask for your oily skin? The biggest challenge with oily skin is to maintain a balance between removing extra oil and providing enough moisture to your skin. Some skin products work as very good moistures, but they can’t control excessive oil. And, some of them are suitable for oily skin, but can’t retain required moisture.

But you can successfully attain that balance by using pineapple for skin lightening. Plus, all other skin benefits of pineapple are already there.

And complimenting pineapple with honey can only maximize the benefits. Honey can also hydrate your skin, along with controlling excessive oil production. Thanks to its amazing antimicrobial properties, honey can also control the acne breakouts. We have also used oatmeal in this recipe, which can’t only collect the excess skin oil, but can soothe your skin as well.

Ingredients You Need:

  • One tbsp pineapple puree
  • Two tbsp each of honey and oatmeal powder

Steps to Follow:

  • Add honey and pineapple puree in a small bowl.
  • Now, add oatmeal powder and mix thoroughly to make a fine paste.
  • Clean your face and apply evenly, focusing more on dark spots.
  • Splash fresh water after 15 minutes.
  • Finish with a gentle skin moisturizer.

 2. Peach and Pineapple Face Mask for Skin Whitening

If you are annoyed with your facial skin’s dryness, you might need this super-soft, moisturizing, and nourishing face pack to replenish your skin properly. The combination of pineapple and peach can be the ultimate solution for dull and tired skin.

How?

Peach is packed with numerous antioxidants, nutrients, and moisture. It keeps your skin hydrated and makes your skin supple, plump, and smooth by working on dry patches. Peach is also very effective natural treatment for fine lines and wrinkles. So, peach can perfectly complement the usage of pineapple for skin.

Ingredients You Need

  • One tbsp pineapple puree
  • Three tbsp mashed peach
  • Powdered milk according to the requirement

How to Make and Use

  • Combine both ingredients evenly in a small bowl.
  • Improve the creamy consistency by adding enough powdered milk, ensuring the combination is not too runny or thick.
  • Now, wear a thick layer of face mask on a clean, dried face.
  • Keep the face mask on for about twenty minutes.
  • Now, splash some lukewarm water and keep removing slowly and gently.
  • Dab a gentle skin cleanser before finishing with a face cream.

6. Special Pineapple Face Mask for Uneven Complexion

If you want to improve your uneven skin complexion, you should go for this particular pineapple face mask for skin whitening. This face mask won’t only improve your skin’s complexion but will do wonders to improve your skin’s tonicity as well.

We recommend aloe vera and tea tree oil as other very goods skin ingredients for uneven skin complexion. Aloe vera is not a new ingredient when we talk about skincare products. It can effectively heal your skin, get rid of small scars, and soothe skin inflammation.

On the other hand, thanks to its antimicrobial and anti-inflammatory properties, tea tree oil can also improve your skin’s complexion disturbed by acne, blemishes, pimples, etc.

Ingredients Required to Make this Amazing Pineapple Face Mask for Skin Whitening

  • One tbsp pineapple puree
  • Two tbsp aloe vera gel
  • Two drops of tea tree oil

How to Prepare and Use

  • Transfer all three ingredients in a small bowl.
  • Mix these ingredients constantly until you get a smooth paste.
  • Ensure the face mask is light and runny without any lump.
  • Use a mild face scrub to exfoliate your skin.
  • Wear a thick layer of face mask and keep it on for about ten minutes.
  • Avoid complete drying of face mask by regularly dabbing your face with the mask.
  • Swill the mask off with lukewarm water after about twenty minutes.
  • Give your face a finishing touch with a suitable skin moisturizer.

6. Coconut Oil, Rice, and Pineapple for Skin Whitening

Rice can have surprising effects on your skin. It can be a very suitable ingredient to have a beautiful, toned, spotless, toned, and nourished skin. Rice not only a very good skin exfoliator, thanks to its nourishing capacity, it can also improve unnatural skin dryness.

While pineapple can help you get rid of dark spots and acne marks, coconut oil can complement it perfectly thanks to its nourishing capacities. In addition, coconut oil also forms a protective layer on the skin, rejuvenates, and heals it.

Ingredients You Need

  • One tbsp pineapple juice
  • 3 tbsp cooked rice
  • 2 tbsp coconut oil

Steps to Follow

To maximize the efficacy of pineapple for skin whitening,

  • Take the cooked rice in a small bowl, ensuring it is still hot.
  • Keep the rice mashing while adding coconut oil.
  • Use a fork to beat and mix the rice with coconut oil properly, ensuring there is no lump.
  • Now, add pineapple juice and mix again.
  • Wash your face properly to remove all the dirt.
  • Cover your face with a thick layer of this face mask.
  • Keep the mask on for twenty-odd minutes.
  • Rinse off with lukewarm water before finishing with a gentle face cream.

7. DIY Pineapple Face Mask for Acne

You get some added benefits when you correctly use pineapple for skin whitening. It can effectively control acne breakouts by tackling excess oil production. Various enzymes of pineapple also exfoliate and unclog your skin pores.

We already know how oatmeal can help you in your skin whitening journey, as oatmeal can heal skin irritation and redness. We have used rose water as a complementary ingredient here. Rosewater is very well known for its antimicrobial and antiseptic properties and can improve the healing process after acne breakouts.

Here is How to Use Pineapple for Skin Whitening on Acne-prone Skin 

  • Add 2 tbsp rose water to 1 tbsp pineapple juice and mix evenly for a few seconds.
  • Now, add 2 tbsp oatmeal powder to ensure better consistency.
  • Apply the mixture evenly after washing your facial skin, focusing more on acne breakouts.
  • Wear the mask on your face for about fifteen minutes.
  • Remove very slowly and gently to avoid possible discomfort – Use some more rosewater if the mask gets excessively dried.
  • Appley a chemical-free moisturizer.

Pineapple is packed with a lot of skin benefits, and if you are thinking of using pineapple for skin whitening, we suggest you go ahead. After all, we haven’t only helped you with the amazing benefits of pineapple, we have also suggested some very effective DIY recipes to get soft, supple, and naturally glowing skin finally. You can opt for any of these recipes depending on your skin condition as well as the availability of ingredients. We will surely welcome your comments related to your skin whitening journey. Bless us with your valuable comments

13 Natural and Effective Remedies to Get Rid of Oily Hair

Having oily and greasy hair is very common, and almost all of us get annoyed multiple times in our lives. Natural oil (sebum) is very important for your hair’s health. But, excessive production of sebum can make your hair as well as scalp oily, greasy, dirty, sweaty, irrespective of how often you shampoo or condition them.

Sometimes, the excessively oily scalp can be a sole reason for redness, itching, inflammation, and even seborrheic dermatitis. However, you don’t need to get hopeless, as there are some very effective oily hair treatment & remedies that can help you to balance the greasiness of your scalp and hair. But, before we start discussing these amazing remedies, let’s know why your hair gets greasy all the time

Potential Causes of Oily Hair

Yes, excessive production of sebum is obviously the most important factor responsible for annoyingly slick hair, there are some other possible factors too.

  • Humidity: If you continuously reside in a humid environment, there are higher chances of you getting oily hair even if you take care of them correctly.
  • Touching your hair unnecessarily can also cause greasy hair as the oil from your hands may transfer to the scalp.
  • Prolonged application of certain hair serums may also be responsible for oily scalp.
  • Excessive use of conditioner
  • Hormonal imbalances.
  • Vitamin B deficiency
  • Shampooing your hair excessively can cause stripping of natural oil from the scalp, and hence, causing overproduction of sebum.
  • Untreated or ignored dandruff.
  • Not washing your hair correctly and frequently.

Some Very Potent and Safe Home Remedies for Greasy Hair

  1. Tea Tree Oil

Tea tree oil can be the best bet if you have got oily hair due to excessive and untreated dandruff. According to a study, tea tree oil is packed with extraordinary antimicrobial properties and can control dandruff. Hence, it can effectively treat greasiness of hair and scalp without causing any unwanted effect.

Here is How to Administer Tea Tree Oil on Hair

  • Take 30 ml of carrier oil of your choice (preferably coconut or jojoba oil).
  • Now, add 15 drops of tea tree essential oil and mix well.
  • Apply the combination of two oils to your scalp.
  • Spread the oil evenly from hair roots to the ends.
  • Applying tea tree oil directly on your scalp can be even more effective (only if you are not sensitive to it).
  • Use this blend twice or thrice a week, and complement with a natural conditioner for best results.
  1. Apple Cider Vinegar for Oily Hair

Apple cider vinegar inholds acetic acid, which may balance your scalp’s pH level. Your scalp usually has a low pH, and washing it with ACV can effectively restore its pH level. With that, ACV can control the excessive production of natural hair oil.

Steps to Use Apple Cider Vinegar for Oily Hair

  • Add 3 tbsp of diluted apple cider vinegar to one cup water, and mix properly.
  • ACV with water can work as a mild cleanser, and you can use it to wash your hair without any harsh effect.
  • Wash your hair with a shampoo, and wash again with ACV solution.
  • Keep the solution on for a few minutes, before finally washing the hair again with cold water.
  • Repeat this formula thrice a week for expected results.
  1. Coconut Oil for Oily Hair

Coconut oil is one of the most affordable as well as a very effective natural treatment for oily hair. Applying it before conditioning your hair can avoid the sliminess of your hair. Virgin coconut oil is known for its lightness as it has much lower molecular weight when compared to most of the other hair oils. And that’s why coconut oil can go a long way to control the oiliness of the hair. In addition, the oil can give your hair the much-needed shine and glow.

Here is How to Use Coconut Oil for Oily Hair

  • Wet your hand with little virgin coconut oil rub it between the palms.
  • Apply the oil properly on the scalp as well as hair.
  • Wash your hair with a light shampoo after about one hour.
  • Use coconut oil once a week to balance the production of natural hair oil.
  1. Aloe Vera for Oily Hair

Thanks to its powerful astringent and nourishing properties, aloe vera is also one of the most affordable, yet very handy natural treatment for oily hair. It is also packed with numerous nutrient-rich components and can make your hair soft and shiny by controlling excessive sebum production.

How to Treat Oily Hair with Aloe Vera

  • Compound one tbsp fresh aloe vera gel with one tbsp lime juice.
  • Now, add this mixture to one cup of water, and mix thoroughly.
  • Wash your hair with this mixture, preferably after finishing the shampooing.
  • Keep the mixture on for about five minutes before washing it off with cold water.
  • Implement this treatment once or twice a week to control greasiness of hair and scalp.
  1. Epsom Salt for Oily Hair

Thanks to its high content of magnesium, Epsom salt can also be among the best home remedies for oily hair. How? Magnesium works very effectively on the scalp’s inflammation and absorbs the excess sebum from the scalp.

How to Use Epsom Salt for Oily Hair?

  • Simply, add two tbsp Epsom salt to your shampoo.
  • Apply the shampoo containing Epsom salt on the scalp, and leave for about ten minutes before washing.
  • Follow this treatment twice a week to eliminate extra oil from your hair.
  1. Baking Soda for Oily Hair

When it comes to hair and scalp, baking soda provides double benefits. It is not only a very good natural dry shampoo but works as a hair rinse too. There is enough anecdotal evidence of the effectiveness of baking soda on oily hair, as it can get rid of excess scalp oil. In addition, baking soda can be a potent natural remedy to balance your scalp’s pH level.

Here Are the Steps to Use Baking Sod for Oily Hair

  • Sprinkle a handful of baking soda on your hair, ensuring your scalp is covered as well.
  • Use a high-quality, soft hairbrush to spread the baking soda evenly through hair ends.
  • Alternatively, add four tbsp of water to one tbsp baking soda and apply on your moist hair.
  • Wash your hair with fresh water after about five minutes.
  • Use baking soda for oily hair twice a week and notice the difference.
  1. Green Tea for Oily Hair

Green tea is packed with a lot of polyphenols and can be a blessing for your scalp’s overall health. Green tea can maintain the balance between dryness and greasiness of hair by successfully controlling the over-secretion of sebum.

  • Boil one cup water in a saucepan, and add ½ cup of green tea to it.
  • Simmer green tea for five minutes before straining.
  • Keep the mixture aside to give some cooling time.
  • Once the mixture gets a bit colder, apply it thoroughly on your scalp.
  • Leave the amalgam for about half an hour before washing with cold water.
  • Trying this method once a week should give you great results.
  1. Cocoa Powder for Oily Hair

When it comes to home remedies for oily, frizzy hair, cocoa powder also becomes a preferred choice. It works very effectively as a dry shampoo, especially on dark hair. Cocoa powder can get rid of excess scalp oil and give a natural shine to your hair.

How to Use Cocoa Powder as a Dry Shampoo?

  • Sprinkle about one tbsp cocoa powder evenly on your hair and scalp.
  • Even out the powder by using a hair comb.
  • You can use it as a dry shampoo whenever you are short on time to wash your hair.
  1. Egg Yolk for Oily Hair

Thanks to their fatty acids and nutrients, egg yolks can be among the most potent home remedies for greasy hair. They can absorb and control the scalp’s sebum and prevent the excessive greasiness of hair and scalp.

What You Have to Do with Egg Yolk?

  • Add one tbsp lemon juice to one egg yolk and beat for a few seconds.
  • Now, wear this hair mask evenly on recently washed hair, focusing on the scalp as well.
  • Keep the mask on for about forty minutes before rinsing with cold water.
  • Apply this hair mask every weekend to see a clear difference.
  1. Lemon Juice for Oily Hair

Lemon juice is not only a great natural treatment for oily hair; it can be proved immensely effective against dandruff as well. As we know, it is acidic in nature, and hence, can bring the pH level of your hair and scalp to normal. Additionally, citrus found in lemon can also contain the extra production of sebum.

How to Use Lemon Juice for Oily Hair

  • Squeeze out the juice from a couple of lemons.
  • Add the juice to two cups of fresh, distilled water and dilute properly.
  • Now, refrigerate this mixture in an air-tight container.
  • Whenever you shampoo and condition your hair, pat them dry, and finish with this refrigerated mixture.
  • Keep the emulsion on for about ten minutes before washing your hair again.
  • This method is a bit laborious as well as time-taking but is packed with amazing benefits. So, you can treat your hair with this method every now and then, when you have enough time.

Here is a word of caution: Lime juice can bleach your hair when exposed to sunlight. So, avoid sitting under direct sunlight with this mixture on your hair.

  1. Jojoba Oil for Oily Hair

The chemical properties of jojoba oil are quite similar to those of sebum produced by your hair. If you can use jojoba oil consistently for your hair, it can control the extra production of natural hair oil, and hence, can reduce the oiliness of scalp and hair.

Here is How to Get Rid of Oily Hair Naturally with Jojoba Oil

  • Apply a few drops of high-quality jojoba oil uniformly on your scalp working through the hair strands.
  • Leave this mighty hair oil for about one hour before rinsing off with a mild, chemical-free shampoo.
  • Use jojoba oil every other day for a few weeks and see the reduction in natural scalp oil.
  1. Oatmeal for Oily Hair

The use of oatmeal is not limited to healthy and nutritious food. If used precisely, it can be one of the best home remedies for oily hair too. As oatmeal is thick and consistent, it can easily soak up the extra oil from your hair and scalp. Additionally, due to its anti-inflammatory properties, oatmeal can make your hair smooth by soothing the scalp.

Steps to Use Oatmeal for Oily Hair

  • Cook a handful of oatmeal and mash it to get scrub-like consistency.
  • You can, of course, adjust the quantity according to your hair.
  • Now, apply smoothly on your scalp, working evenly on hair strands.
  • Keep the oatmeal paste on for about twenty minutes before rinsing with a mild shampoo.
  • Applying oatmeal once or twice a week will be enough to get healthy, less-oily hair.
  1. Yogurt Hair Mask for Oily Hair

Here is another fine natural treatment for oily hair. Treating your hair with yogurt can help you get rid of extra hair oil and provide the much-required nourishment to both scalp and hair.

Here is How to Use:

  • Add two tbsp lemon juice and one tbsp baking soda to ½ cup plain yogurt.
  • Beat the compound for a couple of minutes to get suitable consistency.
  • Cover your scalp and hair with this mixture.
  • Wear a shower cap or use a clean towel to seal the moisture.
  • Wash your hair with plain water after about half an hour.
  • Use plain yogurt once a week to nourish your hair and keep them healthier, softer, and shiny.

Oily hair can be so annoying and waste your precious time while styling. Hopefully, you are now armed with some very good oily hair treatment & remedies. You can elect any of these treatments according to your choice, and of course, availability of the ingredients. Do share your hair treatment story with us! We will be gleeful to listen to your side.

13 Lazy Hacks to Lose Weight

Losing weight requires some doing. You have to give a lot of dedication and hard work to get rid of unnecessary body weight. Eating right and physical workout are two of the main components of a successful weight loss journey. However, some people can’t afford to be involved in continuous, rigorous physical exercises either due to some health conditions, tight schedule or sometimes, even a lack of motivation to hit the running track of gym.

There is still some optimism left for such people! Yes, you can finally get rid of extra body fat by following some very simple and lazy hacks to lose weight. Your daily habits like using your smartphone, trying some cooking shortcuts, opting for prepared foods etc. can be proved surprisingly helpful to finally help you get back in shape. Check out these proven strategies that can make your weight loss journey not only effective but interesting as well.

1. Multitasking in Front of the Television

You can save a lot of minutes and money by skipping those challenging and time-taking gym sessions. Instead, working out at home can be so fascinating, and at the same time, result-oriented. How?

You can keep some weights in front of your TV set. Try performing your favourite exercises like crunches and lunges while watching your favourite shows on TV. What about enjoying some programs based on fitness? You can also park different fitness machines like elliptical and treadmill in front of your TV so that you can be engaged mentally and physically.

2. Reduce Your Shopping Duration

Instead of spending hours on getting prepared for shopping, eat before leaving your home for a grocery shop. And once you reach there, try to purchase only the items you really need. That way, all you have to do at the grocery shop is to decide the type of product or brand. Instead of purchasing full cream milk, ask for skim milk. Instead of white loaves of bread, choose whole-grain pasta, brown rice and bread. Instead of shopping for the soft drink, add sparkling water to your cart. Always, always prioritize whole fruits instead of fruit-flavoured drinks. If you are habitual of overeating directly from packages, opt for pre-portioned sizes only. These are some of the underestimated but very effective weight loss tricks that actually work. Bringing some very short changes to your shopping pattern can have surprising effects on what you eat, and in result, can complement your weight loss efforts.

3. Shop for Ready-to-eat Snacks

If you don’t like keeping apple slices and tote almonds in your office bag, you’re more likely to go for a satisfying snack at a corner store, coffee shop, or a vending machine, especially in the late afternoon. “Convenience” is one of the most misunderstood words, and it becomes an indirect problem for foodies when they are hungry. Sometimes, we all go through a time when we can eat almost anything.

And “convenient food” is a very commonly used synonym for junk foods. Instead of always craving for junk foods, you should go for pre-packaged foods available in their original forms. Some of the best examples of pre-packaged foods are whole or pre-cut fruits, veggies, cups of yogurt, and hard-boiled eggs etc. If you are a money-saving person (of course, everyone should be), and don’t prefer advance planning, you can also make some packages of healthy snacks at home. You can simply wash and cut celery, capsicum, and carrot etc. to make them easy to grab.

4. Take a Break Between Bites

It might take some time to comply to your lifestyle; it can be one of the best ways to lose weight. Taking multiple breaks of a few seconds between each bite reduces the eating speed, and can help you to eat fewer than you are expected to eat. In addition to taking in-between breaks, we also suggest you to take enough time to properly chew your food. In a China study, people who chewed their foods 30-40 times per bite were successful in eating fewer kilojoules than the people who chewed only 15-20 times per bite. Drinking water before eating is another very effective way to fill yourself faster. And this will, of course,assist you to remain hydrated – always critical for weight loss.

5. Try to Get Your Foods Hand-delivered

If you are not into stewing food, you can surely opt for delivery services to get healthy meals. It has been one of the major fitness and health trends in the recent past. Portion-controlled and kilojoule-restricted eating plans can help you to fed extra weights without pondering much overcooking.

6. Add Healthy Snacks to Your Diet Repertoire

For your surprise, your favourite night-time snack can be one of the easy ways to lose weight. People who snack popcorn quite frequently get as many as 22 per cents more fibre and 250 per cent more whole grains than those who don’t know enough about low-kilojoules snacks. How is it linked with weight loss? Whole grains and fibre are known for keeping your bloodsugar level in check. And help you feel satisfied for a long time. Try to add some healthy snacks like salads, popcorn, gorgon nuts, mixed berries, and Greek yogurt instead of munching all the time on oily, buttery snacks.

7. Dedicate Some Quality Time to Dressing

If packing your gear and preparing your workout wardrobe keeps you away from the gym, you may not like the clothes you have. These days, clothes, especially fitness clothes, are getting better and better. So, while shopping for your gym clothes, choose ones that suit you perfectly. Opting for your favourite colour or design can make a lot of difference in your efforts to get ready for exercise. So, always go for flattering, stretchy, breathable clothes for your workout sessions. And don’t forget to add a pair of attractive, high-quality running shoes!

8. Play Video Games While Exercising

This might be among the funny as well as easy ways to lose weight. Yes, prolonged video gaming can conjure up teenagers to spend hours on crouch. But as they say, you have to know how to use something correctly and for your advantage. And a lot of people of all ages are shedding some serious weight with the help of video games!

Although you must have to choose video games that need proper physical movement. Games like Playstation’s Dance Dance Revolution and Wii Boxing are the best examples. These games inspire you to involve in enough physical activities to shed a decent number of calories. According to an energy expenditure study performed on 39 children with different body shapes, video games involving physical exercises can help to burn 15 to 25 kilojoules per minute. And for your information, a treadmill walking with 5kph speed burns 15 kilojoules in a minute.

9. Push Yourself a Bit Harder – Day by Day, Week by Week

Only getting out of your comfort zone can also be considered as one of the effective lazy hacks to lose weight. If you can’t perform structured workouts due to certain health issues or simply due to your tight schedule, try doing your routine works a bit differently. Breaking your exercises in shorter intervals instead of doing them in one go can give you immense benefits. Wearing a steps tracker gadget, or simply using your smartphone to track your steps can play a critical role in helping you to get back in shape. Try adding 50-100 steps day by day if not more! This way, you will keep improving your body without feeling too tired!

If you have a sitting job, get up every hour or two and roam around for a while. Your boss won’t shout out until you are staring at a female colleague 😉. Instead of transferring yourself up and down in a lift, try to count those stairs at your workplace. In short, inspire yourself to avoid comfort all the time!

10. Hit the Snooze Button – Yes! Quite often!

Surprised again? Right, sleeping can possibly be among the best lazy hacks to lose weight. According to a 6-year study from Canadian researchers, there is a huge connection between obesity and sleep patterns. The researchers observed that people who were in favour of 6-hours sleep per night gained as many as 9 kgs more than those who follow “early to bed and early to rise” mantra and get a sound sleep of 7 to 8 hours.

There are so many studies suggesting an increase in the formation of hunger hormone due to sleep deprivation. According to a recent study, an abnormal lack of sleep can not only favour the obesity but can also slow reduce the pace of fat burning.

According to Swedish researchers, even a single night of disturbed sleep may hamper the metabolism in the morning and reduce the number of calories burned while performing physical exercises. So, instead of being habitual of short night sleeps, always, always help yourself with a nice, sound sleep of 7 to 8 hours.

11. Pay with Cash Instead of Paying Online

It is among one of the ignored but very effective and easy ways to lose weight. Surprised? Well, we were too, until we got an indirect link of paying with cash to your weight loss efforts.

According to a recent study, people are more likely to purchase unhealthy foods when they use online transaction options. Still, how paying with cash is linked with healthy purchases? The study unveiled that shoppers find it psychologically painful while spending cash with a sense of losing money. On the other hand, paying with your debit or credit card sounds fancier! You may end up spending more than what you required!

A sense of losing money while paying with cash can eventually help you to avoid purchasing an extra dough of unhealthy foods! So, next time when you strategize to go to a supermarket, get some cash from an ATM machine instead of giving your card for swipe. You will surely understand the difference.

12. Brush Your Teeth! Twice, Daily!

Don’t say you are not surprised again! We all know brushing is more about oral hygiene, but how it is linked with lazy hacks to lose weight? Just like spending money with cash, brushing after meals is also a psychological thing. Brushing is usually a signal to put a brake on eating. You are more likely to resist having snacks at least for half an hour or so after brushing. And the strong minty taste of toothpaste may also distract your taste buds from more craving! Hence, for a change, start brushing after meals instead of before them!

13. Friendship with Your Smartphone

Your smartphone can help you in a lot of different ways. Smartphones these days are not only for calling, texting, emailing, or exploring the internet. Some amazing fitness applications can help you to be on your toes all the time. From tracking your meals for calorie counting to counting your daily steps, and tracking your workouts, the smartphone can be your ultimate fitness buddy! Instead of spending hours in gaming and other entertainment applications, prefer spending only a few minutes daily on your smartphone to keep yourself fit and fine.

There are some amazing fitness applications available on both Apple Store and Google’s Play Store. All you have to do is to be more proactive and of course, fall in love with yourself. You’ll see how your 6-inch gadget can do the trick for you.

Losing weight is nothing short of a passion. It is not about being better than others. Instead, it is about being the best version of yourself. First thing you have to do to shed some weight is to love yourself. The day when you feel a lot of love for your body and health, you will start doing a lot of things for fitness. And we have already helped you with some amazing lazy hacks to lose weight. Whether you are about to start your weight-loss journey, or you have tight on schedule, you can’t give excuses anymore – unless you are yet to find the reasons to love yourself.

How to Use Coffee for Skin Whitening?

Coffee might be your favorite mood booster to start your day. It might be the best way for you to elevate your energy and metabolism every day. Yes, coffee is one of the most favorite beverages worldwide and has plenty of health benefits. But for your surprise, coffee can be a single remedy for a lot of skin problems, especially dark skin too! Yes, “coffee for skin whitening” might sound a bit strange, but it has the potential to give you a clean, radiant, and glowing skin.

Coffee is packed with various antioxidants, including phenols, and can fight free radicals that can cause so much damage your skin. In fact, according to a study from the American Chemical Society, coffee is one of the primary sources of antioxidants in the USA – even more than other common beverages known for their great antioxidating properties.

While a refreshing coffee cup can be a great source of antioxidant, you can obtain various skin benefits by using coffee beans or coffee powder topically. And the best part is, you can use coffee for skin whitening in a lot of different ways, including a paste, mask, and scrub.

In this manual, we will support you with different tips and tricks of using coffee to obtain clean, glowing, and healthy skin. But before that, let’s know why coffee can be so effective for your skin.

How does coffee work on Your Skin?

Following are some amazing skin benefits of coffee that make it a decent skin whitening remedy.

  • Coffee Reduces Cellulite

Coffee may be helpful to reduce the cellulite appearance on your skin. Thanks to its caffeine content, coffee can play a decisive role in eliminating cellulite by dilating the blood vessels right beneath the skin layers. In addition, coffee also improves the skin’s blood flow and in result, reduces the bad appearance of cellulite.

  • Coffee is Packed with Surprising Calming Effects

If you think coffee can only calm your mind and boost your mood, you haven’t experienced the best of it. Thanks to its antioxidants content, coffee can calm your skin’s tissues as well.

  • The Anti-aging Benefits

Using coffee for face whitening can successfully delay the premature ageing. Coffee may reduce the appearance of fine lines, redness, sun spots, hyperpigmentation, and a lot of other types of facial spots. In fact, according to a study, researchers found a direct link between coffee consumption and photoaging effects.

  • Vitamin B-3 For Skin Cancer

Although more researches and studies are needed, coffee scrub for skin whitening is also linked with reducing the risk of skin cancer. Coffee is a great supplier of vitamin B3 mainly due to the breakdown of trigonelline. And if the studies from Skin Cancer Foundation are to be believed, niacin content of coffee may be effective in preventing nonmelanoma types of skin cancers, and may also avoid other types of abnormal skin growth.

  • Reducing Inflammation

Coffee contains chlorogenic acid and melanoidins – both of which are linked with reducing skin inflammation and hyperpigmentation. And hence, using coffee beans for skin whitening can also reduce skin inflammation due to various skin conditions.

  • Acne Treatment

Regular use of coffee can help in fighting with acne-causing bacteria. As coffee contains CGAs, and have both antibacterial and anti-inflammatory properties, it can be a beneficial acne treatment and can fight the darkness left after acne.

  • Dak Circles

Coffee may also be effective against some of the most stubborn dark circles under the eyes, Beverly Hills MD Cosmeceuticals states. This is because of the caffeine content of coffee that may dilate the blood vessels contributing to the appearance of dark circles.

Different Ways of Using Coffee for Skin Whitening

In this segment, we are sharing some very effective coffee recipes you can try to get rid of different skin problems. Let’s find out more in details.

 1. Coffee, Curd and Turmeric Face Pack

Turmeric is not an alien ingredient when it comes to natural remedies for glowing skin. It can restore the natural glow by working on uneven skin tone. Hyperpigmentation is the primary cause for unnatural skin darkness, and turmeric can be that ultimate ingredient that can control hyperpigmentation without causing any adverse effect on your skin.

On the other hand, thanks to the presence of skin-friendly contents like lactic acid and zinc, curd can moisturize your skin and also slow down the process of ageing. Combine the extraordinary properties of these two ingredients with scrubbing prowess of coffee; you will get a toned, glowing, and healthy skin.

Recipe

  • Properly mix one tbsp each of turmeric, coffee powder and curd for skin whitening.
  • Stir well to get a consistent, lump-free paste.
  • Cleanse your face with water and pat dry before applying.
  • Now, apply the mixture levelly on your face as well as neck in a downward motion.
  • Give a “dry out” time of about twenty minutes.
  • Lather your face with lukewarm water and pat dry again.
  • You can repeat this treatment twice or maybe thrice a week for best results.

 2. Coffee, Coconut Oil, and Cinnamon Powder Face Pack for Pimples

Coconut oil can be proved handy when it comes to improving your skin’s complexion. It is also a very effective as well as a gentle home remedy for hyperpigmentation, dullness, unnatural darkness, and pimples etc.

If we talk about cinnamon powder, it is packed with powerful skin lightening properties. It can be especially effective to improve the scars and dark spots after acne scars, blemishes, and pimples etc. And, of course, we have discussed a lot about the amazing results of using coffee for skin whitening.

Recipe

  • Add ½ tbsp coconut oil and ¼ tbsp cinnamon powder to one tbsp coffee powder.
  • Mix all these ingredients evenly so that you get a smooth paste.
  • Apply on the cleansed, and dried face.
  • Wash the paste off after twenty-odd minutes.
  • Pat dry, and finish with a mild moisturizer.
  • Repeating this method once a week should be enough.

 3. Coffee and Lemon for Skin Whitening

Thanks to the high concentration of vitamin C and powerful antioxidants, you can use lemon juice very effective for skin whitening. Humble lemon juice can singlehandedly get rid of various causes of skin darkness, including dark spots, freckles, acne, hyperpigmentation, and sunburn etc. Vitamin C content of lemon juice reduces the melanin and hence improves the natural skin appearance. On the other hand, caffeine constituents of coffee can remove the tan and lighten the skin up.

Recipe

  • Mix one tbsp each of lemon juice and coffee powder in a bowl.
  • Stir appropriately to prepare a fine, lump-free paste.
  • Cleanse your face and apply the mixture evenly focusing on face as well as neck.
  • Wash the paste off with lukewarm water after twenty minutes.
  • You can try this remedy twice a week for best results.

 4. Coffee Scrub for Skin Whitening

Gram flour used in this recipe can be aa very good remedy for acne. It contains a good amount of zing and can fight various skin infections causing skin darkness and dullness.

Honey is nothing less than nature’s blessing when it comes to skin problems. Due to its antiseptic and antibacterial properties, honey can promote skin whitening, especially on acne-prone skin. Being a very gentle and effective humectant, honey can also maintain your skin’s moisture, preventing it from being too oily.

We have used aloe vera gel as well in this recipe. And aren’t we fond of this commonly-found gel? After all, it can help you to overcome a myriad of skin problems, including burns, blemishes, and acne scars.

The combination of these three amazing ingredients can get rid of almost all the skin problems causing unnatural skin darkness.

Recipe

  • Add 2 tbsp. coffee powder, one tbsp gram flour, two tbsp aloe vera gel, and three tbsp honey to a small bowl.
  • Now, add a few dips of essential oil of your choice.
  • Mix well to make a coarse paste.
  • Cover your face with paste and scrub in a circular and upward motion for about fifteen minutes.
  • Then, wash the paste off with lukewarm water and pat dry.
  • Repeat this method once daily for a positive outcome.

 5.Coffee and milk for skin whitening

You simply can’t ignore the skin whitening properties of milk. Raw milk can have surprising cleansing effects on your face as well as body. Thanks to the great amount of vitamin A, D, E and K, lactic acid, and protein, milk works as a powerful exfoliating, cleansing as well as hydrating agent. Combine all these properties of milk with great exfoliating abilities of coffee powder, you can easily get rid of dark circles, and can finally have clean, hydrated, and glowing skin.

  • Add one cup of coffee powder to one cup of whole milk and mix properly.
  • Add ¼ cup of cocoa powder (if available).
  • Mix again to prepare a smooth, lump-free paste.
  • Apply the mixture on your rinsed face and wash after about twenty minutes.
  • Pat dry and finish with a gentle, natural skin moisturizer.
  • Doing this once a week for about five weeks should be enough for skin whitening.

 6. Rice Flour and Coffee Face Pack for Skin Whitening

Surprisingly, rice flour can help you with a wide range of beauty benefits, including skin whitening. Adding rice flour to your beauty regime can assist you to remove acne, pigmentation spots, and other causes of skin darkness. Rice flour is a very good source of vitamin B and may help in the production of new skin cells. While rice flour can promote skin whitening, coffee can get rid of various types of skin impurities by improving the blood flow.

Recipe

  • Take a small dish and add one tbsp each of instant coffee powder and rice flour.
  • Add lukewarm water according to the requirement to make a lump-free, smooth paste.
  • Apply on the face, focusing more on dark spots.
  • Let the paste stay for about fifteen minutes before washing with cold water.
  • Repeat this method twice a week for desired results.

7. Brown Sugar and Coffee for Skin Whitening

Brown sugar doesn’t only work to hydrate your skin, it also exfoliates and get rid of dead skin cells from under the skin layers – and gives your skin a hydrated, natural, and glowing look. It also prevents from ageing and tanning of the skin. Applying brown sugar on your skin can also diminish different types of scars due to sunburn, acne, pimples, and hyperpigmentation etc. Using brown sugar with the coffee can give you moisturized, firmed, smooth, and glowing skin within a few weeks.

Recipe

  • Mix three tbsp each of brown sugar and coffee powder.
  • Add enough coconut oil to moist the mixture and make a granulated paste.
  • After dampening, scrub your face with this mixture.
  • Ensure scrubbing in circular motions for about twenty minutes.
  • Wash your face off with gentle soap and pat dry.
  • Repeating this treatment twice or thrice a week will start showing great results.

Some Important Tips to Have Clean, Glowing Skin

Yes, using coffee for skin whitening can be a great idea, but you can follow these important tips and tricks to avoid unnatural skin darkness and to show off your natural skin color and tonicity.

  • Get enough sleep of about eight hours to ensure proper blood supply to your skin cells.
  • Gulp enough water throughout the day to keep your body as well as skin hydrated.
  • Wear sunscreen every time you go out in the sun.
  • Keep your skin moisturized by using a gentle, natural moisturizer.
  • Massage your face regularly with a combination of coffee powder, honey, and olive oil.
  • Use rose water to keep skin inflammation at bay.
  • Exfoliate your skin with brown sugar/coffee powder and coconut oil.
  • Always have a healthy, balanced diet with loads of fruits, vegetables, and juices.

You can, of course, get amazing results of using coffee for skin whitening. And there is myriad of different ways of using this mood booster for your skin, and we have shared some of the most effective of them. Hopefully, you can finally have glowing, clean skin after combining these coffee recipes and some dietary adjustments. Do share your skin whitening story with our readers to encourage them to use coffee or other natural ingredients instead of using harmful, chemical-induced whitening creams.