Home Remedies for Kidney Stone – Is It Really Possible to Remove Kidney Stones “Naturally”?

Kidney stones are common but can be very painful and comfortable. If you feel pain in the lower right or left of your back, there are chances that you may have one or more stones in your kidney. There are various factors responsible for the formation of stones in one or both kidneys. They are unhealthy diet, obesity, lack of physical exercise, and dehydration, etc. How to remove 8mm kidney stone naturally? Well, that’s an interesting question! Because stone of anything more than 6 mm can be very hard to remove without proper treatment!

But there are a few claims about the “natural removal” of kidney stones with 8 mm diameter. Is that really possible? If not, what are other successful treatments? How is kidney stone pain different from the general type of abdominal or back pain? What changes should you make to your lifestyle to prevent kidney stones? How can your life get affected? We will try to answer all these questions and more in this article. Let’s find out

How do I know if it’s kidney pain?

Abdominal or lower back pain can be due to loads of known as well as unknown causes. Sometimes, you may feel pain right at the “kidney region” due to excessive bowel gas! But pain due to kidney stones is a bit different.

Kidney stone pain is characterized by constant, dull, and very aching, deep pain at the right or left flank (depends on the affected kidney). If both kidneys have stones, you may feel interchanging or constant pain on both sides. But usually, one kidney is affected with stone at a time. So, it’s less likely to feel the pain on both sides of the flank. Pain due to kidney stone gets worse on touch. Even the slightest of touch can make the patient go mad due to pain.

Other Kidney Stone Pain Symptoms:

If you have some other accompanying symptoms with flank pain, you should know that you may have stones in your kidney without hitting the panic button. Some common accompanying symptoms of kidney pain are:

  • Frequent urination
  • Blood in urine
  • Constant nausea and vomiting
  • Intermittent fever with chills
  • Flank pain radiating to the groin region
  • Burning pain while passing urine
  • Urinary tract infection

If you feel flank pain on either side with one or more of these kidney stone pain symptoms, you should not take a chance and go for proper investigation and treatment.

What Are the Causes of Formation of Kidney Stones?

Finding one definite, single cause for kidney stones is hard. But some factors increase the probability of stone formation in your kidneys.

Kidney stones are formed due to excessive crystal-formation substances in your urine. They can be calcium, oxalate, and uric acid. Calcium or uric acid in urine is not uncommon, but when the quantity is more than the fluid in urine, the chances of stones formation are higher. At the same time, there may be a lack of crystal preventing substances in your urine that can cause kidney stones formation.

Different Types of Kidney Stones

Depending on the crystal-forming substances, there are different types of kidney stones, such as:

  • Calcium Stones: Kidney stones are mostly formed from calcium in the form of calcium oxalate. Your body either gets oxalates from your liver or the diet. Various fruits, veggies, chocolate, and nuts are prime sources of oxalate. Dietary factors like excessive intake of vitamin D and several metabolic disorders may increase calcium stones formation risk.
  • Uric Acid Stones: Increased uric acid is a common phenomenon in people with malabsorption and chronic diarrhea and those who get high protein in their diets. People with diabetes and metabolic syndrome are also at risk of developing kidney stones from excessive uric acid.
  • Struvite Stones: One of the less common types of kidney stones is usually seen in urinary tract infection. These stones are pretty larger and grow quicker than other types.
  • Cystine Stones: People having hereditary disorders like cystinuria are prone to cystine stones.
What Are the Home Remedies for Kidney Stone Pain?

Treating kidney stone pain at home is not the smartest idea, as it needs proper treatment under medical assistance. However, you can reduce the severity of pain with some home remedies for kidney pain.

Dehydration is one of the major causes of kidney pain, and staying hydrated is the most common advice you will get from doctors. The following are some home remedies to increase the chances of passing out kidney stones along with conventional treatment.

NOTE: Staying hydrated is the most important aspect of easing kidney pain.

1. Drink A Lot of Water:

Increasing your water intake is a must if you want to give your body even a little chance to pass out the stones. Instead of the standard recommendation of 8 glasses of water per day, drink 10 to 12 glasses.

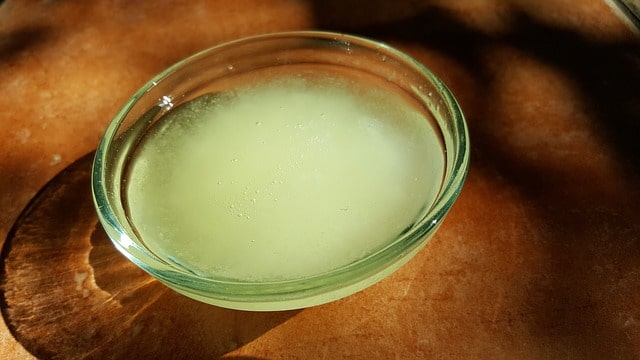
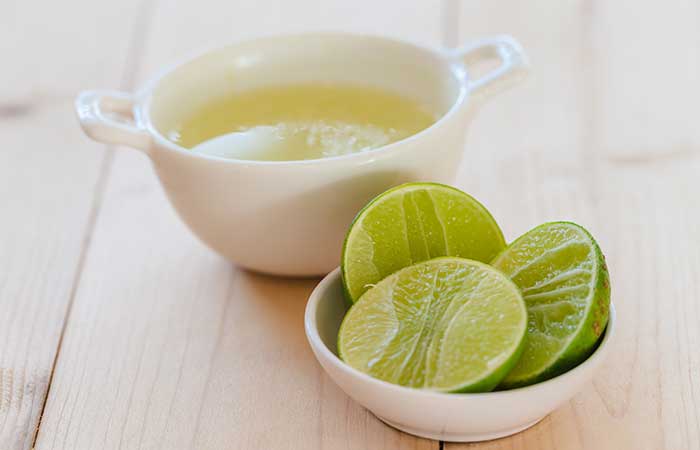
2. Add Lemon Juice to Your Diet

Freshly squeezed lemon juice is not only a great mood lifter, but it is also packed with plenty of other health benefits as well. Lemon is a very good source of citrate and can prevent calcium stones from used regularly. Citrate can also break up small calcium stones to pass them through urine.

Lemon juice is more effective when it comes to the prevention of kidney stones. And you need a lot of them to somehow dissolve and pass through urine. Yes, lemon juice can dissolve kidney stones of up to 2 mm, especially if used regularly for a couple of months. But you can’t dissolve kidney stone fast with the only lemon if they are more than 4 mm in diameter.

3. Use Basil Juice

Acetic acid is one of the main components of basil juice and can help ease kidney stones pain. It’s packed with various nutrients. Basil juice is also a good natural remedy for inflammatory and digestive troubles.

Basil juice can keep your kidneys healthy due to its antioxidants and anti-inflammatory agents.

You can use fresh and dried leaves to prepare a cup of basil juice and drink twice a day. Juicing fresh basil leaves or adding it to a smoothie is also a good option.

Here are words of caution, though:

Using medicinal basil juice for more than straight six weeks can be a bit harmful, as it can cause

  • Low blood pressure
  • Low blood sugar
  • And increased bleeding

Also Read: How Long Do Canker Sores Last?

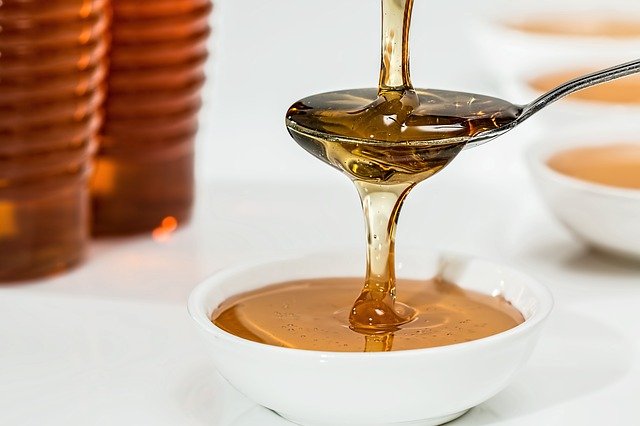
4. Is apple cider vinegar good for kidney pain?

Yes, you can use apple cider vinegar for kidney stones. ACV can flush out small-sized kidney stones. And improves other symptoms too. Let’s find out how ACV is good for kidney pain.

  • Softens and dissolves stones: ACV contains acetic acid and can break down the small-sized stones within a few weeks. In addition to breaking them down, ACV can also soften them and reduce their size to make them movable with the urine.
  • ACV cleanses your body: ACV prevents the formation of kidney stones by removing the toxins out of your body.
  • Breaks down the stone forming tissues: ACV also contains phosphoric and citric acid and can significantly break down the hard tissues responsible for forming kidney stones.
  • Improves Digestion: Alkaline properties of ACV help in the digestion process and trigger hydrochloric acid production.

In short, you can use apple cider vinegar in the initial stages of kidney stones pain. But relying on ACV in the case of large-sized stones is not recommended. Seek proper medical advice if you don’t notice any improvement. Here is how you can use apple cider vinegar for kidney pain.

  • Add two tbsp apple cider vinegar to one glass purified water.
  • Drink the mixture throughout the day.
  • Don’t consume ACV mixture more than 8-ounce.

5. Celery Juice:

Celery juice can also ease kidney stones pain and improve other symptoms of kidney stones pain by removing the toxins contributing to kidney stones’ formation.

Blend a few stalks of celery with water, and drink the juice numerous times a day.

Avoid this drink if you are using:

  • Lithium (Lithane)
  • Levothyroxine (Synthroid)
  • Medications that increase your sensitivity to the sun, like isotretinoin (Sotret)
  • Sedative medications like alprazolam (Xanax)

And you should also avoid using celery if you are having:

  • Bleeding disorder
  • A scheduled surgery
  • Low blood pressure

How can I ease kidney pain?

Kidney stone pain can be very severe and can make you feel uncomfortable very quickly. Proper diagnosis, investigations, and treatment are still very important. But if you suffer from sudden aching pain while recovering during treatment, you can ease the pain by:

  • Staying hydrated: Drinking plenty of fluids throughout the day is very important to ease the pain. Avoid taking alcohol or coffee until you overcome the infection.
  • Applying heat: When you feel pain, place a heating pad on a painful area to get quick relief.
  • Using painkillers: For severe pain, you may have to use painkillers like acetaminophen (Tylenol), Ibuprofen, etc.

How long can kidney pain last?

Depending on the stones’ size and severity, you may frequently suffer from pain if the kidney stone is more than 5 mm. However, kidney stones of 2 to 3 mm don’t cause chronic or severe pain. Frequency and duration of pain depend on various factors, including lifestyle, diet, treatment, etc.

Will kidney pain go away?

Again, the size of kidney stones matters a lot when passing out on their own. Kidney stones with smaller sizes get out faster without causing a lot of pain.

Here are approximate timelines for different sizes of kidney stones:

  • Around 80% of stones with less than 4 mm diameters are passed through urine in about one month.
  • Approx. 60% of kidney stones with a 4 to 6 mm diameter take 45 days to pass without surgery.
  • Only 20% of stones of more than 6 mm diameter can pass on their own in about one year. However, when the stones are larger than 6 mm, immediate surgical removal is the best option.

How to sleep with kidney pain?

Sleeping posture can also play a key role in easing kidney stone pain. The pain usually gets worse if you sleep in one position for so long. Sleeping in one position is not advised, especially if you suffer from recurrent kidney stones formation. Simple behavioral adjustments, including frequent sleep position changes, can reduce the severity of pain to a decent extent.

Homeopathic Treatment for Kidney Stones Pain

Some homeopathic medicines are very, very effective in reducing kidney stones pain. And can even dissolve the stones of up to 6 mm without causing any additional complication. Some prominent homeopathic medicines for kidney stones are:

  • Lycopodium: One of the most effective medicines for right-sided kidney stones. Pains usually aggravate between 4 pm to 8 pm, and there is red sedimentation in the urine.
  • Cantharis:  A very effective remedy for kidney stones pain, especially when accompanied by a constant urge to urinate.
  • Pareira Brava: One of the chief medicines for almost all types of urinary problems. Works superbly on chronic kidney stones with urine retention is characterized by great straining in thighs while urinating.
  • Berberis Vulgaris: An excellent medicine prescribed fora wide range of renal and kidney health problems. It helps improving kidney dysfunction due to chronic kidney stones and eases all other symptoms as well.

Advice: Homeopathic medicines are mighty effective in cases of kidney stones and other related problems. But you should not have them until and unless prescribed by a licensed homeopathic practitioner.

How to remove 8mm kidney stone naturally? This is the question we started this article with. And the conclusion is very clear: it is almost impossible to remove an 8mm kidney stone without proper treatment, and usually, a surgical procedure is required. We suggest you not to waste precious time in your quest to treat kidney stones at home. Small-sized stones are easily removed by the combination of some home remedies and conventional treatment.

Stay hydrated, eat healthily, do some physical activities, keep track of what you eat, avoid alcohol and smoking. Medical infrastructure around the world has developed a lot that kidney stone is no longer a very serious complication until you are very ignorant about it.

References:

https://www.healthline.com/health/kidney-health/home-remedies-for-kidney-stones#celery-juice

https://www.mayoclinic.org/diseases-conditions/kidney-stones/symptoms-causes/syc-20355755#:~:text=Kidney%20stones%20form%20when%20your,for%20kidney%20stones%20to%20form.

https://www.healthline.com/health/what-does-kidney-pain-feel-like#What-causes-kidney-pain?

https://www.maxhealthcare.in/blogs/urology/apple-cider-vinegar-effective-dissolving-kidney-stones

https://www.mayoclinic.org/diseases-conditions/kidney-infection/diagnosis-treatment/drc-20353393

https://www.medicalnewstoday.com/articles/326775#how-to-speed-up-the-process

https://www.ncbi.nlm.nih.gov/pmc/articles/PMC1174745/

How Long Do Canker Sores Last? – Different Healing Stages and Home Remedies

Also known as aphthous ulcers, canker sores are small, painful sores develop inside your mouth. They are usually oval-shaped with a red boundary and a white or yellow center. How long do canker sores last? Well, it depends on causative factors and your body’s response to different medications and remedies. But they usually last one to two weeks.

You may find eating, drinking, and talking very painful and uncomfortable, especially in the initial days. They mostly fade away in a couple of weeks, even without treatment. But some home remedies and OTC treatments can speed up the healing process.

In this article, we will discuss everything about canker sores, some causative factors, different healing stages, and some very good natural remedies. Let’s go through the content to know more.

What are the causes of canker sores?

It is hard to underline specific causes of canker sores, because one or more factors may be responsible at a time. Following are some possible causes:

  • Simple sores may develop from injury to mouth due to different reasons including tooth brushing, braces, dental work, dentures, and sports accidents.
  • Food sensitivities or allergies from certain foods like citrus fruits, junk foods, chocolates, and coffee, etc.
  • Food items with low content of vitamin B12, folate, iron, or zinc.
  • Toothpaste made with sodium lauryl sulphate.
  • Hormonal imbalances.
  • Emotional stress
  • Allergy to certain foods or bacteria
  • Smoking
  • Diseases related to gastrointestinal tracts like Crohn’s disease or Celiac disease
  • Chronic constipation
  • Autoimmune disorders like Bechet’s disease or systemic lupus erythematosus
  • Systemic conditions like nutritional deficiencies
  • Oral Cancer
  • Certain drugs, including:
  • Nonsteroidal anti-inflammatory drugs (NSAIDs)
  • Aspirin
  • Beta-blockers
  • Oral nicotine
  • Chemotherapy medicines
  • Phenytoin
  • Platelet aggregation inhibitors
  • Antibiotics
  • Antihypertensives

Also Read: Glycerin for Lips – Benefits and DIY Recipes

How Long do Canker Sores Last?

Different Stages of Healing

As we said earlier, canker sores usually heal without any treatment in a couple of weeks. There are three stages of healing:

  1. Prodromal or Beginning Stage – It is the pre-ulcer stage, i.e. period before the formation of ulcers. It usually lasts for one to three days. You may feel a prickling or burning sensation during this initial period, which leaves a raised, reddened, painful area on the mucus membrane of the cheek or lips.
  • Ulcer Stage – It is usually three to six days (may remain longer in some people). The formation of ulcers is completed, characterized by redness and excessive pain.
  • Healing Stage – The healing stage usually begins nine to ten days after the initial stage. During this stage, the healthy tissue starts working on sore, and pain starts fading away. Ulcer also starts getting smaller.

Symptoms and complications of the healing stage depend on the type of ulcer

  • Mild canker sores heal within a couple of weeks.
  • Major canker sores may remain for a few weeks and can be painful for a long time. They often create a scar on the affected area.
  • Herpetiform canker sores are rare types of sores and fade away after ten to four days without causing any scar.

Signs and Symptoms of Canker Sores

Sores may develop inside the mouth, on the tongue, the inner lining of cheeks, inside the lips, and the gums, etc. Sometimes, the soft palate right at the back of the mouth roof is also affected. Some common signs and symptoms of canker sores are:

  • Burning, prickling, and tingling sensation for about 24 hours prior to the appearance of sores.
  • White, yellow, grey ulcers with a red border.
  • Very painful, especially in the first week.
  • Difficulty eating, swallowing, and speaking.

Some less-common symptoms of canker sores (They are the indication of some possible, more serious underlying conditions)

  • Fever
  • Sluggishness
  • Weight Loss
  • Swollen Lymph Nodes
  • Thrush infection in mouth or throat

You should contact your doctor if you have some very rare symptoms of canker sores like:

  • A gradual increase in size
  • Spreading ulcers
  • Causing excessive pain
  • Difficulty in drinking
  • Accompanied by continuous fever
  • Ulcers spreading to other internal parts like the oesophagus

Home Remedies for Canker Sores

Treating mild canker sores with home remedies is very successful. And you can try a few of them, especially in the initial stage. Here are some very effective home remedies for canker sores:

1. Coconut oil for Canker Sores

Thanks to its antimicrobial properties, coconut oil can be an effective treatment for canker sores, especially if they are caused due to bacterial infection and are spreading. The anti-inflammatory properties of coconut oil can also reduce pain and redness. And, of course, it tastes very good too!

Coconut Oil
  • Generously apply a few drops of coconut oil on the sore a few times a day to feel better.

2. Honey for Canker Sores

Honey is another very good anti-inflammatory and antibacterial home remedy for various health problems. And it can also effectively reduce the pain, redness, and size of the canker sore. It is also very good at preventing possible secondary infections.

Honey
  • Use only unpasteurized, unfiltered honey. Manuka honey is the best option.
  • Apply on the sores three to four times a day until they are gone.

3. Hydrogen Peroxide for Canker Sore

Hydrogen peroxide can be surprisingly effective against canker sore and can reduce the severity within a couple of days.

  • Use only 3 percent diluted hydrogen peroxide with equal parts of water.
  • Take a cotton ball and dip into the solution.
  • Apply the solution on canker sores repeatedly throughout the day.

Using hydrogen peroxide solution for mouth rinse is also an effective way of healing canker sores.

4. Milk of Magnesia for Canker Sore

Magnesium hydroxide is the active component of milk of magnesia. It works both as a laxative and an acid neutralizer. If you use milk of magnesia orally, it will change the pH inside your mouth and will make it hard for sores to thrive.

Here is how to use:

  • Apply only a few drops of milk of magnesia on and around the sore.
  • Leave for a few seconds and wash.
  • Repeat three to four times a day to start feeling better.

5. Watermelon Frost

Watermelon frost is also a successful treatment for canker sores. You can find watermelon frost in different forms including powder, tablet, and spray. Applying it directly to the sores can elevate the healing process and can also give some relief from pain and burning.

6. Vitamin B Complex Supplement

Diet low in vitamin B-12 can be one of the causative factors for canker sores. It’s not very clear how vitamin B-12 can improve sores. But according to a study, people who were taking enough vitamin B-12 with their diets had fewer canker sore outbreaks than those who didn’t get the required amount of dietary vitamin B-12

Some other vitamin Bs can also elevate the healing process, and vitamin B complex supplement contains all eight types of vitamin Bs. So, you can also take vitamin B complex supplements to improve canker sores. However, you should ask your doctor before starting any supplement.

7. Echinacea for Canker Sores

The Wound-healing and immune-boosting prowess of echinacea makes it one of the other promising home remedies for canker sores.

To use:

  • Add one tbsp liquid echinacea to one cup of warm water and mix well.
  • Take the solution in your mouth and swish around a few times before swallowing or spitting.
  • Repeat these steps twice or thrice a day for great results.

8. Chamomile Compress for Canker Sores

Chamomile is a natural remedy for various types of wounds and pains. And can be effective in canker sores due to its antiseptic and anti-inflammatory properties. A chamomile tea bag can be used as a compressor to heal canker sores.

  • To use, take a wet chamomile bag and apply it on the canker sore.
  • Leave for a few minutes before removing.
  • Otherwise, wash your mouth with freshly-brewed chamomile tea.
  • Repeat one of these methods twice a day to feel the improvement.

9. Does putting salt on a canker sore help?

Yes! Saltwater should be the go-to remedy for canker sores. It can be a bit painful but will start improving the sores right from the word go.

To use salt water,

  • Add one tbsp salt to one cup of warm water and dissolve properly.
  • Swirl saltwater in your mouth for 20 to 30 seconds and spit out.
  • Repeat this treatment every two or three hours to start feeling comfortable again.

10. Yogurt for Canker Sores

Sometimes, Helicobacter Pylori (H. Pylori) is also responsible for canker sores developed with inflammatory bowel disease.

And according to studies from 2017, lactobacillus in yogurt can eradicate H. pylori and improve the symptoms of inflammatory bowel disease. So, if canker sores are caused due to or accompanied by IBD, adding yogurt to your diet can help.

Yogurt also works very effectively on the digestive system. Hence, it can effectively improve canker sores developed due to chronic constipation.

11. Sage for Canker Sores

Sage tea is known for its anti-inflammatory effects and maybe a good treatment for canker sores. Both drinking sage tea and using it to wash your mouth can improve a lot of oral problems. Thanks to its antiseptic and antibacterial qualities, sage can also relieve pain due to canker sores.

Sage mouthwash is easily available in most pharmacies. Although preparing sage tea from fresh leaves of teabags is the best idea.

  • Add two tbsp sage leaves or a couple of sage tea bags to one cup boiling water.
  • Steep for about five minutes and strain.
  • Keep aside to cool down.
  • Swish the tea inside your mouth for a few minutes.
  • You can swallow or spit out.

12. Zing Lozenges for Canker Sores

A weak immune system invites multiple infections and diseases, and can also be great for canker sores to thrive. And zinc mineral can boost your immunity to a decent extent. You can get zinc lozenges very easily at nearby medical stores. The lozenges contain other ingredients like echinacea to enhance the taste. And you can dissolve one lozenge easily in your mouth.

  • What is the white stuff in a canker sore?

There is no white “stuff” in or around the canker sores. The middle part of the sore becomes white, yellow, or sometimes grey due to the injury to surrounding tissues. Tissues are injured, and hence the blood supply to the injured area is deprived, and the area starts looking white, yellow, or grey.

  • Can canker sores last for months?

No, canker sores don’t last for more than two or a maximum of three weeks. If they don’t heal even after three weeks, there is probably an underlying condition like prolonged constipation, excessive bowel gas, inflammatory bowel syndrome, habitual smoking, emotional stress, etc. If you are unable to overcome canker sores for so long, you must get proper medical attention to find out the exact cause and get treatment accordingly.

  • Prevention from canker sores

Prevention of canker sores is very much possible, and you can successfully reduce the frequency with little changes like:  

  • Have a healthy and balanced diet to avoid nutritional deficiency.
  • Maintain good oral hygiene to keep infections at bay.
  • Choose healthy foods instead of oily, unhygienic, unhealthy foods.
  • Maintain emotional stress by talking to your family members, friends, or a psychologist.
  • Use orthodontic waxes if you have braces or other dental appliances.
  • Protect your mouth, especially while playing an outdoor game.

A canker sore is not a serious complication and usually subsides within a couple of weeks or three. However, if they remain for multiple weeks or months, you should understand that it’s not only about canker sore. There is something wrong with your body that is halting or disturbing the healing process. In such a case, getting proper treatment from a licensed practitioner is recommended.

Hopefully, we have assisted you with numerous effective home remedies for canker sores. We will be very pleased to hear from your side. Take care of your mouth, overall health, as well as your loved ones. A healthy and happy lifestyle is always a solution to many, many problems. Keep smiling!

References:

https://www.medicinenet.com/canker_sores/article.htm#what_natural_or_home_remedies_cure_canker_sores

https://www.medicalnewstoday.com/articles/how-long-do-canker-sores-last#treatments

https://www.mayoclinic.org/diseases-conditions/canker-sore/symptoms-causes/syc-20370615#:~:text=They%20usually%20have%20a%20white,the%20base%20of%20your%20gums.

How to get rid of oily hair fast–DIY Tips and Tricks

Starting your day with those sticky, oily hair can be the worst thing you would want! And, unfortunately, we all go through this problem quite a few times!

And we keep scratch or heads asking “how to get rid of oily hair fast!” And that’s because dealing with messy, glossy hair can turn into a nightmare, especially for working ladies!

Hey guys! If you are also one of those annoying people having oily, greasy hair for a while now, like always, we are here to help you!

Getting rid of grease from hair can surely be intimidating because no one wants to disturb the natural scalp oil that keeps your hair healthy and shiny. And using hard substances on hair is not recommended. So, what are the alternate solutions?

Before answering that, let’s try to find out why your hair gets greasy and oily?

Why does my hair get greasy after one day?

There are very different causes of oily and greasy hair, and you may have a completely different reason(s) than your family members or friends. But yes, one thing is usually common among all affected people is overactivity of sebaceous glands meaning due to some obvious reasons, your sebaceous glands start producing excessive sebum.

But yes, one thing is usually common among all affected people is overactivity of sebaceous glands meaning due to some obvious reasons, your sebaceous glands start producing excessive sebum.

Sebum is of course very good for your hair, and keeps them smooth, healthy, and shiny, and prevents them from breaking and drying out. Just like all other things, excess of sebum can have negative effects on your hair, as they get slick and greasy.

Factors like excessive dandruff and excessively oily scalp are also linked with greasy hair. Some other common causes of oily hair are:

  • Heredity problems
  • Prolonged usage of certain medications
  • Improper care of hair
  • Unhealthy diet and regimen
  • Hormonal imbalances
  • Extended periods of stress
  • Atmospheric changes

How to Treat Oily Hair Easily at Home?

1. Manage the Frequency of Washing Your Hair

According to the American Academy of Dermatology, people having excessively oily hair should apply shampoo once daily. High-quality, chemical-free shampoo can be very effective to reduce excessive oil and debris from the scalp.

And if you are already washing your hair with shampoo almost every day, you should play with washing them less frequently! Yes, over-washing can also be one of the causes of oily hair. You should maintain a balance while washing your hair. And that balance is hard to guess without trying! Some people need to wash their hair every day, and some are comfortable with washing twice or thrice a week. So, going ahead with a “try and test” formula is advised.

2. Condition the end of hair instead of the whole length

People usually condition their hair from the roots, and that’s not always the best idea. You should not apply the conditioner to the scalps and hair roots to avoid the possible buildup of the product. Always follow this simple rule – “Use conditioner on hair and shampoo on the scalp only”

Also Read: How to Get Rid of Baby Rash?

3. Shampoo and Condition Your Hair Properly

Following the formula mentioned above, be careful while shampooing or conditioning your hair. Because washing your hair wrong can also damage your hair and make them oily and greasy.

How to wash hair correctly?

Look, this is not rocket science, and one idea doesn’t necessarily suit everyone. But we can discuss a general rule here.

  • Apply a very little amount of shampoo on your scalp.
  • Massage very gently without using your nails.
  • Avoid aggressive scrubbing, as it can irritate the scalp and may cause unwanted production of oil.
  • Avoid using shampoo directly on hair ends. Instead, use a conditioner.
  • Wait for a few minutes so that shampoo itself can run through hair ends.
  • And for the goodness of your wallet, you don’t necessarily need to use a conditioner or shampoo every day!

4. Use Good Quality “Hair Products” Only

There is so much hype around a lot of hair products, but not all of them are good for your hair. You should be very selective while purchasing hair products. Check out the ingredients carefully and avoid purchasing products containing harsh chemicals. Shampoo with stronger detergents is considered a better treatment for oily hair.

However, if you have no other option but to wash your hair daily, go for a mild shampoo. Some people also consider using “baby shampoo” due to its mild and skin-friendly ingredients. And same applies to hair oil and conditioner as well! Don’t purchase cheap products with a lot of promises and hype. After all, it’s not only about hair; your skin is in question too! And it worth investing a bit in good products rather than pondering over unhealthy, sluggish, and oily hair.

5. Avoid Overbrushing Your Hair

Brushing your hair frequently can be very tempting, especially when you have sticky, greasy hair. But you should avoid this, as overbrushing, especially at roots can cause overproduction of natural scalp oil and can make your hair even more sticky.

Also, avoid using a dirty hair comb to avoid the buildup of bacteria, dust, and other unwanted substances on hair.

6. Use Aloe Vera Gel for Deep Cleaning

Aloe vera gel can also be a very good natural remedy for oily hair. And it is not only good for hair in summers! Aloe vera can give you a very good scalp mask and can remove excess oil from the scalp, fights dandruff, and soothes the scalp. In the end, you will get soft, shiny, and healthy hair.

7. Don’t Use Hair Products Containing Silicone

A lot of hair products including creams, conditioners, shampoo, and styling gels, etc. contain silicone to make hair “look” smooth and extra shiny.

Silicone products like cyclomethycaine, dimethicone, and amodimethicone, etc. are not good for your hair and can cause your hair to look dirty, oily, and weight down. Silicones are never recommended for hair due to some other obvious reasons also. They can reduce beneficial and necessary moisture from hair shafts. So, always avoid hair products made even with a few traces of silicone.

8. Lemon Juice for oily hair

The topical application of lemon juice can be beneficial for your hair. Lemon lightens your hair naturally, reduces excessive oil and dandruff, and makes them healthier and shinier.

Lemon Juice for Oily Hair

Lemon contains a natural bleach called “citric acid” and can be used very effectively with hair colors and bleaches. Citric acid also works on hair roots to eliminate dryness and dandruff. However, you should use lemon with some precautions, as there are numerous side effects of lemon on hair too.

  • Lemon can increase skin irritation.
  • May even cause contact irritation especially to sensitive people.

Some other risks associated with using lemon for hair are:

  • Burning
  • Dryness
  • Redness
  • Stinging
  • Increased dandruff

Is lemon good for hair?

Applying lemon juice on your hair is not the worst idea, but there are some risks associated with it too. If you get better results from lemon, don’t go in direct sunlight while having lemon juice on your hair. The citric acid in lemon can become more acidic in direct sunlight and can increase scalp irritation.

So, we recommend you not to go for lemon always when it comes to hair treatment. There are some more effective and gentle home remedies to get rid of oily hair.

9. Can I Wash My Hair with Just Water?

Washing hair with only water is also a decent idea. Water can effectively remove away dirt, dust, and other water-soluble debris from hair as well as scalp, and that too, without affecting the sebum.

But if you have very oily hair, don’t wash your hair with water only because water can’t completely remove the oil on its own. Choose the best and most suitable shampoo and conditioner for your hair, and use twice or thrice a week to wash your hair.

10. Dry Shampoo is Another Option

Dry shampoo can also be a nice idea if you are struggling with oily hair. Yes, the sudsy wet wash is still the best option, but it can help dry out the extra oil and can give your hair a balanced and cleaner look. Dry shampoo from a few well-known brands comes with a very light scent as well.

There is a downside too! Dry shampoo can add residue to your hair that can make the scalp dirty and gritty. It can dry out your hair more than you want. So, using it frequently is not a good idea. Use it once or max twice a month and wash your hair properly.

11. Don’t Play with Your Hair

If you frequently keep looking for answers for “how to stop hair getting greasy”, you will have to stop playing with your hair. Unwanted head-scratching, frequent touching, brushing, and playing can stimulate the oil glands, and hence can be responsible for unwanted oil on the scalp and hair. So, give them some free time without disturbing them.

12. Go for Natural Oil-Fighting Ingredients

Shampoo or oil with natural ingredients should be on your wish-list to fight greasy oil. Look for ingredients like aloe vera, tea tree oil, and seaweed extract. They have anti-inflammatory properties and can very effective to remove extra oils from your scalp and hair.

13. Try a Dandruff Shampoo if You Have Dandruff

If you are unable to control excessive hair oil, you’re very likely to develop dandruff more frequently. Because excessive oil buildup on the scalp is also associated with unwanted growth of a natural yeast known as “Malassezia”.

Although the small amount of Malassezia is good for hair growth, overproduction can cause symptoms like thick, flaky scalp, itching and tenderness, etc.

That’s why, before looking for home remedies for oily scalp and dry hair, go for dandruff shampoo instead. Because dandruff is more of a scalp issue than a hair issue, and working on the scalp is more important.

Anti-dandruff shampoo from some well-known brands contains zinc pyrithione, which doesn’t work directly on the oil but reduces dandruff by working on yeast.

Here is a tip: Once you apply the anti-dandruff shampoo on your hair, don’t wash away immediately.  Leave it for a few minutes to work on dandruff.

14. Blowing your hair is a good idea instead of waiting for air dry

Over-drying your hair is not good at all, but leaving them in the air to dry is not a smart idea as well. Blow drying is very helpful if you are working on the greasy air. Leaving your hair in the air for long can also be one of the causes of oily hair.

Blow your hair at the root to allow plumping of hair follicles to help them absorb the oil. Don’t overheat your hair while blowing. Use the lowest temperature to avoid damaging your hair due to heat. And that applies to other products like curling irons and flat irons too.

15. Don’t put oil on your scalp

Since, you are already annoyed with greasy hair, adding more oil can only increase the buildup and make your hair greasier. Don’t apply the oil directly on the scalp, and it applies to all the oils including coconut oil, jojoba oil, argan oil, and olive oil, etc.

16. Add Green Tea in Your Daily Regime

Green tea is also a very effective natural remedy for oily hair. And you can use it in both ways – internally as well as typically. Drink at least one cup of green tea every day, and also use green tea extract topically on your scalp and hair. It will nourish your hair and will also reduce the production of sebum.

Final Words:

Oily hair can be very annoying and can force you to spend a lot of time in your hair-care routine. Hopefully, you will find these DIY tips and tricks helpful to get rid of oily and greasy hair. All of them are equally effective, as well as easy to follow. We will be very happy if you can share some more tips and tricks for greasy hair. Whether you have some tips, suggestions, questions, or anything, hit the comment box.

References:

https://www.healthline.com/health/lemon-for-hair#takeaway

https://www.healthline.com/health/lemon-for-dandruff#takeaway

https://www.byrdie.com/washing-hair-with-only-water-348137#:~:text=Water%20is%20effective%20at%20washing,be%20left%20behind%20as%20well

https://www.healthline.com/health/oily-hair-remedy#22.-Wear-it-down-now-and-againhttps://www.prevention.com/health/a20428078/15-home-remedies-for-oily-hair/

How to Get Rid of Baby Rash?

Diaper rash is a very common skin condition affecting a lot of infants. And almost every parent asks “how to get rid of baby rash without much effort,” especially if they are blessed with their first child. Although it is not serious, it can surely be uncomfortable for little ones with very soft skin. And that’s why every parent, as well as a caregiver, should know, what are the easy and safe ways of getting rid of this condition.

Diaper rash is usually red, painful, and usually aggravates in moist, warm conditions, and can make skin look raw, bumpy, and even scaly. Infants with underlying skin conditions like eczema are more prone to diaper rash and can get affected quite often.

Yes, there are various creams available that can improve rashes, but like most other skin problems, you should go for some effective and safe home treatments. Here are a few tips and tricks to help your baby feel better after getting affected by the baby rash. Before jumping on the home remedies, let’s talk about some possible causes of baby rashes first.

What Are the Causes of Baby Rash?

There are various and very different causes of the baby rash, including:

  • Heat
  • Friction
  • Chemicals
  • Dampness
  • Fragrances
  • Allergies
  • Fabrics
  • Wet, low quality, or unfit diapers

Some other factors associated with diaper rash are:

  • Chafing or rubbing: Rubbing during the massage or due to tight clothes.
  • Irritation due to urine and stool: Your baby may get affected with diaper rashes in case of frequent bowel movements, diarrhea, or dysentery. Prolonged exposure to urine or stools in pants or diapers may start irritating skin and cause rashes.
  • Irritation from certain products: It is one of the major causes of rashes in newbies. Because infants’ skin is very soft and may react to diapers, wipes, detergent, fabric softener, or fabric bleach from new brands, ingredients are found in creams, lotions, oils, powders, etc. are also responsible for baby rashes.
  • Introduction to New Foods: The stool content starts changing when your baby starts eating solid foods, and the chances of baby rashes may also increase to some extent. Stools’ frequency may also change with a sudden change in type and quantity of foods and may lead to red rashes on bumps. Breastfeeding babies can also get rashes from their mothers when they eat something that doesn’t suit the baby.
  • Bacterial of Fungal Infection: Buttocks, thighs, and genitals are usually covered with diapers and are very much favorable for the growth of bacteria and fungi. And the infection due to these microorganisms usually spread to other skin regions as well. You can easily identify rashes due to infection from scattered red dots all around the diaper region. In such cases, home remedies to treat diaper rash are not very effective, and you should take your child to a licensed medical practitioner for proper treatment.
  • Overuse of Antibiotics: Yes, antibiotics are prescribed to treat a bacterial infection, but the bad part is, antibiotics also kill the bad bacteria. Antibiotics can kill the bacteria known for controlling yeast growth and may open the door for yeast infection. Antibiotics can also cause diarrhea. And breastfed babies can even get rashes from their mothers taking antibiotics.
  • Sensitive Skin: As we have learned earlier, babies have very sensitive and soft skin and can’t tolerate skin conditions like atopic dermatitis or other skin problems. Some infants are born with highly sensitive skin and can easily get rashes all around their bodies, even for some strange reasons.

Also Read: 15 Home Remedies for Rash Under Breast

Home Remedies to Treat Diaper Rash

As already said earlier, diaper rash is not a serious skin condition and can be cured easily. Following are some home remedies to treat diaper rash:

1. Change diapers frequently

Leaving your baby with wet or spoiled diapers is one of the most common causes of painless diaper rashes, and you should avoid this as much as possible. Whether you are reading this as a parent or a caretaker, change the spoiled diaper promptly to avoid symptoms from getting worse.

2. Give some open time to your baby

Keeping them packed with diapers all the time is surely not the best idea. Give your baby some healing time with no diaper or pants on. It will dry out the moisture and start healing the rashes within the first couple of days.

Also, avoid putting on synthetic, rubber, or tight pants while your kid has diaper rashes. Instead, prefer dressing them in loose, comfortable, high-quality, 100% cotton pants to make them feel happy and playful.

3. Use diaper creams and ointments

You can easily find skin-soothing creams and barrier ointments at a nearby grocery or medical stores. Creams containing zinc oxide are very effective as over counter treatment for diaper rash. Apply a thick layer of cream on rashes and leave open to allow some time to dry.

4. Avoid giving foods you are not sure about

Yes, just like you, all parents want to upgrade their kids’ eating patterns, and there is nothing wrong with it. However, you should be careful while introducing your baby to new foods. Please don’t give them acidic foods like citrus fruits or tomatoes. The acidic nature of these foods can irritate the urine or stool, affecting the surrounding skin.

Start with soft, easily-digestive foods like banana, oatmeal, fruit puddings, mashed rice, dal, etc. And always keep a check on foods to find which one is suited and which are not.

5. Clean, but don’t scrub the area

You should keep this point as prevention from diaper rash even in the future. Yes, keeping the area clean and dry is very important, but unnecessary scrub can irritate. And hence, gentle cleaning is the only option.

6. Avoid using scented detergents or soaps

It is very easy to fall for scented detergents and soaps. But you should avoid them, especially when it comes to your baby. Scented soaps, creams, bubble baths, and laundry detergents are not good for infants, even if the manufacturers advertise about them as “child-friendly.” So, use only gentle, unscented soaps, creams, and detergents from a well-known brand to keep your baby’s skin soft, supple, and healthy.

baby diaper rash

7. Are baths good for diaper rash?

Yes, certain baths are very good for diaper rash. You can try an oatmeal bath to improve the condition. Colloidal oatmeal is very effective in reducing inflammation and irritation especially caused due to atopic dermatitis. You can find the oatmeal bath treatment easily at nearby drug stores as well as online. Follow the directions on the package to give your infants a healthy and soothing bath.

8. Say “No” to Baby Wipes:

Keeping the diaper area clean and dry is important, but you can do it without using baby wipes too.

Avoid using baby wipes if your baby is having diaper rashes, as wipes can increase the irritation. We advise you to use only gentle, scent-free soap and water to wash and pat dry with a soft, cotton cloth.

If you have no other option but to use wipes, choose only unscented, natural wipes, which are a bit costly but are good for babies’ skin

9. Choose only high-quality, fit diapers

Loose or bad quality diapers are also one of the causes of diaper rashes. Choose the diapers very carefully. Diapers should neither be too tight or too loose. Check the size properly according to age and get larger sizes as your baby grows.

10. Switch to different diaper or laundry detergent brands

If you notice the frequent appearance of rashes, it means your baby is sensitive to a certain product. For example, diapers or wipes from a particular brand can trigger irritation. If you use cloth diapers, try to change the detergent brand to see if your baby is allergic to a specific detergent.

Your aim should be to eliminate the harmful chemicals from baby care as much as you can.

11. Apple Cider Vinegar

Using apple cider vinegar for diaper rash is also a very good idea, especially if rashes develop due to fungal or yeast infection. Diluted apple cider vinegar can kill the infection-causing bacteria and improves the condition pretty quickly. Add one tbsp diluted ACV to a cup of water and wash your baby’s bottom every time while changing the diaper.

12. Apply Olive Oil

Olive oil is very famous for its anti-bacterial and anti-inflammatory properties and can be very handy to eliminate almost all kinds of rashes. You should use olive oil for massaging your baby even if there are no rashes. Olive oil is very healthy and keeps your baby’s skin soft, supple, and radiant. Also, olive oil is pretty good to induce calming, peaceful sleep, which is very important for your baby.

13. Massage with Coconut Oil

If olive oil is not available, virgin coconut oil is a great alternative. And it is very easily available too! Coconut oil is very hydrating and also protects your baby’s skin from irritation and rashes. Studies also suggest that coconut oil is very good against fungal infections and can be a pretty effective treatment for rashes due to yeast infection. 

14. Is Vaseline good for diaper rash?

Yes, like other skin conditions, Vaseline can be very good for diaper rashes as well, especially if rashes are developed due to excessive dryness. Vaseline locks the skin’s moisture and doesn’t only treat the condition but prevents further chafed skin from diaper rashes.

Vaseline works on the skin by restoring the softness and forming a protective layer to reduce moisture and prevent fungal and bacterial infection. So, if you ask, “can I use petroleum jelly on my baby?” our answer is, “Yes, you surely can.”

15. Chamomile Tea and Honey

Both honey and chamomile tea are known for their antiseptic effects and can heal diaper rashes within a few days. Add one tbsp honey to two cups of chamomile tea and spray all over the rashes without massaging.

How to Prevent Diaper Rashes?

As they say, “prevention is better than cure” would be great if you can already eliminate the chances of developing diaper rashes or preventing recurrence. Here are some preventive measures you can try to reduce the likelihood of diaper rashes.

  • Wash your baby’s bottom with warm water each time you change the diaper: Using a bottle, tub, or sink is advisable to make it easier for both you and your baby. You can also use moist washcloths, natural baby wipes, and cotton balls to make the cleaning process easy.
  • Use only a soft, cotton towel to dry the area: Hard, low-quality clothes or wipes are also among the common causes of diaper rash. Avoid scrubbing the bottom area while drying with a soft, cotton towel.
  • Don’t keep your baby “packed” all the time: Diapers are more for the convenience of parents and caretakers than anything. They surely are not very healthy for kids. Whenever it is possible, give your baby some diaper-free time. Expose the skin to natural air to eliminate the chances of unwanted moisture around the bottom area.
  • Don’t forget to wash your hands frequently: What if you are causing infection to your baby? Weird? Yes, it’s also possible that you are accidentally causing infection to your kiddo without even knowing. Unhygienic or improperly washed hands can work as transporters for bacteria and fungi and cause diaper rashes. So, always wash your hands properly before as well as after changing the diapers.

So, hopefully, you have got a lot of answers to your question, “how to get rid of the baby rash.”In addition, we have also helped you with some prevention tips. Take some extra care of your kid when it comes to maintaining hygiene, especially around that sensitive bottom area. Follow any of the tips mentioned above to get help your baby overcome the condition. If the rashes don’t fade away after a week or so, you should get in touch with a medical practitioner to find possible allergy or other skin condition causing rashes around the bottom.

Apple Cider Vinegar for Sore Throat

Sore throat is a very common but extremely annoying condition. It can make your day worse if it is accompanied by inflammation and pain. Factors like a draught of cold air, environmental changes, cold foods and drinks, and certain infections etc. can cause soreness of throat. Some people find apple cider vinegar for sore throat very helpful. Is it?

That’s what we are trying to discuss in this article. Despite the insufficient scientific proofs, ACV does have good anecdotal evidence of being handy against sore throat. It can improve the condition, especially if caused by a bacterial infection.

You can use diluted ACV alone or with water to improve sore throat. But there are some other effective remedies you can use with ACV to get a more potent response. Before jumping on those ACV recipes for sore throat, let’s talk about some of its possible causes and why ACV can help you to get over this annoying condition.

What are the Causes of a Sore Throat?

There is a wide range of sore throat causes, including:

Bacterial Infection:

Infection from the Streptococcus bacteria is very common and can be characterized by sore throat among other common conditions.

Viral Infections:

  • Common Cold
  • Chickenpox
  • Influenza
  • Coronavirus Disease 2019 (COVID-19)
  • Croup
  • Measles

Some other possible causes of sore throat:

  • Dryness in the air: Prolonged dryness in the air can make your throat scratchy and rough.
  • Nasal Congestion: Chronic nasal congestion is also a common cause, and forces you to breath more from your mouth than nasal passage.
  • Allergies: Allergies to dust, pollens, dander, and moulds can also cause soreness of throat. Sore throat due to allergy is usually accompanied by irritation and inflammation of throat along with postnasal drip.
  • Irritants: Outdoor and indoor pollutants like smoke, cigarette, chemicals etc. can also be responsible for chronic soreness of throat. Irritation is sometimes induced by tobacco chewing, consumption of alcohol and eating very spicy foods etc.
  • Muscle Strain: People who work at announcement desks, call centres etc. are prone to strain to the throat muscles due to continuous and loud talking or yelling.
  • Gastroesophageal reflux disease (GERD): It is a disorder of digestive system characterized by backing up of stomach acids to the oesophagus. It can cause sudden irritation to throat muscles and can be one of the rare causes of sore throat. GERD is usually accompanied by other symptoms like heartburn, regurgitation of stomach contents, hoarseness and sensation of a lump in the throat etc.
  • HIV Infection: A sore throat, especially when accompanied by other flu symptoms, can be an early sign of HIV infection.

Chronic and recurring sore throat is a common phenomenon in HIV-positive people, because people with HIV infection have compromised immune system, and can easily get affected by even minor infections.

  • Tumours: Cancerous tumours of larynx or throat can also cause sore throat. Other signs of cancerous growth are difficulty swallowing, lump in the neck, pain while speaking of eating, painful and noisy breathing and bloody phlegm etc.

Also Read: Apple Cider Vinegar for Toenail Fungus

Why Apple Cider Vinegar is a Good Option?

Despite a lack of scientific data for apple cider vinegar for sore throat, various studies suggest that ACV can improve the condition, especially if caused by bacterial or viral infections. ACV produces a slightly acidic environment in your body and makes the survival difficult for most types of bacteria and viruses, and can be a natural treatment for sore throat. Here are some proven benefits of using ACV for sore throat.

  • ACV is acidic in nature and can stop the growth of bacteria and viruses by balancing the pH level of throat tissues.
  • Thanks to its antibacterial properties, ACV can fight against certain bacteria and germs.
  • ACV is a very good natural expectorant and can thin the phlegm in your throat and nasal passage, and help you feel better.
  • Prebiotic content of ACV, known as inulin, can improve your immunity and can help your body stronger to fight against infections.
How to Use Apple Cider Vinegar for Sore Throat?

1. Diluted Apple Cider Vinegar

Thanks to the antibacterial and acidic properties, diluted apple cider vinegar for sore throat can be very helpful in healing sore throat even without other home ingredients

What do You need?

  • One tbsp diluted apple cider vinegar
  • One warm glass water

Steps to Follow

  • Add ACV to water and mix for a few seconds
  • Gargle with the solution several times a day to feel better.

2. Apple Cider Vinegar with Saltwater

Salt (sodium chloride) is also known for its strong antimicrobial properties and can increase the effectiveness of ACV to fight with a sore throat.

What do you need?

  • One tbsp apple cider vinegar
  • One tbsp salt
  • One warm glass water

Steps to follow:

  • Add ACV and salt to the water and mix well.
  • Use the solution to gargle multiple times daily to cure sore throat fast.

3. Apple Cider Vinegar and Lemon

Hot water and lemon can be one answer to many health problems, including viral infections. Lemon is one of the greatest sources of vitamins B complex and C, iron, magnesium, calcium and potassium. Regular use of lemon juice can also strengthen your immune system and can keep viral infections at bay. And lemon with apple cider vinegar can eliminate soreness of throat within a few days.

What do You need?

  • One tbsp of apple cider vinegar
  • One tbsp of lemon juice
  • One warm glass water
  • Honey (Optional)

Steps to Follow:

  • Add apple cider vinegar and lemon to warm water and sip very slowly.
  • You can add one tbsp honey as a taste enhancer as well.

4. Apple Cider Vinegar with Baking Soda

Baking soda is getting very popular as a second-line of treatment for numerous infections and can be a great home remedy for sore throat, especially if used with ACV. Also known as sodium bicarbonate, baking soda works as a ubiquitous buffer in your body and reduces the pH gradient across the membranes of bacteria, and hence, controls the infection.

You Will Need:

  • One tbsp of apple cider vinegar
  • One tbsp of baking soda
  • One glass warm water

What You Have to Do?

  • Add both ingredients in water, mix well, and use for a gargle in the morning.
  • Repeat it every day for a week to see the difference.

5. Apple Cider Vinegar and Honey

Thanks to its amazing antibacterial properties, honey is known as a very potent healer, and can be the answer if you are asking “how to get a sore throat fast overnight”. Yes, that’s how quick honey can work, especially when used with ACV.

ACV is packed with expectorant properties, and on the other hand, the anti-inflammatory nature of honey can provide very quick relief from a sore throat.

Ingredients You Need:

  • Two tbsp apple cider vinegar
  • Two tbsp honey
  • One glass warm water

What you should do:

  • Add ACV and honey to water and mix well.
  • Drink the solution once daily to improve your throat condition.

6. Apple Cider Vinegar and Cinnamon

Cinnamon is commonly used for soreness and infection of the throat. It is packed with anti-inflammatory and antimicrobial properties and can speed up the recovery from sore throat if used with apple cider vinegar.

You Will Need:

  • One tbsp apple cider vinegar
  • One tbsp cinnamon powder
  • One tbsp honey
  • One tbsp lemon juice
  • One cup of warm water

What You Should Do:

  • Add all ingredients to one glass warm water and mix well.
  • Drink the solution slowly or gargle with it.
  • Repeat this thrice a day to cure sore throat fast.

7. Apple Cider Vinegar and Cayenne Pepper

Cayenne pepper contains capsaicin as the active component and can be very effective, especially against the inflammation of the throat. On the other hand, ACV can break down the irritating phlegm and also decongest your nasal passage.

Ingredients You Need:

  • One tbsp apple cider vinegar
  • One tbsp cayenne pepper
  • Three tbsp of honey
  • One glass warm water

Steps You Need to Follow

  • Mix these ingredients in a glass of warm water.
  • Gargle with this solution three to four times a day to get relief from soreness.
  • You can also take small sips in between to get even better results.

Apple cider vinegar for sore throat is, without a doubt very effective, and you can fight seasonal throat infection with diluted ACV mixed with one of these remedies packed with anti-inflammatory and healing properties. In case, if you have a sore throat for a long time, you should not rely on these home remedies and get proper treatment from a licensed practitioner. If you have anything to suggest, or anything to share with us, you can reach to us through the comment section. We will be very happy to reply.

References:

https://www.healthline.com/health/apple-cider-vinegar-for-a-sore-throat#remedies-and-uses

https://www.mayoclinic.org/diseases-conditions/sore-throat/symptoms-causes/syc-20351635

The Surprising Benefits of Hot Water and Lemon

https://cen.acs.org/articles/96/web/2018/01/baking-soda-help-boost-killing.html

https://www.ncbi.nlm.nih.gov/pmc/articles/PMC3609166/#:~:text=The%20healing%20property%20of%20honey,relevant%20to%20wound%20repair%20too.

https://www.verywellhealth.com/can-cinnamon-and-honey-cure-the-common-cold-770395

Apple Cider Vinegar for Toenail Fungus

Is toenail fungus harmful? What are the different treatments for it? Is apple cider vinegar for toenail fungus a good idea? What are different ways of using ACV for toenail fungus? Let’s try to answer all these questions.

Fungal infection is one of the most common problems affecting toenails, and sometimes, fingernails as well. Factors like moist, warm and dark environments, improper hygiene etc. are usually responsible for the infection of toenails. The nails start looking extra white or yellow with irregular patches all around. It is not a serious problem, but if left untreated, can cause various problems like discolouration of surrounding skin, pain, toenail edges, and even crumbling of nails.

You can treat toenail fungus in a lot of different ways. Still, apple cider vinegar can be a very potent remedy, especially if used with some other natural remedies with powerful bleaching properties.

In this guide, we will tell you everything about the fungal infection of toenails, what are the causes, and how you can use different natural remedies for toenail fungus in different effective ways.

What are the causes of toenail fungus?

A wide range of fungal organisms or fungi can cause toenail fungal infection. But dermatophyte is responsible for most of the cases along with yeast and moulds being other secondary causes of infection.

Irrespective of what causes toenail fungus, older people are more affected than the adults because their nails get brittle and dry with time. Fungi get entry underneath the nails through breaks and pores and cause the infection. Some other responsible factors are disturbed blood circulation due to thrombosis and weakened immune system.

Foot fungus or athlete’s foot usually paves the way for infection, and it can affect multiple nails within a few weeks. It very rarely transmits from one person to another.

You Are at Risk of Developing if:

  • You are older and have been exposed to fungi for so many years
  • Sweat heavily and frequently
  • History of athlete’s foot
  • Skin conditions like injury, eczema and psoriasis etc. are left untreated
  • You walk barefoot usually in damp areas, gyms, washrooms, and swimming pools etc.
  • Have diabetes, weakened immune system, and blood circulation problems for so long.

Also Read: Is Apple Cider Vinegar Really Good Against Shingles?

Complications of Toenail Fungus:

Toenail fungus very rarely gets severe, especially if left untreated. And complications of toenail fungus can be permanent damage to affected nails, painful toes and fingers, discomfort while walking, and very brittle and soft nails etc.

How can Apple Cider Vinegar be effective against toenail fungus?
  • Fungi usually thrive in an alkaline environment. Being acidic in nature, ACV can increase the pH of skin surrounding your nails and can effectively kill the fungi.
  • Thanks to the anti-inflammatory properties, ACV can also improve pain and inflammation caused by infection.
  • Anti-bacterial prowess of apple cider vinegar can kill bacteria, germs, and other infection-causing micro-organisms.
  • ACV can also prevent the further development of infection.

How to Use Apple Cider Vinegar for Toenail Fungus?

Using diluted apple cider vinegar for toenail fungus can be as effective as it gets. But you can get even better results by combining ACV with different home remedies. Here are some DIY ACV recipes to get rid of the infection of toenails.

Toenail Fungus

1. ACV with Water

  • Add equal parts of diluted ACV to water
  • Take water in a wide pot and soak your feet in the solution for about half an hour
  • Remove your feet and pat dry with a towel or a soft cloth
  • Repeat this method every day for three to four weeks and notice the difference

2. ACV and Cotton Swab

  • Dip a cotton swab into one tbsp diluted ACV
  • Apply the swab onto the infected nails
  • Leave for a few minutes to dry out
  • Repeat these steps a couple of times a day for a few weeks

3. ACV with Baking Soda

Using apple cider vinegar and baking soda for toenail fungus is another smart idea. Thanks to its fungistatic properties, baking soda can gel very well with ACV to get rid of fungal nail infection

  • Add one cup ACV and one tbsp baking soda to one cup of water
  • Mix well and soak your nails for about fifteen minutes.
  • Take your foot out and pat dry with a soft cloth.

Alternatively,

  • Make a fine paste by mixing diluted ACV with baking soda
  • Apply the paste on infected nails to cover them completely.
  • Leave for about twenty minutes before washing with freshwater and pat dry.
  • Repeat the process twice every day to get back your shiny, pinkish, healthy nails.

4. Apple Cider Vinegar and Manuka Honey

Manuka honey is also one of the most effective home remedies to treat nail fungus. Various researches suggest that honey can kill fungus and other infection-causing bacteria. Being a natural antiseptic and high in hydrogen peroxide, honey can effectively get rid of toenail fungus.

  • Add one tbsp manuka honey totwo tbsp diluted apple cider vinegar
  • Mix well, and add one glass of warm water, and mix again
  • Drink this mixture to effectively attack fungi from inside

5. The mixture of ACV, Lemon Juice and Listerine

In addition to strong detoxifying properties, lemon is also known for powerful anti-fungal prowess too. Lemon can stimulate the action of fungi and can be even more effective if used with apple cider vinegar for toenail fungus. On the other hand, Listerine is a very potent antiseptic and can easily kill bacteria, germs as well as fungus.

  • Add one tbsp each of diluted ACV, lemon juice and Listerine, and mix properly.
  • Soak your toes in the water for about half an hour.
  • Remove your feet and gently scrub to remove the leftovers.
  • Pat your feet dry completely with a towel.
  • Repeat these steps twice a day for three to four weeks to get the desired results.

6. Apple Cider Vinegar and Epsom Salt:

Epsom salt is another one of the most effective home remedies to treat nail fungus. It has been used to treat fungal infections and wounds for a long time now. It is used specially to draw out the infection and make it easier for antibiotics and other infection medications to work on infections. Epsom salt can make the environment difficult for fungal growth by drawing out the moisture. You can increase its effectiveness by using it with apple cider vinegar. Here is how:

  • Add 1/3 cup of apple cider vinegar to 1/3 cup of Epsom salt and 2 cups of hot water.
  • Stir the mixture well and wait for a few minutes until water is at a comfortable temperature.
  • Soak your nails in the water for about half an hour.
  • Repeat these steps two times a day continuously for a few days.

7. Apple Cider Vinegar with Hydrogen Peroxide and Borax

What is the most effective treatment for toenail fungus?

If you are looking for the most potent way of treating toenail fungus, this mixture can be the answer for you. Hydrogen peroxide is very good at killing fungus on your foot surface, and can even kill other infection-causing bacteria.

On the other hand, borax or boric acid is a capable remedy, especially for yeast infections of the feet. You can even try borax as a second-line treatment when other medicines don’t work. If you are annoyed with recurrence of infection from Candida fungi, you should give a try to borax at least once.

In short, using ACV with hydrogen peroxide and borax is surely a compelling way of treating toenail fungus.

Ingredients

  • Two tbsp borax
  • Equal parts of diluted ACV and water
  • A little amount of 3% diluted hydrogen peroxide

Directions

  • Dissolve borax into hot water for a couple of minutes.
  • Add a little more water along with ACV and mix again.
  • Add hydrogen peroxide and keep stirring the mixture.
  • Now, soak your toenails for about 45 minutes.
  • Repeat these steps every day until you get rid of the infection.

Some Prevention Tips

Prevention of toenail fungus is quite possible as well as easy. Here is how you can adopt some habits to prevent toenail fungus

  • Don’t forget to wash your hands and feet regularly.
  • Keep them moisturized by applying a good quality moisturizer.
  • Try wearing sweat-absorbing socks.
  • Wear shoes made with breathable material.
  • Don’t go in water or damp areas without footwear.

Toenail infection is more of a lifestyle problem than anything. And if you had the question “can apple cider vinegar heal toenail fungus?”, hopefully, you have now got the answer. Yes, ACV does help in treating the infection and can be even more potent if used with some other natural disinfectants. Use ACV according to your ease and choice and get rid of this infection within a few weeks. If you have anything to ask or suggest, don’t forget to hit the comment section. We will catch up with you pretty soon.

References:

https://www.healthline.com/health/food-nutrition/top-raw-honey-benefits#:~:text=Research%20has%20shown%20that%20raw,for%20these%20kinds%20of%20infections.

https://www.healthcentral.com/slideshow/10-foods-combat-candida

https://www.healthline.com/health/home-remedies-for-athletes-foot#otc

https://www.medicalnewstoday.com/articles/325518#:~:text=Boric%20acid%20is%20an%20effective,is%20available%20as%20vaginal%20suppositories.

Neck Pain – Possible Causesand How to Relieve at Home

You are trying to leave your bed in the morning, but finding it so difficult due to a stiffed and painful neck! Or all of a sudden, you are unable to rotate your head around due to aching neck pain! And you are looking for answers to “how to relieve neck pain”!

It is a very common lifestyle problem and can affect almost everyone on every other day. Factors like sitting with the wrong posture, wrong exercise, strain at physical work, wrong sleeping position – all can play their part in making your neck stiffed and painful.

Vertebrae extending from your skull to upper torso complete the structure of your neck, and there are cervical disks to absorb external shock between the bones. The bones, muscles, and ligaments of your neck provide support to your head and ensure proper motion. Any inflammation, abnormalities, or injury can impact your neck and make your day very uncomfortable.

Neck pain due to lifestyle errors is not something serious, but it can be if caused by contact sports, injury from fall, or whiplash, and needs proper treatment. Let’s find out more about neck pain.

Possible Causes of Neck Pain

There are various causes of neck pain, including:

  • Poor sitting posture
  • Sitting on working chair for very long without changing position
  • Wrong movement of neck during exercise
  • Sleeping in the wrong position
  • Injury

Your neck is almost always vulnerable to injury, especially if you are frequently involved in sports and other physical activities. Extra pressure on the neck while running, sudden wrong movement of the neck in the gym, or a car accident can severely affect your neck muscles and ligaments. In short, you may feel neck pain due to injury when your muscles and ligaments are forced to do the unwanted and unnatural movement.

  • Fracture of neck bones due to a massive accident can be extremely dangerous and is usually coupled with serious damage to the spinal cord.
  • Heart Attack

Prolonged neck pain can be one of the rare signals of possible heart attack, but it usually noticed with some other symptoms, including:

  • Arm or jaw pain
  • Shortness of breath
  • Sweating
  • Nausea
  • Vomiting

If you suffer from neck pain with these symptoms, you should seek immediate medical attention to at least discount the possibility of something really serious.

Also Read: How to Relieve Shoulder Blade Pain

  • Meningitis

Meningitis is the inflammation of your meninges – the protective tissues around your brain and spinal cord. People with meningitis may have complications like throbbing headache, often with severe neck pain.

Some other causes of neck pain are:

Pressure on the spinal cord due to conditions like spinal stenosis.

  • Protrusion of the cervical disk due to injury or trauma.
  • Degeneration of cervical disks also called “spondylosis”.
  • Muscle pain all over the body in case of fibromyalgia.
  • Inflamed and painful joints due to rheumatoid arthritis.
  • The weakness of bones in case of prolonged and untreated osteoporosis.
  • Congenital abnormalities
  • Spinal cancer
  • Abscesses due to severe infections

When to See a Doctor?

The symptoms of neck pain, including the painful movement of neck and shoulder, headache, muscle spasm, etc. are improved gradually with rest and other home treatments. But you should seek medical help in case of:

  • The pain is severe
  • Accompanied continuously be numbness, headache, weakness, or tingling
  • Lump around the neck
  • Nausea and vomiting
  • Difficulty breathing
  • Fever
  • Sudden and severe neck pain without an apparent cause
  • Pain doesn’t improve for a few days
  • Pain radiating to the arms or legs
  • Difficulty while touching the chin to chest
  • Dysfunction of bladder or bowel

If you suffer from an accident or fall, you must get proper medical help as quickly as possible

What are the treatments?

Treatment of neck pain depends on the cause and severity. Your doctor may ask for certain investigations, including X-rays, MRI, and CT scans, also, to complete medical history to find the exact cause(s) of pain. Depending on the results of medical history and investigations, you may get different types of treatments, including:

  • Physical therapy like exercises and stretching
  • Cold and heat therapy
  • Pain medications
  • Muscle relaxants
  • Neck Color (especially in case of an injury)
  • Corticosteroid injections
  • Traction
  • Antibiotics in case if the pain is due to an infection
  • Hospital treatment if the pain is due to heart attack or meningitis
  • Surgery.

Alternative therapies like:

  • Massage
  • Acupuncture
  • Chiropractic treatment
  • Transcutaneous electric nerve stimulation (TENS)
How to Improve Neck Pain at Home – Home Remedies for Neck Pain

Reaching out for painkillers is always not the best idea, as you can treat mild to moderate neck pain with very simple remedies and techniques. Here are some very effective and easy home remedies for neck pain.

  • Massage: Massage has been effective in improving muscular pains and stiffness. And having a calming and relaxing massage is always a better option than painkilling drugs. And if you can add a few drops of essential oil to your regular massage oil, you can get rid of neck pain without much fuss. Massage warms up the stiff muscles, improves the blood circulation around the painful area, and reduces the pain within a few minutes.
  • Getting help from your buddy or partner is the best idea. Otherwise, you can also book a physical therapy session with a physiotherapist or spa expert.
  • Ice Packs: Ice packs are also very effective in healing mild to moderate pain. All you need to do is to crush a few pieces of ice and wrap them in a rubber bag. Put a clean towel or any other cloth on the painful area and apply the ice packs gently. You will feel the effects within a few minutes, and the pain will start fading away. Ice pack treatment is especially helpful when you have a painful neck due to sudden stress while playing or exercising.
  • Heat Pads: You can find heat pads very easily at pharmacies or departmental stores. Apply the hot pads directly on the painful neck, and your pain will start fading away within the first couple of minutes. Heat pads work similarly to massage and reduce inflammation and pain by improving blood circulation. Just take care of the right brand and choose the appropriate pad.
  • Exercise: Exercise can be one of the reasons for your painful neck. But it can also be effective to manage the pain very effectively as well. Some movements are proved very helpful in reducing neck pain. You can try moving your stiffed or painful neck in a circular motion or move it forwards and backward very slowly. If you feel comfortable, start with 8-10 slow motions in different directions. If the pain increases with a few movements, stop it immediately to prevent further damage to your neck. You can get in touch with a professional physiotherapist to ask for some effective neck exercises. Otherwise, talk to a doctor for proper treatment of neck pain. 
  • Warm Shower: Warm water shower is an ideal treatment for almost all types of body pains. And can be amazingly effective in case of neck pain as well. Have a warm water shower for five to ten minutes. The warm water will improve blood circulation and will help you feel better. And having a warm water shower in the morning is always a very good idea to have an energetic day and as well as restful sleep.
  • Epsom Salts: Sprinkling some Epsom salts to your bathwater is another very good idea to manage neck pain. It is surely a treat to bath with Epsom salt in water. Thanks to its magnesium and sulfate contents, Epsom salt reduces muscular tension and rest. Also, they can improve the regulation of certain enzymes in your body and give you natural relief from neck pain.

How to relieve neck pain from sleeping wrong?

Neck pain from sleeping wrong is a common problem, and you can get rid of it by some over-the-counter medications like ibuprofen and naproxen. Self-massage and gentle stretching are also very effective to improve pain when it is in the initial stage. Start with very little, gentle stretching and increase with the flexibility and improvement in pain. If you are unable to move your neck due to excessive pain, you should book an appointment with your doctor.

What is the best position to sleep with neck pain?

Sometimes, pain can remain for a weak or two, and that’s not something to be worried about. However, little things can make a lot of difference, and one of them is your sleeping position for neck pain. Sleeping in an upright position is very effective in both back and neck pain. You can buy a horseshoe-shaped pillow for comfortable support for your neck.

Neck pain is very common, and you should go into the overthinking mode, especially in the initial days. Try these DIY remedies and techniques to get rid of the pain. And if you don’t find any relief at all even after a few days, we recommend you talk to your doctor to find the exact cause and proceed with the treatment accordingly.

References:

https://www.mayoclinic.org/diseases-conditions/neck-pain/symptoms-causes/syc-20375581

https://www.spineuniverse.com/conditions/neck-pain/home-treatments-neck-pain

https://www.healthline.com/symptom/neck-pain#home-remedies

https://edisonspinecenter.com/sleeping-positions-for-back-and-neck-pain/#:~:text=Best%20Sleeping%20Positions%20for%20Neck,pillow%20to%20cushion%20your%20head.

https://www.spine-health.com/conditions/neck-pain/how-treat-stiff-neck-after-sleeping

How to Relieve Shoulder Blade Pain

How to relieve shoulder blade pain easily at home? How and when it gets serious? What are the possible causes? Let’s find the answers to these questions and a few more.

Also known as “interscapular pain,” pain between shoulder blades is very common. You may have aching, sore, dull, and shooting pain at the mid-back of your shoulder blades.

Usually, there is nothing serious about it, and it gets better in a few days. However, it can also be a sign of some more serious health conditions. Although it is not serious, it can surely disturb the quality of your life. Read on to find everything about shoulder blade pain.

What are the possible causes?

There may be various possible causes of shoulder blade pain. An injured muscle or tendon usually causes the pain, and the injury may cause due to:

  • Wrong exercise
  • Heavy lifting
  • Poor sitting position
  • Prolonged hours of working at computers
  • Muscle strain while sleeping.

Injuries to other different body parts like spine fracture, rotator cuff tears, or any type of injury due to trauma can also be responsible for pain at shoulder blades. Some other but rare causes of pain are:

  • Osteoarthritis of ribs, spine, neck
  • Spinal stenosis
  • Acid reflux
  • Fibromyalgia
  • Scoliosis
  • Shingles
  • Myofascial pain syndrome
  • Nerve compression
  • Certain cancers like lymphomas, lung cancer, liver cancer, bone cancer, mesothelioma, oesophageal cancer, etc.
  • Gallstone

Shoulder blade pain can also be one of the heart attack symptoms, especially in women’s cases. It may be accompanied by other signs like shortness of breath and chest pain. If you suffer from these three symptoms at a time, you should not waste any time and seek immediate medical attention.

At times, sharp, severe pain in the upper-middle back is also a sign of rupture to the thoracic aorta. In such a case, the patient may suffer from severe pain and is more often than not a medical emergency.

Pulmonary embolism is another very serious condition and can be a factor responsible for shoulder blade pain. People with pulmonary embolism may complain about a sudden, sharp pain at the shoulder blade. It happens when the blood clots in the legs are breaking down and travel to the lungs. One of the major symptoms of pulmonary embolism is shortness of breath, and it also needs immediate medical attention.

When should you see a doctor?

When you suffer from severe, unusual pain for more than a couple of weeks, you should get in touch with a qualified medical practitioner. Persistent pain can be a sign of something wrong you are unable to find. Whether or not your condition is serious, if it doesn’t go away after a couple of weeks. So, it’s better to get medical attention instead of waiting for something serious.

If you develop shoulder blade pain along with some other symptoms, chances are of something really serious. It may even become life-threatening and require prompt medical attention. You should get immediate medical attention if the pain is accompanied by:

  • Shortness of breath
  • Excessive sweating
  • Chest pain
  • Cough with blood
  • Light-headedness or vertigo
  • Pain, redness, or swelling in the legs
  • Loss of vision
  • High fever
  • Sudden difficulty speaking
  • Rapid or irregular heartbeat
  • Loss of consciousness
  • Paralysis of any part of the body

Treatment for shoulder blade pain will be decided according to the exact cause and severity. And recovery time will also depend on the condition and causative factor(s).

Home remedies

The condition can be managed with home remedies if there is no other major complication. Here are some home remedies for shoulder and neck pain; you can try to get some relief.

Exercise

Physical exercise is very important to follow a healthy life. But it can also be effective to strengthen your shoulder and back and may relieve acute pain. We recommend a few exercises like pullups, push-ups, and sit-ups, to improve pain initially.

Stretching

Stretching techniques like Yoga can also effectively improve pain by managing blood circulation through better mobility.

Also Read: Is Apple Cider Vinegar Really Good Against Shingles?

You can try this stretching exercise for shoulder blade pain.

  • Cross one arm over the body.
  • Pull your elbow using the other hand towards your chest, and hold for about 10 seconds.

Diet and Regimen

Some foods can increase the inflammation and hence pain. You should avoid processed foods and add a lot of fruits and vegetables to your diet. Foods rich in omega-3 fatty acids, like salmon, are also helpful in improving the condition.

Rest

Sometimes, rest is more than enough to recover from shoulder blade pain, especially if developed due to injury or exercise.

Cold or Hot Therapy

Cold or hot compresses in the affected areas can also be a solution. Repeat cold or hot compress every two hours for fifteen minutes to relieve discomfort

Massage

A professional therapist can help you overcome the pain by working between your shoulder blades to relax the stiffed muscles.

Occupational Therapy

Occupational therapy is effective in case of pain due to a compressed or injured nerve. The therapist will help you to perform certain physical exercises targeting the affected muscles and tissues.

Epsom Salt Bath

Epsom salt contains magnesium and, thanks to its anti-inflammatory properties, it can give some relief to your shoulder blades.

How to get Epsom salt bath:

  • Add one cup of Epsom salt to your bathwater and dissolve for a couple of minutes.
  • Soak yourself in the bath for 15-20 minutes to feel the calming and pain-relieving effects of Epsom.

Kinesiology Tape

Using kinesiology tapes to relieve shoulder blade pain is also a great ideal. It is used to control the movements of the scapular region to avoid shoulder pain. The function of this medicated tape is to support the injured shoulder during movement. It is also great short-term pain management but is recommended for acute pains only.

What You Need

  • A kinesiology tape from a renowned brand

Steps to use the tape

  • Put the tape across the muscles of your shoulder griddle (You can get help from someone for proper placement).
  • Watching a tutorial or seeking help from a therapist isn’t a bad idea, either.
  • Keep it for four to five days or until you feel better.
  • You can also reuse the tape for a few months.

OTC Medications

Over the counter medications for shoulder blade pain can also be effective, especially there are mild symptoms. OTC medications like aspirin, ibuprofen, naproxen, acetaminophen, etc. may improve the condition.

When you need surgery?

Surgery is very rarely recommended for this condition. As many as 90 percent of patients get better by nonsurgical treatment like exercises, medications, rest, etc. But your doctor may advise for in case if the condition is caused by an injury and is not improving after prolonged treatment. The doctor may remove minor scar tissues or repair tendons in the affected area.

Chances of Prognosis

Prognosis is very good in the case of shoulder blade pain. However, if there is severe chronic pain, the prognosis also depends on the duration and severity of pain.

More often than not, it is a temporary condition and goes away with a combination of treatment and rest. However, some people may live the whole of their life with the pain!

Some Prevention Tips

Instead of knowing how to help shoulder blade pain, you are better if you know how to prevent this condition. Here are some prevention tips:

  • Always maintain good posture: Posture matters a lot! Bad posture can affect your body very heavily. Always stand or sit tall. Avoid slouching as much as possible. An ergonomic chair or a special pillow can help you maintain your posture if you have sitting work.
  • Avoid long sitting hours: Don’t sit continuously for hours, even if you have a sitting work. Take a break now and then, and walk around for a few minutes.
  • Avoid lifting very heavy items: Heavy lifting is also one of the major causes of shoulder blade pain. Don’t carry heavy bags on your shoulder. And if you have to lift something very heavy, don’t do it alone, and avoid so much pressure on your back.
  • Adopt a healthy lifestyle: Lifestyle changes can go a long way in dealing with shoulder pain. Try to get a healthy and wholesome diet, get proper sleep of six to eight hours, and do regular physical exercises.

Pain between your shoulder blades is mainly because of bad lifestyle habits. You can surely avoid it to a decent extent. And now, you have some very effective methods to improve mild to moderate pain. If you have severe pain for more than a few days, we recommend you visit a qualified doctor to find the exact cause and start proper treatment.

References:

https://www.spine-health.com/blog/relieving-pain-under-your-shoulder-blade

https://orthoinfo.aaos.org/en/diseases–conditions/shoulder-pain-and-common-shoulder-problems

https://www.healthline.com/health/shoulder-blade-pain#prevention

Is Apple Cider Vinegar Really Good Against Shingles?

Is apple cider vinegar good for shingles? Easily one of the most debatable and underestimated questions related to shingles – probably, among the appalling skin conditions.

To be honest, shingles are more about management than the treatment, as there is still no cure for this annoying infection. Your doctor may prescribe a combination of antiviral medication to reduce the severity of symptoms. And several home remedies can also reduce discomfort and pain. 

ACV is also “assumed” as a very effective treatment for shingles, more by netizens than medical experts or researchers. Apple cider vinegar for shingles is a topic of debate, and the internet is flooded with a lot of content backing ACV as an effective home remedy for shingles. But what is reality?

In this article, we will try to know in detail about shingles and apple cider vinegar. Also, we will find out whether ACV is good for the skin condition or not.

What is Shingles?

Also known as herpes zoster, shingles is a common viral infection characterized by painful red rashes. It is caused by the Varicella Zoster virus, which is also responsible for causing chickenpox. If you developed chickenpox in childhood, the shingles virus remains dormant in your body. It can get reactive anytime to cause red, painful, itchy rashes at any part of the body, typically small and covered parts.

Although it is not a life-threatening infection, it can surely make you feel very uncomfortable, as the rashes are very painful, and at times, itching as well. Postherpetic neuralgia is one of the most common shingles complications and may develop if shingles are ignored or not treated properly.

How are Shingles Developed?

When the virus varicella-zoster invades your body, more often than not, you suffer from chickenpox. It is usually a childhood condition, but the chances of adults suffering from it can’t be discounted.

Once the chickenpox course is completed, the virus changes its place, travels to the nerve tissues around your spinal cord and brain, and remains dormant.

We are still not sure about this, but, in some people, the virus becomes active again and starts moving from nerve fibers to skin. And that’s how you suffer from the second and more painful punch and develop herpes zoster. And we can say that “reactivity of dormant varicella-zoster is the sole cause of shingles.”

Also Read: Glycerin for Lips – Benefits and DIY Recipes

Image source: https://www.google.com/url?sa=i&url=https%3A%2F%2Fcommons.wikimedia.org%2Fwiki%2FFile%3AShingles_rash%2C_thigh._Caused_by_the_herpes_zoster_virus.jpg&psig=AOvVaw0OT-l9niDeDaQ8xE7hqDQb&ust=1603030149827000&source=images&cd=vfe&ved=0CAIQjRxqFwoTCMDjhevmu-wCFQAAAAAdAAAAABAJ

Risk Factors

Not everyone with a history of chickenpox is at risk of developing shingles. However, you are more likely to get it if you are

  • 50 years old or more
  • Suffering from stress quite often
  • Having immune-disturbing health conditions like cancer, chronic diabetes, gonorrhea and HIV infection, etc.
  • Suffering from chronic, serious physical injury.
  • Habitual of taking steroids or other immune-disturbing medications.

Possible Complications

You may suffer from various shingles complications even after rashes are gone, including:

  • Inflammation of brain cells
  • Paralysis, especially if ignored for a few weeks
  • Loss of vision in case of rashes around the eyes
  • Postherpetic neuralgia pain in one out of five people with shingles

Is Shingles Contagious?

Yes, the spread of shingles is possible from one infected person to other healthy people, even people who never had chickenpox or shingles. And patients remain contagious until all the sores are crusted. Until then, patients should maintain distance, especially from pregnant women with no history of chickenpox.

Vaccine for Shingles

Two common vaccines for shingles, approved by the Food and Drug Administration are Shingrix and Zostavax. Doctors recommend that over 50 people get this vaccine even if they didn’t have chickenpox or shingles.

How Shingles is Diagnosed

Diagnosing shingles can be a bit tricky, as similar symptoms are noticed in other skin problems. Your doctor may take a detailed medical history with symptoms and do a physical exam to confirm the diagnosis. The doctor may also send a small number of fluids for laboratory examination.

Treatment for Shingles

There is still no proven treatment for shingles, but some antiviral drugs are very effective in reducing the complications and favoring the healing process. But patients should get these drugs within a couple of days of a shingles outbreak. So, visiting a doctor very early becomes really important.

Medications for shingles may include:

  • Acyclovir
  • Famciclovir
  • Valacyclovir
  • Antidepressants
  • Anticonvulsants
  • Medicated locations
  • Prescription painkillers
  • Numbing medications etc.
Apple Cider Vinegar – Surely an effective treatment for various skin conditions

Apple cider vinegar is no short of a miracle. It can be very useful for a lot of health and skin-related conditions. From managing your body weight to improving your skin’s health, ACV can do many things until it is used “correctly.”

Apple cider vinegar for skin is surely a nice idea, as ACV is packed with antibacterial, antiviral, and anti-fungal properties and can deal with numerous skin conditions. However, caution is very important while applying it to your skin or drinking. Only diluted ACV is recommended to use for any purpose. Even the diluted ACV can cause severe irritation on your skin, especially if you have an allergy. And undiluted ACV can cause severe problems like burns and blisters!

Why is ACV used for skin?

ACV is being used for the skin for so many years now. And that’s due to its numerous skin benefits.

  • ACV maintains your skin’s pH level and removes dead cells
  • Thanks to its anti-inflammatory properties and acetic acid and alpha hydroxy acid contents, ACV can be very effective against acne.
  • Its antibacterial and anti-fungal properties are effective against bad foot odor.
  • If you have bug bites, ACV can be the answer to it as well.
  • ACV can treat various skin infections, including paronychia.

Is ACV Effective against Shingles as Well?

If you think, “is apple cider vinegar good for shingles,” keep reading to find your answer.

As we have stated earlier, ACV for shingles is more of an “online concept” than anything. Yes, it has numerous antiviral properties, but we are nowhere close to having scientific or medical evidence to suggest that ACV can relieve shingles symptoms.

Why Should You NOT Use ACV for Shingles?

You can find many tips and tricks on using ACV directly on shingles rashes or combining it with other home ingredients like honey. People also recommend taking a bath with a small amount of ACV in water.

Some reports are suggesting that ACV can give some relief from painful itching and stinging of the rashes. But one thing is pretty sure that it can’t completely cure the condition.

Additionally, there is no medical evidence of ACV being effective in improving itching or pain, and you can’t use something topically or internally until doctors approve it. However, it doesn’t mean that you can’t use ACV for your skin at all.

Possible Risks of using ACV

Apple cider vinegar for shingles is associated with several risks, especially if used undiluted. ACV is highly acidic and can cause excessive burning and itching on shingles rashes. You may even suffer from a bacterial skin infection, along with an increase in rashes!

Whether you use ACV for shingles (if you want to use) or for any other skin problem, apply it only after diluting it heavily. A dilution of 1 tbsp (15 mL) ACV and 1 cup (237 mL) water is considered safe to add to your bathwater.

What about safe alternatives?

Working closely with a qualified doctor is one of the most important aspects of alternative treatment for shingles. Medicated creams for topical use are at least safe, if not effective against shingles. They won’t cause blisters or burning in already uncomfortable conditions.

You can try some other, safer treatments like cold compress and lukewarm oatmeal bath to reduce the severity of complications. Some over the counter medications like calamine lotion is also proved handy to induce a calming effect.

The Conclusion

There is no scientific or medical evidence of using apple cider vinegar for shingles. ACV is certainly recommended for shingles by “technical doctors” online, but you can’t make a mistake of believing them. Yes, ACV does have some antimicrobial and antiviral properties; you can’t use it to treat serious skin conditions like shingles.

What do we suggest?

Getting proper treatment for shingles is the only effective option to relieve the severity. There is no home remedy effective enough against shingles, and we strongly recommend you not to use them. A cold compress or oatmeal bath are some of the effective ways to relieve pain and burning. Everything other “home treatment for shingles” is nothing more than a “myth.”

Hopefully, we were successful enough to bust the myth about apple cider vinegar for shingles. Hopefully, you have no doubt whatsoever now. Bless us with your good words if we helped you even a bit. Take care of your health and skin, stay happy, stay healthy, and stay safe.

References:

https://www.webmd.com/skin-problems-and-treatments/shingles/shingles-skin#2

https://www.mayoclinic.org/diseases-conditions/shingles/symptoms-causes/syc-20353054

https://www.menshealth.com/health/a25846878/apple-cider-vinegar-skin-benefits/#:~:text=%22Acetic%20acid%20has%20keratolytic%20effects,balance%20your%20skin’s%20pH%20levels.

https://www.healthline.com/nutrition/shingles-pain-relief-apple-cider-vinegar#bottom-line

Glycerin for Lips – Benefits and DIY Recipes

Are you trying very hard to get soft, supple, pink lips without much success? Are you annoyed after frequently reaching out to your lip balm? Don’t worry; you are not alone! Having dry lips is very common, and many people suffer from it, especially in the winters. If you don’t give much attention, your lips may get flaky and dark, and you may start feeling the pain. They can even start bleeding after a couple of weeks! If you search for a simple, safe, and very affordable solution, glycerin for lips can make it easy for you.

Glycerin is very good for problems like skin dryness, flakiness, and inflammation, etc. It is a very effective moisturizer and can be surprisingly effective in improving your skin as well. You can use glycerin to get rid of your lips’ dryness and make them look soft, supple, and hydrated again. But before that, let’s find out why we recommend you to use glycerin for lips.

Why is glycerin good for your lips?
There are numerous benefits of glycerin on lips and skin, such as:

All-day moisturizer:

Dryness of lips becomes a huge problem, especially in winters. If not cured on time, you may have pigmented and painful lips. And glycerin is very soft as well as an effective skin moisturizer, and it can keep your skin moisturized throughout the day, and you won’t have to search your lip balm all the time.

Glycerin keeps your lips soft, supple, and pink:

Among other glycerin for lips benefits, the softness of lips is one of the major ones. Because glycerin is a long-lasting moisturizer, its regular application can help you have smooth, supple lips. After all, soft lips reflect your self-esteem and confidence!

Protects your lips from irritation:

You may have irritation, especially due to chapped lips. And licking your lips can only aggravate the problem! You can control the irritation by regularly applying glycerin to your lips. And lip balms are, after all, not as effective and are prepared with different harmful chemicals!

Removes dead cells and keep your lips healthy:

Glycerin for lips doesn’t only improve your lips’ overall look, but it makes them healthy by stimulating new growth cells. It means glycerin is a long-term solution to all your problems related to lips!

Glycerin delays the signs of aging:

Premature aging affects your lips, just like your facial skin. Blemishes and fine lines start affecting your lips too! And glycerin delays these signs by making your lips soft and supple.

It can be effective against mouth sores and ulcers too

Medicated ointments are usually preferred for treating mouth ulcers and sores. But if you want a natural and much safer alternative, glycerin can be one for you. It can heal mouth sores and ulcers if used topically.

It Improves blemishes

Pigmented lips are pretty common, especially for pregnant women. Some other causative factors are prolonged exposure to the sun, excessive usage of makeup and carelessness, etc. But don’t worry, you can get rid of blemishes by using glycerin for lips.

Prevents Bleeding and Flaking

Excessive dryness of skin brings flaking and bleeding more often than not. At times, you even start feeling embarrassed. And glycerin can help you to avoid both flaking and bleeding by keeping your lips moisturized.

Glycerin helps to get rid of dark lips

When you don’t give enough attention to your lips, various factors like impurities, dead cells, and the draught of air make your lips darker than your natural skin color. You may notice this problem quite frequently in winter. And you can remove the abnormal darkness by applying glycerin every night before going to bed.

Fades dark spots

Having dark lips and dark spots on your lips are two different problems. Factors like allergies, smoking, and long sunlight exposure, high caffeine intake, and vitamin B deficiency, etc. are associated with dark spots on lips. Regular administration of glycerin can help you to remove these dark spots and blemishes as well.

Also Read: White vinegar for skin whitening

Different effective ways of using glycerin for lips

As we have stated earlier, simply applying glycerin to your lips is enough to keep them soft, hydrated, and healthy. However, if you follow these easy DIY recipes, you may get even better results

Glycerin and Lemon Juice

Lemon juice is a very powerful antioxidant and is a great source of vitamin C. It is slightly acidic and can be very effective, especially against dark lips. Thanks to its astringent properties, lemon can heal the damage to external factors and even halt premature aging. Let’s know how you can use glycerin and lemon juice to quickly improve your lips’ health.

  • Add one tbsp lemon juice to one tbsp glycerin, and apply on your lips to have soft, supple, pink, and hydrated lips all day long.

Glycerin and castor oil

Castor oil contains antioxidants and can fight free radicals responsible for a lot of skin problems. It can be very effective, especially if your lips are dark due to an allergic reaction. Moisturizing properties, reducing puffiness, promoting your lips’ overall health, and delaying premature aging are some of the unique benefits of using castor oil with glycerin.

  • There is not much fuss. Add an equal quantity of castor oil to glycerin, apply on your lips, and leave overnight. You will wake up with healthy, smooth, and rejuvenated lips the next morning.

Glycerin and Honey

Thanks to its proven therapeutic value, honey is used to manage various skin problems for ages. Wound healing is one of the widely recognized honey qualities and can help you overcome chapped lips only within a few days. And the powerful anti-inflammatory properties of honey can be proved handy against numerous lips problems like dryness, flakiness, bleeding, etc.

  • Add one tbsp honey and one tbsp lemon juice to an equal amount of glycerin and wear on your lips to make your lips look healthy and rejuvenated.

Glycerin and Strawberry

Strawberries are probably the most underrated fruits when it comes to treating skin problems. You will be surprised to know that strawberries can help you immensely in your quest to get soft, attractive, and healthy-looking lips.

They have great anti-inflammatory, antioxidants, and astringent properties and can be specifically effective against dark spots due to sunburn, smoking, or aging. Thanks to the alpha-hydroxylic acid content, strawberries can also get rid of dead skin cells from your lips and give you pinkish, soft, mushy, and pliable lips. Here is how you can use glycerin with strawberries.

  • Mash one strawberry fruit to get a thick consistent paste.
  • Add one tbsp glycerin and mix for a couple of minutes.
  • Wear this paste on your lips and leave for five to ten minutes.
  • Wash off with fresh water and pat dry.

Glycerin with Olive Oil

Olive oil is nothing less than a blessing from nature. It can singlehandedly tackle many health and skin-related problems and can be extremely beneficial for your lips. When you use olive oil for your lips, you will get soft, hydrated, and squishy lips. Also, olive oil can give you instant relief from chapped and cracked lips. And guess what, it is one of the most effective protectors against SPF! You can use olive oil in a lot of different ways for your lips.

  • Add a few drops of virgin olive oil to half tbsp glycerin and apply swiftly on your lips to enjoy beautiful, healthy, and personality-defining lips.

DIY glycerin lip balm

Why would you purchase lip balms made with harmful chemicals if you can make DIY glycerin lip balm at home? Here’s how

Ingredients you need

  • One tbsp glycerin
  • Two drops of essential oil of your choice
  • Two tbsp coconut carrier oil
  • Two tbsp beeswax pastilles

Here is how to make glycerin lip balm:

  • Add coconut carrier oil to beeswax pastilles and blend for a few minutes.
  • Next, microwave the mixture for about 5 minutes.
  • Meanwhile, mix essential oil and glycerin in a small bowl.
  • Add the glycerin solution to beeswax mixture once it is melted, and mix thoroughly.
  • Your all-natural, homemade lip balm is ready.
  • Transfer in a lip balm pot and start using once it reaches room temperature.

Some important tips

  • Start using glycerin on your lips without mixing any other ingredient.
  • Drink enough water throughout the day to avoid dehydration.
  • Avoid licking or peeling dry lips.
  • Avoid smoking, alcohol, and excessive caffeine to keep your lips healthy.
  • You can apply a thin coat of glycerin before using any makeup product to protect your lips from chemicals.

Glycerin is a very simple, easily available, and affordable product. You can take care of your lips by the regular usage of glycerin. Hopefully, you are now very well informed about the benefits of glycerin for lips and how to use it effectively. Taking care of your lips is not a big deal. All you need to do is to follow some very simple and practical rules. Hit the comment section if you have any suggestions, recipes, or questions related to lip problems and glycerin. We will be more than happy to answer.

References:

https://skinkraft.com/blogs/articles/how-to-use-glycerin-on-lips

https://www.medicalnewstoday.com/articles/honey-for-skin#benefits

https://www.glamourmagazine.co.uk/article/beauty-benefits-of-strawberries

https://www.healthocto.com/4-amazing-benefits-of-using-glycerin-on-lips/

https://www.olivellaline.com/blogs/blog/the-benefits-of-olive-oil-for-the-lips