Gotu Kola For Stretch Marks

gotu-kola

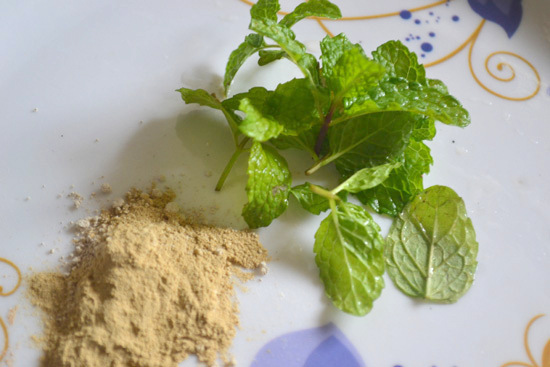
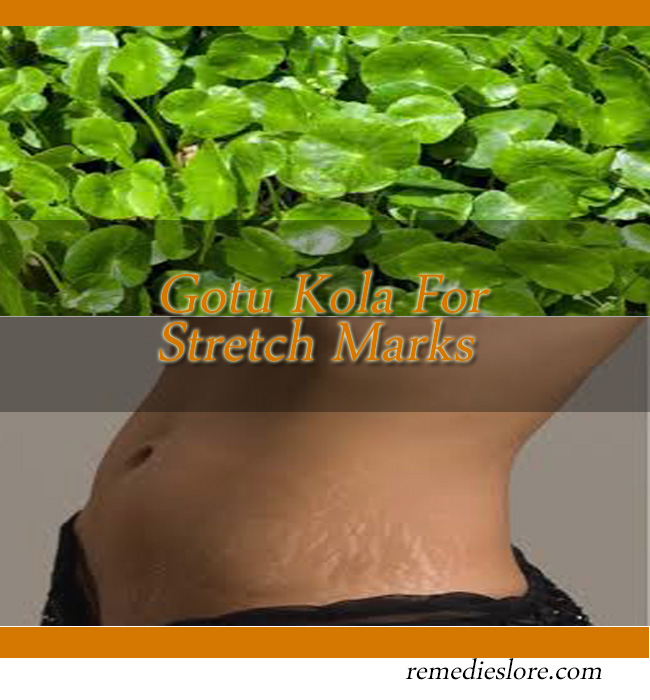
Gotu kola, also known as centella asiatica, Indian pennywort and spade leaf is basically a herb with outstanding nutritious components in it. Gotu kola grows nearby water and is flavourless.

Despite being tasteless it is very useful in making Ayurvedic medicines as well as it is used by most of the Chinese pharmaceutical companies for treating many skin related problems.

Stretch marks and loose belly skin are the problems faced by most of the women especially post delivering a child. Gotu kola is the solution to these problems, by the use of this herb or the creams containing the herb u can make your skin stretch mark free.

Usually stretch marks occur due to the constant weight gain and during pregnancy where the skin gets stretched and leaves white lines like marks on the skin. The areas where stretch marks usually occur are thighs, buttocks, breasts, knees, shoulder and hips.

Gotu kola herb is on the economical way to treat stretch marks. In addition to treating stretch marks, Gotu kola is very useful in preventing ailments like stomach ulcers, fever, asthma, leprosy, hepatitis, psoriasis, diarrhoea and mental fatigue.

How to use Gotu kola?

Gotu kola can be consumed in different ways

  • It can be either consumed orally or you can even extract the juice from it and apply to the stretch marks directly.
  • You can even make Gotu kola tea and sip it. All you need to do is, to a cup of boiling water add few dry Gotu kola leaves and a teaspoon of sugar and stir well. Boil it for 2-3 minutes and then allow this to cool down a bit before sipping.
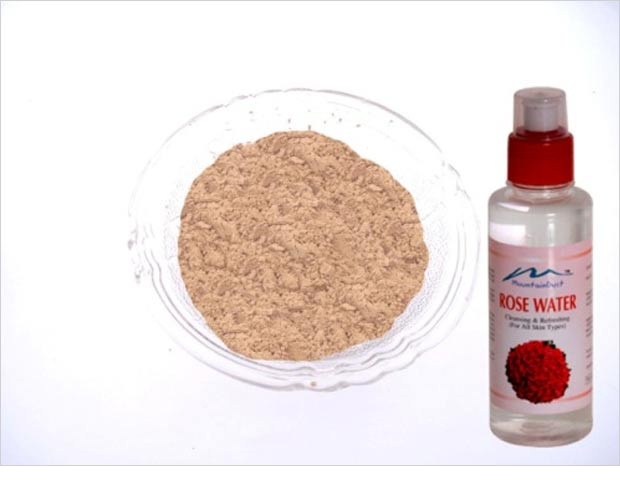
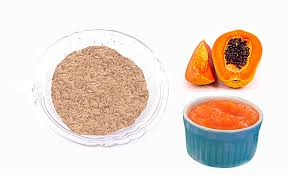
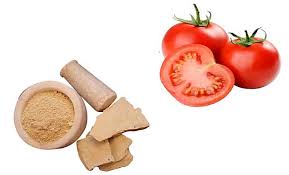
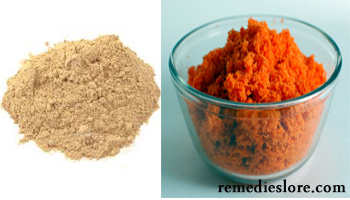
  • Buy cream or oil containing Gotu kola herb in it and apply it on the stretch marks.

Uses of Gotu kola herb

  • Gotu kola helps in dealing with inflammation, faster healing of wounds, improves blood circulation, stimulate cell growth etc with the help of the components present in it like amino acid, fatty acid, beta carotene.
  • Damages of connective tissues can be treated by consuming Gotu kola herb; in addition it also improves blood circulation.
  • Lightening of stretch marks lines is basically done by the element present in Gotu kola called Triterpenoidand 
  • Gotu kola has been found very effective in repairing veins, it even heals minor burns.

Note:  

  • After consuming Gotu kola if you suffer from dizziness, drowsiness, nausea or any other health problem then immediately stop consuming it and do consult your doctor.
  • Gotu kola does not treat stretch marks permanently, it only lighten the lines.

Castor Oil For Warts And Mole

castor-oil

Warts are small lump like substance grown on, skin which are usually caused due to virus. There are different kinds of warts and the affect it causes vary from person to person.

Most of the warts do not cause any problem while few may have serious affect on your health. Chances are that they might spread from person to person and from one part of the body to another. However these can be treated in a simple way by using castor oil and other home remedies.

Moles on the other hand make no harm, but some people think it as unattractive and ugly and want to get rid of it, especially if it is on the face. Moles are caused due to melanocytes that cause pigment.

Moles occur in two types of colour black and brown, the latter one may look like patches or skin colour spots. Moles will usually be black and flat, but sometimes it can be raised one with or without hair. Sometimes it does happen that the moles tent to vanish after a certain period of time.

The following is one of the easiest Home Remedy in order to get rid of Moles and Warts.

Removal of Moles and Warts with Castor Oil

One of the easiest and most economic ways to remove warts and moles is by the use of castor oil. Your skin will be spot free with no sign of scar after the removal of warts and moles. However, one needs to be patient while using this method as it takes time to get removed.

  • Take few drops of castor oil in your palm
  • Add a pinch of baking soda (optional)
  • Mix this together
  • Apply the oil on the mole and wart
  • Leave it for few hours
  • Repeat this process at least twice daily.

Other Home Remedies for Warts and Moles

  1. Vinegar: Warts are the result of bacteria and vinegar has got anti inflammatory agents which can deal with the virus and make your skin wart free. All you need to do is dip a cotton ball in vinegar or apple cedar vinegar and keep it on wart. You can cover it up with a band or tape and keep it over night. Make sure you wash the area before and after applying vinegar. The choice of vinegar id all yours, you can either use white vinegar or apply cedar one.
  1. Garlic: Garlic is one of the affective ways to remove warts and moles. It has got the substance which helps to lighten the pigment spots. Crush garlic until it is juicy, then apply it on the wart or mole and guard it with the help of tape or bandage. Keep it for 4-5 hours and then remove it. 
  1. Bananas: Another easy home remedy is banana, not the fruit but just the peel of banana. All you have to do is simply pat or rub the inner surface of the banana peel on the mole or wart for few minutes or you can either tape the peel on the wart or keep it over night. Do it regularly before going to bed for few weeks.
  1. Honey: Honey is the solution to most of the skin related problems; it has got anti bacterial properties which can deal with the bacteria of wart. In order to eliminate mole and wart cover it up with thick layer of honey and wrap it with cotton cloth. Leave it for almost a day and then remove.

Note: in order to get best and quick results repeat the process daily or at least every alternate day.

How To Remove Dry Skin From Feet With Vinegar

vinegar-foot-soak

Every one of us hates dry and cranky feet. The solution to this problem is simply Vinegar. This is the simplest and easiest DIY tip. Vinegar is used not only for cooking purpose but it has been used to cure many pains and aches.

It helps in treating foot problems like foot odour, athlete’s foot, fungus, cracks etc. As we all know vinegar is acidic in nature and this property helps to deal with cracks and make foot softer and smoother.

Lack of moisture is one of the main reasons behind dry and dead skin on your feet. However there are few more reasons behind it and they are as follows.

Reasons behind Dead Skin on Feet

  1. Soaps : The soaps that you regularly use may contain harsh chemical that can turn out to be harmful on your foot. This can cause your skin to become more dull and dry.
  2. Footwear : Selecting right kind of footwear helps in keeping your foot away from some of the foot problems. If the footwear is not comfortable enough then it can give problems like cracks and dry skin.
  3. Overweight : Your feet are the one who carry your weight all day long and if you are overweight then the ones who suffer are your feet itself.
  4. Long Hours of Standing : Standing for long hours can puts more pressure on your foot; as a result the foot may become full and dry.

Note: if you are diabetes patient then do not follow the vinegar soak, it is advisable to consult your doctor for foot problems.

How to make Vinegar Foot Soak?

Using vinegar directly may not harm foot but it is advisable to dilute it with water. Mix it in 1:2 ratio i.e.; one part of vinegar and two parts of water. The smell of vinegar may be annoying but it will vanish after the foot are dried up.

Vinegar Foot Soak

Vinegar deals with all sorts of foot problems listed below. The choice of vinegar is all yours. You can either use white vinegar or apple cedar vinegar.

  1. Athlete’s Foot: it is a type of fungal infection that mainly disturbs the toes. The toes develop redness and the skin starts peeling. Furthermore it can cause itchiness and burns on the foot.
    •  Take a tub and fill it with water and vinegar in 2:1 ratio that is two portions of water and one portion of vinegar.. Dip your foot in the tub for 10-15 minutes. Make sure your foot are completely soaked inside water. You need to do this either daily or at least every alternate day in order to get rid of the fungal infection.
  1. Smelly Foot: bacteria are the reason behind smelly foot and this foot odour can sometimes turn out to be very annoying and irritating.
    • To avoid smelly and itchy foot soak your foot in vinegar and water tub. You may either use white or apple cedar vinegar. You can even add one to two teaspoons of baking soda in it. Leave your foot for 10-15 minutes and then dry your foot thoroughly. Always wash your feet thoroughly with soap before soaking in vinegar.
  1. Overtired Foot: if you want to calm your foot after a long day at work then the vinegar soak is best. It relieves your foot from all sorts of pain and aches.
    • Fill the tub with warm or hot water, however you like it. Add in 2 cups of vinegar and 1 teaspoon of salt in it. Give it a mix and then leave your foot for relaxing. Leave it for 15-20 minutes. Repeat this daily to keep your feet calm and relaxed.
  1. Dry Foot: in order to get rid of dry and dull skin, leave your foot in vinegar soak for 15 minutes then after that gently rub it with soft brush or pumice stone on the dry areas. Later on use a moisturiser on your foot.

3 Homemade Apricot Face Mask Recipes

apricot-face-mask-recipe

Today you’ll learn about an amazing homemade apricot face mask recipe that will hydrate your skin, reduce wrinkles, treat acne and nourishes your skin.

Natural remedies unlike cosmetic creams come with lots of benefits.

Essential nutrients and vitamins residing in the apricot can provide the needed nutritional benefit for your skin.

With increasing pollution and impurities, you must pay more attention towards your skin. My cousin isn’t a makeup addict but I see 3 different creams for her skin.

After inquiring she said one is for exfoliating, one for moisturizing and other a normal face wash.

All those vitamins and minerals are packed in this apricot facial mask.

Note: Though they are packed with vitamins, all home remedies will not work for everyone. Try the one which gets well with your skin type.

Benefits of Apricot Facial Mask for Skin

You can use apricot fruit blended with honey or just massage with apricot oil. I prefer apricot fruit as it is packed with all nutrients.

  • Essential fatty acids packed in the mask can help to get rid of dry skin and moisturize your skin.
  • Vitamin A along with other nutrients helps to exfoliate dead skin cells off the face.
  • Gamma linoleic acid residing in this homemade face mask can help to maintain pH balance over the skin.
  • Vitamin A and E postpones premature aging wrinkles. You can get a smooth and youthful skin.
  • Anti-inflammatory activity of the mask can help to reduce skin ailments like acne.
  • Vitamin C improves elasticity of the skin and fastens the healing process.
  • Eczema, psoriasis, acne and other minor skin issues can be reduced by regular application of this face mask.

How to Use Apricot Face Mask?

Normally, beauty experts prefer to blend all natural ingredients to make it more effective. This is what differ homemade recipes from personal care products.

Depending on your skin type you can mix other ingredient.

  1. Take 4 apricots (canned or fresh) and place in boiling water for 60 seconds.
  2. After cooling slice and collect it in a bowl.
  3. Add 6 fresh mint leaves, 3 tablespoon of plain yogurt and 1 tablespoon of raw honey to the bowl.
  4. Now blend to obtain fine paste.
  5. Wash your face and apply the apricot face mask evenly.
  6. After 20 minutes, rinse it off.

You need to place apricots in boiling water for easy cleaning.

Apricot and Olive Oil for Dry Skin

If you’ve dry itchy skin, then take fresh apricots slice them as mentioned above and add required amount of olive oil to it.

Apricot and Lemon Juice for Oily Skin

Excess oil often leads to acne lesions. Blend apricot pulp, honey and add few drops of lemon juice to it.

Wash your face with water and pat dry.

Apply the mixed face mask evenly all over the face and leave it dry naturally for 20 minutes.

Note: Don’t expect overnight results. Add this wonderful remedy to your beauty regimen and try twice in a week to see positive change.

7 Homemade Face Mask to Remove Blackheads

homemade face mask to remove blackheads

Blackheads are the most common skin problem faced by almost every individual after a certain point of age. The reason behind blackheads is that when the excess sebum flows it creates obstruction in the skin pores which leads to blackheads formation. Dry and dead skin is also one of the reasons for blackheads.

The following are some of the easy to use homemade face mask to remove blackheads.

1. Milk and honey

  • It is a fact that honey has got antibacterial properties which helps in keeping your skin away from blackheads and the milk always gives smoothness to your skin.
  • Take a tablespoon of honey and add one teaspoon of milk to it.
  • Microwave this for a minute
  • Allow the mixture to cool down and mix well
  • Now apply this mixture over the blackheads, make sure you apply it in thin layers
  • Take a thin cotton strip cloth or you can even take wax strip and gently pat it on the mixture
  • Keep it for few minutes and then slowly remove it
  • Wash with cold water and apply moisturiser
  • You need to repeat this process at least 3-4 times a week

2. Steam treatment

  • this is the most common way to get rid of blackheads
  • Take a steamer and hold it around the blackheads area
  • Do not hold it too close to your skin
  • Give the steam for about 4-5 minutes
  • Now gently rub the skin with a soft cloth or towel
  • Dry pat your skin and repeat this process twice or thrice a week

3. Honey and cinnamon

  • Take a teaspoon of honey and mix this with a teaspoon of cinnamon powder
  • Apply thin layer of this paste on blackheads
  • Now take a cotton strip or a wax strip n pat it on the paste
  • Allow it to sit for few minutes
  • Then gently peel off the strip
  • Wash your face with cold water

4. Lemon juice

  • Squeeze out juice from one or two lemons, depending on the affected area
  • With a help of a cotton ball apply the juice on the blackheads
  • Keep it over night and wash your face next morning
  • Make sure you do this before bedtime

5. Honey

  • Take a teaspoon of raw organic honey
  • Rub it over the affected area
  • Allow it to sit for 10-15 minutes
  • Then wash off with cold water

6. Baking soda

  • Take two teaspoons of baking soda in a bowl
  • Add few drops of water to make a thick paste out of it
  • Now apply this paste on the blackheads and gently massage it in circular motion
  • Keep it for 10-15 minutes and then wash with cold water

7. Turmeric

  • Turmeric has got antiseptic properties and it works great on blackheads as well as on other wounds
  • All you need to do is take 2 teaspoon of turmeric
  • Add two teaspoon of mint juice into it
  • Mix this well and apply it on nose and other blackheads area
  • Allow it to sit for about 10-15 minutes and then wash away with cold water

Note: In order to get best results apply the desired pack regularly.

Share your own homemade face mask recipe to remove blackheads in comments.

Save

Green Tea for Blackheads

green-tea

One of the prevailing problems which almost every adult face are the blackheads. The reason behind the blackheads is the dry and dead skin cells. When there is obstruction in skin pores due to surplus flow of sebum blackheads tend to rise. Usually blackheads occur on nose as well on chin.

Dirt and dust are not the reason behind blackheads, it’s all internal. When the skin pores are open and dead skin cells comes in contact with the air, blackheads will occur. This is known as oxidisation and it will make your skin turn black. Using any scrubbing creams will not help you to eliminate blackheads, instead they may become worse.

In addition to green tea there are some of the home remedies that can be used in order to eliminate blackheads.

How to Use Green Tea for Blackheads

  • Boil one cup of water
  • Remove the water from heat and put two green tea bags into it
  • Leave it in hot water for some time and then refrigerate it for almost an hour.
  • Now wash your face with a face wash n dry par your skin thoroughly.
  • With the help of a cotton ball apply green tea on your face, especially on blackheads.
  • Allow it to rest until water gets dried and then wash with cold water.
  • Repeat this process daily for better results.

In Addition to Applying Green Tea

  • Consume green tea regularly to avoid blackheads.
  • Make sure you drink fresh green tea
  • You can even add few drops of green tea to your regular lotion and apply on your skin.
  • Apart from treating blackheads green tea has got various health benefits. It is best to include green tea in your daily diet.

Check this post for other Home Remedies to Remove Blackheads

Note: In order to get best results apply the desired pack regularly.

5 DIY Neem Face Packs For Acne

neem-face-pack

Neem is used from decades as a home remedy to fight against ache, pimples, pigmentation and leaving your skin flawless and healthy. Neem has got anti bacterial and anti fungal properties which helps in making your skin oil free. Its antiseptic properties are highly profitable to oily and acne prone skin.

Most of the cosmetic companies use neem as the key ingredient in making face washes and creams. The following are some of the neem face packs which help in removing acne and pimples and maintain a healthy skin.

1. Neem, Rose Water and Lemon Face Pack:

This face pack is used for acne prone skin.

• For this you need to take hand full of dried neem leaves and grind them to make a fine powder.
• Now add two teaspoon of rose water and a teaspoon of lemon juice and mix them well to get a fine paste.
• Apply this face pack evenly on your skin, gently scrub and leave it until it gets dry or up to 10-15 minutes and then wash off with cold water.
• Lemon has got citric acid which helps in removing acne and even it reduces blemish marks on skin.
• On the other hand rose water has antibacterial and antiseptic features which are very helpful in treating pimples.
• Use this face pack either daily or every alternate day to reduce the acne and pimples.

2. Neem and Tulsi (Basil) Face Pack:

This face pack is for glowing skin.

• Take a bunch of dried neem leaves and tulsi (basil) leaves. You can even take the fresh leaves and keep it under sun to make it dry. Crush the leaves or blend it and make a fine powder.
• Now add a tea spoon of honey and mix it thoroughly, if needed add few drops of water to form a paste.
• Apply this face mask on your skin and leave it for about 15 minutes and wash with cold water.
• Tulsi is rich in properties which helps in reducing acne, pimples and makes skin healthy and glowing.

3. Neem and Yogurt Face Mask:

This mask is helpful for oily skin.

• Take two tablespoons of dry neem leaves powder and mix it along with a teaspoon of yoghurt and two teaspoon of rose water.
• Blend this very well to form a smooth paste.
• Apply this pack on your skin and leave it until dry and then rinse with cold water.
• Yoghurt helps to moisturise the skin as well as it has got bleaching and oil control properties.

4. Neem and Gram Flour Face Mask:

This face mask is to get clear skin.

• Take a tablespoon of dried need powder and add a teaspoon of gram flour (besan)
• To this mixture add a teaspoon of yoghurt and mix to get a fine paste.
• Apply this on your skin and leave it until dry or for about 10-15 minutes.
• Then wash with cold water.

5. Neem and Turmeric Face Pack:

This face pack is for dry skin

• Take a tablespoon of neem powder and mix it along with half a teaspoon of turmeric powder.
• Add few drops of rose water and make smooth mixture
• Apply this pack on your skin and allow it to sit for 10-15 minutes.
• Rinse with cold water.
• Turmeric is helpful in hydrating and moisturizing dry skin as well as it gives glowing skin.

Note: in order to get best results apply the desired face pack regularly.

Save

Potato for Skin Whitening – 8 Awesome Homemade Recipes

potato-for-skin-whitening

Looking beautiful and maintaining a healthy skin is everyone’s dream and this can be achieved with the help of one of the most widely used vegetable available in every house that is potato.

Potato deals with many skin problems like dark circles, dark spots, tan, pigmentation etc. Potato has got natural bleaching agents which helps in skin lightening.

Instead of spending thousands of bucks on skin whitening creams and on saloon bills you can go natural way by treating your skin with potato and that too at a very low cost. The chemicals present in such creams can be harsh on your skin.

Home Remedies with Potato:

  • Potato and Lemon Juice with Honey: Blend a potato and make juice out of it now mix equal quantity of lemon juice and a bit of honey to it. Apply this mask to your face and neck and leave it for 10-15 minutes then wash off. This mask best suits for the one with oily skin.
  • Potato Slice and Juice: Potato is rich in skin bleaching properties and if you use it on a regular basis then change on your skin is sure to happen. This one’s so simple and easy, all you need to do is take a potato slice and rub it on your face for about 5-10 minutes. This works very well on dark circles so make sure you cover the dark circles also. You can even squeeze juice from potato and apply it on your face.
  • Potato and Multani Mitti: Multani Mitti or fuller’s earth gives various skin benefits and when mixed with potato paste, the results are going to be amazing. Take 2 table spoons of Multani mitti and mix it along with a table spoon of potato paste and apply on your skin evenly. Keep it until dry and then wash off.
  • Potato and Tomato Juice: Now this mask can do wonders on your skin by making your skin spotless and giving fairer complexion. Blend tomato and potato together and make a paste out of it. Apply this on your face and neck.
  • Potato and Yoghurt: If you are looking for an anti aging home remedy then this is worth trying. Take 2 tablespoon of potato paste and add 1 tablespoon of yoghurt and mix it well, apply it on your skin, keep for 15-20 minutes and wash off.
  • Potato and Cucumber Juice: This mask works as natural skin tone. Mix potato juice and cucumber juice in equal quantity and apply on your skin. This gives freshness to your skin as well as makes your skin spotless.
  • Potato with Milk and Glycerine: This mask can make your skin wrinkle free. Extract juice from a small size potato and then mix few drops of glycerine and tea spoon of raw milk. Apply this pack on your skin and leave it for 10-15 minutes and then wash with cold water.
  • Potato and Olive Oil: Boil a small size potato, peel its skin and mash it smoothly. To this add few drops of olive oil mix it well and apply on your skin. Allow it to sit for 10-15 minutes and then wash away.

Note: in order to get best results apply the desired face pack regularly.


Save

Save

Lavender Oil for Migraine Headaches

lavender-oil-for-migraine-headaches

Migraine is a common and serious headache resulting in moderate to severe pain. About 12 percent of U.S population suffers from migraine headache. Reports show that women are affected three times more than men.

Depending on intensity of the pain, different medication is suggested. Anyhow, for a quick relief from migraine and other types of headache experts suggest trying lavender oil. Excellent aroma of lavender oil soothes headache and lifts your mood.

In a study scientist says that the migraine pain is due to physiologic changes in brain. Migraine is often associated with sensitivity to light; sound and you may also experience vomiting. Factors like stress, loud noise and diet can trigger migraine headache.

Lavender Oil and Headache

All types of headaches have one thing in common, that is pain. You may experience moderate to severe pain in head. Though not all headaches are same, but fortunately you can use same innate remedy for different headaches. As mentioned, lavender oil has mood stabilizing effect it can effectively reduce pain.

Topically apply this essential oil over affected part or inhale; you’ll be find instant relief from pain. Coumarin, a compound present in lavender oil dilates or opens up blood vessels to reduce headache.

There is no medical data to back the benefits of lavender oil for headache, anyhow in a study carried out in 1994, H. Gobel documented that topical application of essential oil relaxed mind and muscle vessels. Mostly, people place cold compress or warm compress to relief from headaches, but if you’re looking for instant relief dab essential oil over temples.

How to use lavender oil for headache and migraine?

As mentioned above you can either inhale or topically massage over forehead and around the neck. If you’re allergic to lavender oil, you may experience severe headache, so patch test before trying this home remedy.

  • Take pure lavender oil from local drug store and drop 2-4 drops in 2-3 cups of boiling water to inhale.
  • Another method is to pour 2 drops of lavender oil in cold water and drop wash cloth in it.
  • Wring the cloth and place it over forehead.
  • You can do the same with warm water, if you want warm compress.

If you don’t have time, then directly apply 1-2 drops of lavender oil on temples and neck to relief.

Note: Lavender oil is toxic, so avoid its internal use. Pregnant and breast feeding women are advised to stay away from lavender oil.

Comparing lavender oil to pain killers

Effectiveness of high dose pain killers for migraine patients is 70%. Anyhow, side-effects associated with these powerful drugs are server. Tylenol drug may cause vomiting, swelling and stomach pain. (source) Ibuprofen is an anti-inflammatory drug. Overdose of this drug may cause indigestion, pale skin and weight gain. (source)

Unlike these drugs, lavender oil for migraine headache has no or less side-effects. Those who’re using it for the first time need to patch test to confirm that they are not allergic to this oil.

Imagesource

Multani Mitti face pack for oily skin

multani-mitti-face-mask

Multan Mitti, also known as fuller’s earth is a natural solution to various skin problems. It is rich in natural minerals and can do wonders to your skin. It is capable of removing dark spots from your skin, removes oil, dirt and dead skin cells from the skin.

Multan Mitti is highly recommended for not only oily skin but also for acne prone skin. It is rich in aluminium silicate which helps in making your skin radiant and flawless.

Today Multan Mitti has become an essential ingredient at home. When mixed and applied with certain basic ingredients, it can do wonders to skin. The following are the ways in which Multan Mitti can be used.

  • Multani Mitti and Honey:

    multani-mitti-honey

    If you are tired of dull and lifeless skin then this face pack can give a radiant look to your skin. Regularly going out in sun can make your skin become dull, apart from using sun screen creams you can also try out this face pack. Take 2-3 table spoon multani mitti, 1 teaspoon honey and mix it with few drops of milk. Apply this pack on your face and neck and leave it until dry and wash with cold water.

  • Multani Mitti with Almond and Milk:

    multani-mitti-with-almond-and-milk

    If you want your skin to be softer and smoother then this face mask is best. For the one with dry skin almonds and milk gives proper moisture to the skin.Take 3 tablespoon of multani mitti, 1 tablespoon of crushed and ground almonds and a tablespoon of raw milk. Mix all these together and make a smooth paste. Apply this pack to your face and rest it until dry or at least for 20 minutes before washing.

  • Multani Mitti with Mint Leaves:

    Multani Mitti with Mint Leaves

    In order to get rid of dark patches you can use multani mitti and mint face pack and get spotless skin. All you need to do is take a tablespoon each of multani mitti, yoghurt and mint leaves powder and make a fine paste out of it, if needed add few drops of water. Apply this mask evenly to your face, keep it for about 15-20 minutes and wash with cold water.

  • Multani Mitti with Rose Water:

    multani-mitti-face-pack-multani-mitti-with-rose-water

    By applying multani mitti and rose water face pack regularly you can say good bye to oily, greasy and pimple prone skin. It naturally cools down the skin and removes oil and dullness from skin. Take half a cup of multani mitti and 2-3 tablespoon of rose water and mix well. Apply this mask and keep it until dry or at least 15-20 minutes.

  • Multani Mitti with Papaya Pulp:

    Multani Mitti with Papaya Pulp

    Tired of using fairness creams of market? Here’s the best home remedy to the problem of dark or tan skin. Papaya is an age old practise in order to get fairer skin and when it is combined with the goodness of multani mitti and honey it gives even better results. Make a fine paste out of a tablespoon of multani mitti, 1 tablespoon honey and 1 tablespoon ripe papaya pulp. Apply this evenly to your skin; allow it to sit for 20 minutes before washing.

  • Multani Mitti with Tomato Juice:

    Multani Mitti with Tomato Juice

    If you want your skin to be glowing and spot free then multani mitti and tomato juice will surely give you best results. Take 2 tablespoons each of multani mitti and tomato juice and a teaspoon of sandal wood powder. Mix this well and apply it on face. Allow it to sit for 20 minutes and wash away.

  • Multani Mitti with Carrot Pulp:

    multani-mitti-with-carrot-pulp

    In order to get rid of pigmented skin use multani mitti and carrot face pack. Take one tablespoon of multani mitti, one tablespoon of fresh carrot pulp and a teaspoon of olive oil. Mix this well, if needed add some water. Apply this pack evenly on your skin.

  • Multani Mitti with Coconut Water:

    Multani Mitti with Coconut Water

    In order to get rid of sun tan use multani mitti along with coconut water. Both gives coolness to skin and makes skin look radiant. Mix multani mitti along with coconut water and a few drops of rose water and mix well. Apply this mask to the effected tan areas.

Note: in order to get best results apply the desired face pack regularly.

Image Source: Source1 , Source2 , Source3 , Source4


Save