How to Increase Breast Milk Supply Naturally

Every mother plays a crucial part in their child’s life and every mother strives their best to provide best to their children in each and every aspect of their life.

First time mothers worry about the supply of breast milk for their child. Well, every mother produces enough milk for their children but some mothers don’t. So here are the simple ways to produce breast milk supply naturally.

You can just simply increase your breast milk supply by taking care of the food you take and by maintaining a healthy diet.

Causes of low milk Supply:

There are various causes for low milk while breast feeding which are follows:

  • Waiting too long to start breast feeding
  • Not feeding your child often
  • An infective latch and use of certain medications
  • Sometimes previous breast surgery effects milk production.
  • If the pregnancy has induced high blood pressure and poorly controlled insulin dependent diabetes, then it also affects milk production.

But we also need to know about the importance of breast milk for children

Importance of Breast Milk

  • Breastfeeding is the connection and a loving bond between mother and child, it is not only good for your baby,but also keeps you healthy.
  • It is easily digested and provides all the nutrition’s to you baby for first six months.
  • Breastfeeding also helps your baby to have better mental development and emotional security.
  • Breast feeding speedup the post parturm recovery of mother.
  • It is also beneficial for mothers and reduces her risk of developing breast cancer and heart disease.
  • It lowers the risk of developing asthma and illness.
  • Antibodies present in breast milk will promote sleep in babies and calmness in mothers.

How to Increase Breast Milk Supply Naturally:

There are certain foods which will help you to increase the supply of breast milk.

  1. Barley

Barley is actually a component of beer that isalso called lactogenic. It is richest dietary source of beta glucon ,a polysaccharide which helps to increase the production of prolactin levels in the human body.

How to Use It?

Use barley in regular products like soups, stews, salads and add barley flakes to make milk and homemade bread recipes.

2. Oats

Oats also have high concentration of beta glucon compared to other foods. They are considered to control the occurrence of diabetes post pregnancy. Even the fiber in oats is good for digestion.

How to Use It?

Oats are easy to work out in your diet. You can have oatmeal as your breakfast and you can cook and topped with fruits, muffins and in cookies.

3. Fenugreek

Fenugreek is considered as an effective remedy for stimulating milk producing glands. Due to phytoestrogen in fenugreeks it increases the breast milk production and stimulates sweat gland activity, mammary glands and modified sweat glands.

How to Use It?

Soak one table spoon of fenugreek in one glass of water and leave it overnight. In morning boil this water along with fenugreek and strain this solution and take this solution as tea every day morning.

Continue this process, until you get better results.

4. Fennel Seeds:

Fennel seeds boost the productivity of breast milk. It consists of a herb which acts as a galactogogue which is a substance which helps to increase breast milk, fennel seeds also prevent colic pain in babies and promotes good digestion.

How to Use It?

Take a glass of boiling water and add one table spoon of fennel seeds and cover it with a lid. Let it steep for 30 minutes to absorb the nutrients completely in the solution.

Strain the solution and drink it twice in a day for one month.

5. Garlic

Garlic is an ancient herb and an excellent kitchen ingredient which can be used in many ways. It is excellent galactogogue stores lactation. It has been found that, nursing mothers who are consume garlic in their regular diet will have good production of milk.

Even the babies like the flavour of the milk.

How to Use It?

Take 2 or 3 cloves of garlic and boil them in a cup of water, wait until the water reduces about one quarter of water.

Then add one cup of milk and boil the solution again for few minutes.

Remove it from the heat and now strain this solution and add one table spoon of honey.

Drink this solution daily in the morning of breast feeding period.

6. Spinach and beet leaves:

How to Increase Breast Milk Supply Naturally

Iron, calcium and folic acid are rich in spinach and beet root leaves and these are essential for recouping anaemic mothers. As it contains detoxifying agents, it helps the baby to be strong and the chemicals in spinach could prevent breast cancer.

How to Use It?

Mix them with dough and make paratha or chapathis for a meal.

Note:

Don’t take heavy amount of spinach in your diet because, it may also lead to a condition of diarrhoea in your babies.

7. Cinnamon:

Cinnamon is also useful to increase secretion of breast milk. Including cinnamon in your diet will help to improve the flavour of breast milk. It also helps to delay the occurrence of menstruation after childbirth and even prevents the condition of early conception.

How to Use It?

Take one cup of warm milk and add a pinch of cinnamon powder in it.

Add half table spoon of honey in it.

Drink this milk before going to bed every day for at least two months.

8. Cumin Seeds

Cumin seeds also boost milk supply. These seeds improves digestion and provide relief from constipation, acidity and bloating. It also gives strength to the mothers after the child birth.

How to Use It?

Add one table spoon of cumin seeds in cup of water and boil this solution.

Strain this solution add milk and one table spoon of honey to it.

Mix the solution well and drink this solution every day before going to bed. Repeat this for several weeks.

9. Warm Compress:

In very few cases, low circulation of blood may also be the reason for low production of breast milk. In those cases warm compress will help to increase breast milk supply.

Warm compress on your breasts before feeding sessions will help to increase the blood supply.

How to Do It?

Use any of the essential oil to massage your breasts for better option.

Use a towel which was dipped in warm water, excess the water from it and massage breasts with towel for 5-10 minutes and gently massage the area around the nipples.

After 10 minutes, lead forward and breast feed your baby.


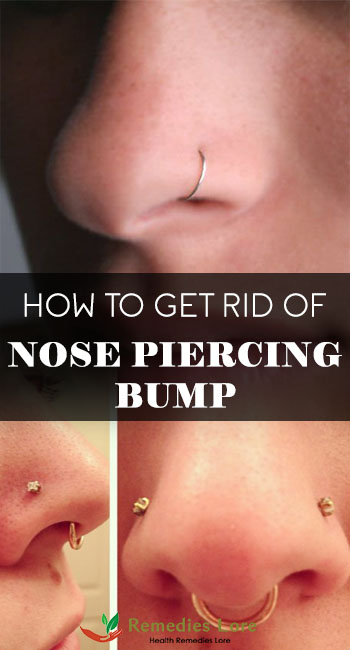
How to Get Rid of Nose Piercing Bump

Nose piercing bump looks unsightly -it can turn red, swollen and fill up with pus when it is infected. So, how to get rid of this problem?

In this article we will help you with the best and effective remedies to treat your infected nose piercing bump and make you look gorgeous with the nose jewellery.

Before that we will see what nose piercing bump is.

What is Nose Piercing Bump?

A bump may appear at the site of piercing at early stages. Bump may occur where the skin cells are dead and become red and fills with pus which causes immense pain .

It also leads to infection, when it is untreated for many days. The two common reasons for causing a bump around a nose piercing are trauma and bacterial infections.

Some nose piercing develops bumps like keloids and granulomas require doctors treatment.

Nose piercing Bump Without Infection

If there is no sign of infection and you have a nose piercing bump that don’t go away, then it is the symptom of granuloma or keloids.

A granuloma can appear just beside your pierced skin, which looks like small reddish spot. It is caused by overgrowth of tissue around your pierced area. Even though it is not an infection, it tends to bleed easily and ulcerate and form crusted sores.

Another nose piercing bump which doesn’t goes away is called keloid. It’s a scar tissue that form after body piercing and leave a white bump around piercing area.

To get rid of nose piercing bumps which are called granuloma and keloids you may need professional medical care.

Nose Piercing Bumps With Infections

A nose piercing bump with infection resembles a pimple. These pimples inflamed tinder and fills with puss which causes pain in pierced area. The body tries to isolate the infection by forming lumps under the skin which is called an abscess.

How do You Know your Piercing Nose is Infected

Here are few symptoms to know that your piercing area is infected:

  • The pierced area is painful to touch.
  • It remains swollen for longer time.
  • Excess crust formation on the wound
  • It is inflamed and becomes red
  • It starts bleeding after the initial stage of healing
  • Fever, nausea and chills
  • Foul smell from piercing
  • Burning and itching sensation
  • Healing process time takes longer than required.

Home Remedies for Nose Piercing Bump

Here are some of the effective home remedies to keep your pierced area bump and infection free. These remedies will help in healing the bump faster.

Sea Salt Soak

Sea salt is extremely effective in avoiding infections and also to get rid of bump. Sea salt water helps to clean the pierced and removes any discharge that has accumulated. This saline solution helps to kill the bacteria which cause infection and help it heal faster.

How to use it?

  • Mix one tea spoon of sea salt in one cup of warm water and let the salt dissolve completely in water.
  • Soak a cotton ball in the solution and apply the ball on your piercing bump.
  • Repeat it for 3-4 times in a day and make sure that you clean with a clean piece of paper towel after soaking with cotton ball.

Warm water is very effective as it helps in increasing the blood circulation in infected nose and speed up the healing process and salt helps in draining the pus from the wound.

Chamomile Tea Bag

Chamomile tea is effective in reducing infection and help wounds to heal quicker. It reduces inflammation of the skin, soothes the skin to relieve irritation and repairs damage skin.

How to use it?

  • To make use of chamomile tea bag for nose piercing bump, place chamomile tea bag in warm water.
  • Place it on piercing area for ten minutes and then again dip in the warm water and apply it again.
  • This can also be used in the combination of salt sea water.
  • Repeat this remedy for 3-4 times in a day, it will reduce the infection of the skin.

Tea Tree Oil

Tea tree oil contain anti bacterial and anti inflammatory properties which helps to reduce the infection, redness and itching around the nose piercing bump.

How to use it?

  • You can apply tea tree oil directly on the infected area. Or
  • Soak a cotton ball in tea tree oil and gently rub the cotton ball around the infected area.
  • You can also use coconut oil instead of tea sea oil.

Aspirin for nose Piercing Bump

How to Get Rid of Nose Piercing Bump

Because of its anti inflammatory properties, aspirin may reduce redness, swelling and inflammation. It also helps in draining out the pus in infected area.

How to use it?

  • Simply crush the aspirin tablet and mix it with 2 table spoons of water and make it a paste.
  • Apply this paste on infected area of bump and let it remain it for overnight.
  • With regular use the infection gets cured.

Honey for Nose piercing Bump

Honey is used from many centuries to treat many skin and health problems. It also helps to control the infection and heal it faster.

How to use it?

  • Take a table spoon of raw honey and apply it on infected area.
  • Leave it for few minutes and rinse it off with cool water.
  • Repeat this remedy for 2-3 times a day, make sure that it is not clogging the opening.

Cold Press

Many people use cold pack to get relive from pain. Cold compress helps to ease the pain by restricting the flow of blood to the infected bump. It also helps in reducing redness, inflammation and swelling and makes piercing bump less noticeable.

How to use it?

  • Take some ice cubes and wrap it in a clean white cloth. Place it on piercing site for about 15-20 minutes.
  • Repeat this for 2-3 times a day; make sure that you are not applying ice cubes directly on the infected area, because it damages the infected area more.

 How to Prevent a Bump?

Here are some tips to prevent a bump developing on your nose after piercing.

  • Never attempt to pierce your body by yourself.
  • Always piercing should be done by a professional
  • Make sure that the needle is free from bacteria when piercing.
  • Clean the piercing nose regularly and follow the instructions provided by the piercer.
  • Don’t play with the stud or ring, it may cause irritation and hinders the healing process.
  • Don’t change the jewelry of your nose regularly
  • Do not touch your nose more often, because the bacteria in the hand may also cause infections.
  • To avoid allergic reactions of piercing nose, choose nose studs and rings that are made of gold and titanium or niobium.

You should immediately consult your doctor if  the infection from nose piercing bump doesn’t goes away.

20 Fantastic Summer Beauty Tips Every Girl Needs to know About!

Summer is the best time to enjoy with your friends, family and relatives. We plan many places to hang out such as beaches and enjoying long summer evenings, sitting outdoor and relaxing. But it also brings in some seasonal beauty headaches, frizzy hair and runny makeup.

There are millions of beauty tips floating around the internet today, but all of them can’t be followed by everyone especially during summer. So here we are presenting you 20 fantastic summer beauty tips every girls need to know about.

20 Summer Beauty Tips for Girls

1. Don’t use Powder to Hide Your Sweat

Instead of using powder on your face, use bottling sheets which will help you to remove the sheen from your face.

Powder stays only for short time and makes clog up on your pores and is one of the cause for breakouts on skin.

2. Rose Water

Rose water is very beneficial in summer season, wash your face daily with rose water at least for 2-3 time in a week.

Its natural cooling properties make it an excellent toner in hot summer season.

3. Drink Plenty of Water

During summer season, because of heat our body gets dehydrated very easily. So, it better to drink more water to keep our self hydrated and it also helps in removing toxins from your body.

Water requirement for body increases in summer, as lots of water is lost due to excessive sweating, try to drink more and more water in summer.

4. Make Lipstick Last Longer

Here is the one of the most important beauty tip girls need to know, it’s very common that you smudge and rub lipstick especially during summer.

To get rid of this, you need to blot the lipstick after applying with a tissue paper and apply a light dusting of translucent powder. Repeat it couple of times to get the intensity that you want.

5. Replace Dry Shampoo with Spray Starch

This is one of the effective beauty tips that will help your hair to get rid of dryness in summer, you just need to grab spray of starch and spray that on the oily parts of your hair.

Spraying starch help your hair to look clean and fresh, if you don’t have spray then you can use baby powder for same purpose.

6. Don’t Stop Moisturizing

Most of us use moisturizers only in winters. As summer is here, you should not stop using moisturizer for your skin, apply moisturizer all through the summer, it will keep your skin fresh and clean and it will stop getting any dry patches.

7. Use Baby Powder to Remove Sand

During summer heavy sweat in beach at the end of the day causes sticky sand on our skin, to get rid of this problem baby powder is the best solution.

Baby powder will absorb all the moisture which stand and stick on your skin.

8. Exfoliate Your Lips

This is one of the most useful tips for lips,mix few drops of olive oil and a bit of sugar and rub them gently on your lips.

It will keep your lips free from dry and dead skin cells.

9. Use hand Sanitizer on Shiny Skin

If your skin is too oily and it’s shining when you are outside, then using sanitizer is the best solution.

Use hand sanitizer under your forehead, under your hair line and across the t zone. Sanitizer helps in removing the excess oil from your skin.

10. Use waterproof Eye Makeup

20 Fantastic Summer Beauty Tips Every Girl Needs to know About

Even if you are not swimming, if you want to avoid smears on your eyes, you need to use waterproof eye liner, because of heavy sweat during summer we are more likely to rub our eyes.

11. Use Cream Eye Shadows

Try to use cream eye shadow in summer, because they will not fade away like the powder ones.

They look great for long hours and can resist the dust and heat on your skin.

12. Avoid Dandruff by Using Crushed Aspirin

Add aspirin to your shampoo which helps in removing dandruff on your scalp. Aspirin contain salicylic acid that helps in removing dead skin cells and flaky skin from your scalp.

13. Use Peppermint Oil for Your Lips

Here is another tip to protect your lips, instead of using branded lip products add 2-3 drops of peppermint oil to lip gloss, peppermint oil helps in keeping your lips soft and smooth.

14. Remove Blackheads With Baking Soda

You can easily remove your black heads by using the simple mixture of baking soda and some water.

Take baking soda and mix it with some water to form a paste, spread the paste over the affected area and let it remain until it gets dry then wash it off and moisturize. Repeat it for several times as much as possible to get rid of black heads.

16. Remove Makeup Before you Go to Sleep

Never go to bed with your makeup still on, because makeup left all night can cause infections and breakouts on the skin.

Coconut oil is the best way to remove make up, you just need to dip cotton ball in coconut oil and wipe the makeup before you sleep.

17. Get Rid of Burning Eyes

If you experience any burning sensation in your eyes when you return back to home, then you have to try this tip.

Keep used tea bags in the freezer and place them on your eyes for few minutes and relax. You can use rose water pads and cucumber slices which are very effective instead of tea bags.

  1. Wear Sunscreen Every Day:

The premature ageing of skin happens because of sun exposure. So, one of the best tip for the people who want to stay young for longer periods is always wear sunscreen even in cloudy days. Because UV rays from the sun can pass through the clouds as well.

18. Don’t Forget to Exfoliate Your Skin

Gently exfoliate your skin regularly which will help you to keep your skin clean by removing the dead skin cells on your skin.

It will also help to remove the skin pores and stops breakouts.

19. Moisturize your Feet

If you don’t want to get your feet look dry and cracked heels, then you need to moisturize your feet regularly.

Rub your feet with shear butter before you go to sleep and cover the feet with a pair of socks over the top. This will give a deep down moisturizing affect.

20. Always Wear a Hat

This is one of the important summer beauty tips to remember to take a wide brimmed hat when you go out for a walk or on a beach.

This helps in protecting your hair as well as your skin from UV rays.

How to Get Rid of Sagging Breasts?

Being in shape and maintainig perfect body figure is what women always want. Breasts are one of the most attractive part of womens body which is to be maintained firm and tight.

With time and ageing, breasts start losing its elasticity and becomes saggy. Sagging can occur by natural reasons like breast feeding, wearing improper bra and even due to hormonal changes in body.

But how do we get rid of them? This article will help you to get rid of saggy breast by following some simple things and promotes your breast health regardless of its cause.

Why do Breast Sag?

Our breasts are naturally elastic due to presence of protein called elastin. These are made up of fatty tissues and glands that produce milk, which is covered by skin.

Smoking destroys the elastin protein and cause skin to lose its elasticity. This causes the skin around and on breasts to become loose and sag.

Dramatically, weight gain and weight loss has a great impact on sagging breasts.

How to Get Rid of Sagging Breast

Exercise

One of the best ways to add firmness to your breast is daily exercise. Women who have sagging breasts should inculcate the habit of exercise in their routine. The easiest and popular exercise is pushups which strengthens pectoral muscles beneath breasts.

It also helps in shaping out breasts and reduces excess fat around breasts. Some of the exercises which help to get rid of saggy chest are as follows:

  • Arm raises
  • Chest pushes and pulls
  • Dumbbell flyers
  • Incline chest press

Try Yoga

Yoga helps you in strengthening back and maintains the perfect posture of your body. It also opens up the chest, strengthens muscles and supports your body for better breasts and makes them less saggy.

The following asanas help you in strengthening and improving your saggy breasts.

  • Ustrasana or camels pose.
  • Dhanurasana or bow pose
  • Veerabhadrasana or warrior pose
  • Chakrasana or wheel pose

Ice Massage

Ice massage helps to lift your breasts naturally and effortlessly. When ice comes in contact with skin, it tightens the skin and alleviates all kind of soreness prevailing in muscles.

Take ice cubes and massage it in circular motion for each breast at least for one minute and dry them using a towel. Wear a tight bra and lie back for 30 minutes in relaxed position.

Repeat this remedy for 3-4 times in a week and see extraordinary results.

Olive Oil Massage

Olive oil is rich in antioxidants and fatty acids that can reverse the damage of free radicals and improve skin tone and skin tightening.

Take some olive oil into your palm and rub it until it produces some heat then apply it on the breasts in circular motion for few minutes and let it remain for 15 to 20 minutes.

Follow this remedy for 4-5 times in a week. You can use almond oil or jojoba oil instead of olive oil.

Improve Your Diet

Diet plays an important role in keeping us healthy as well as breasts. Breasts need proper proteins and nutrients for instant growth and for not losing its elasticity. So eat foods that are rich in protein, vitamins, minerals and healthy fat.

Drinking lots of water not only helps you to keep hydrated, but it also flushes out all the toxins from your body and keeps you healthy.

Wear Supportive Bras

Wearing a loose bra while you do exercise is the cause for sagging breasts. As you jump your breast stretch and bounce. So if you have large breast then you need to wear supportive bra which is neither loose nor tight.

Be sure you have fitted for the right size of your bra which gives the support you need; this step alone can help you to get rid of some of the problems you face around posture as well as breast discomfort.

It’s not necessary to wear bra 24 hours, you can remove it while sleeping.

Avoid Weight Fluctuations

How to Get Rid of Sagging Breasts

You need to maintain healthy body weight, dieting causes your skin to lose its elasticity and causes saggy breasts. Even the weight loss and the weight gain makes breast saggy. So it’s better to avoid weight fluctuations.

Sleep on Back

The way you sleep also effects the elasticity of your breasts, when you sleep on one side the upper breast loses its elasticity and it will stretch and becomes saggy.

So always sleep on your back to get rid of saggy breasts.

Aloe Vera gel

Aloe Vera gel is another way to keep your breasts firm. It improves the strength of skin and attributes the collagen stimulating properties of the gel. It also helps in fighting with sagging breasts and improves elasticity of skin.

Simply apply aloe vera gel on your breast and leave for 15-20 minutes and then rinse it off with warm water. Repeat this process for 2-3 times in a week.

Egg White

Egg is not only good for health of your skin, it also helps in tightening the skin. Egg white contains skin nourishing properties and presence of hydro lipids makes the loose skin around your breast to firm again.

Beat the egg white until it forms bubbles, then apply it on your breasts and let it dry for 30 minutes. Rinse it off with onion juice before washing with water.

Repeat this process for several times in a week.

Fenugreek Seeds

Fenugreek seeds are rich in vitamins and anti oxidants that compensate free radical action and tighten soft area around the breasts. It has been often used to treat sagging breast in ancient ayurveda.

Mix 1/4th cup of fenugreek powder in required amount of water and form it as a thick paste. Apply and rub it on your breasts for 5-10 minutes and later rinse it off with warm water.

Repeat this process for 2-3 times in a week for beneficial results.

Alternatively, you can also make a mask with fenugreek powder, yogurt, vitamin E oil and egg white ,mix them well to form like a paste.

Apply this paste on your breasts and massage it in upward direction for few minutes. Let it remain for 30 minutes and then rinse it off with lukewarm water.

Use this mask once in a week to get rid of sagging breasts.

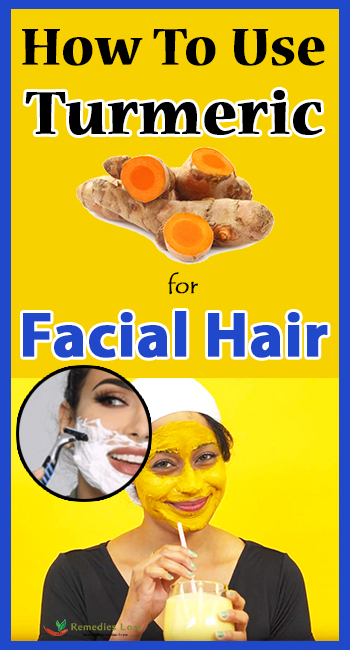
How to Use Turmeric for Facial Hair

Facial hair is one of the embarrassing things that women face, as it causes distress and loss of self esteem. Hair on facial skin may be reason for hormonal imbalance and polycystic ovary syndrome.

We have many treatments like waxing; threading, plucking and even laser treatment helps to get rid of this problem. But these methods are effective but with their own side effects such as redness and pain on the sensitive skin.

No worries! Here is the amazing natural remedy to remove your facial hair without any side effects.

It’s a kitchen spice used for adding color to your recipes. That’s nothing but ‘Turmeric’. Use of turmeric helps to get rid of facial hair and gives you glowing skin.

But do not expect the result in overnight, regular application of this wonderful kitchen item will surely help you to reduce your problem.

Can Turmeric Remove Facial Hair Permanently?

Yes of course, when turmeric is applied to the skin the stickiness will grab the skin tightly. When we scrub after it is dried, the mixture holds the hair of the skin and removes hair from the roots and avoids the regrowth of hair.

The properties of turmeric will reduce the hair growth on the face. If you use this regularly then you can get rid of facial hair completely.

Turmeric contains anti inflammatory properties which reduces acne inflammation and anti bacterial properties which kills acne causing bacteria and protects the skin from pimples and prevents acne.

Here are some of the home remedies by using turmeric to remove the facial hair.

Turmeric Paste

This is a simple recipe for your facial hair removal.

What you need?

2 table spoons of turmeric powder.

One table spoon of water

What you need to do?

Stir enough water in two table spoon of turmeric powder till it form a paste and apply this paste on face as a face mask.

Let it sit for few minutes till it gets dry completely and remove the mask with the help of clean cloth dipped in warm water.

Remove the mask by scrub motion while cleaning the paste on your face then wash with normal water to close the open pores of the skin.

Continue this process for twice in a week.

Turmeric with Milk

This is quite easy method to remove the hair on the face.

What you need

You need only two things

4 table spoon of Turmeric powder

2 table spoons of milk

What you need to do?

Simply mix the ingredients together until it form a thick fine paste. Then apply it on your face where you don’t want to see the hair.

Remain it for 20-30 minutes and remove it by scrubbing the paste in circular motion.

With this regular application of turmeric paste, you can see the results in few months.

Turmeric with Lemon and Sugar

how to use turmeric for facial hair

Sugar and lemon provides softness to your impossibly smooth skin and with turmeric it gives great results.

What you need

Half cup of sugar

2 tea spoons of lemon juice

2 teaspoons of turmeric

What you need to do?

Boil ½ cup of sugar with 1 cup of water to form sugar syrup. Let the sugar syrup cool down and add 2 table spoons of lemon and required amount of turmeric powder to it until it forms paste.

Apply this paste in the direction of hair growth and gently massage it in circular motion.

After it is dried up clean it with clean dry cloth which is dipped in warm water in opposite direction.

Now wash it with normal water, repeat this process for 2-3 times a week for quick and effective results.

Turmeric with Raw Papaya

Raw papaya contains enzyme called papain which helps in reducing the hair growth by breaking the hair follicles.

What you need?

2 table spoon of papaya paste

1 table spoon of turmeric powder

What you need to do?

Mix two table spoon of papaya paste in one table spoon of turmeric powder and make it a thick paste.

Spread it on the face and leave it for 20 minutes and wash it with water and dry your skin.

Continue the same process for twice in a week regularly to get rid of the problem.

Turmeric with Gram Flour

What you need?

2 tablespoon of gram flour

1 teaspoon of turmeric powder

What you need to do?

Mix the gram flour and turmeric and add some water to form a paste.

Apply this paste on the face and clean it with dry cloth dipped in warm water.

Use this method 2-3 times a week.

Turmeric with Wheat Flour

Wheat flour provides nourishment and promotes skin elasticity.

What you need

2 table spoons of wheat four

2 table spoons of turmeric

1 table spoon of sesame oil

What you need to do?

Mix all the ingredients and form it a paste. Apply this paste on unwanted facial hair and let it remain for 30 minutes.

Scrub off with fingers and rinse it with lukewarm water. Follow this process 3 times a week for good results.

Turmeric with Rice flour

Rice flour is a wonderful component for exfoliating dead skin cells and dirt, this effective ingredient could be used as efficient hair removing ingredient.

What you need?

I table spoon of rice flour

½ table spoon of turmeric powder

3 table spoons of milk

What you need to do?

Take a bowl and mix rice flour along with turmeric.

Add required amount of milk in it and make it a smooth fine paste and apply it on the hair prone area and wait for 20 – 30 minutes to dry.

Now, scrub the area with the clean dry cloth and wash it with normal water.

Apply this water for 3-4 times in a week to see hairless smooth skin.

Turmeric with Egg White

Egg white have astringent properties that help shrink pores by tightening the skin and the combination of egg white and turmeric helps to get rid of facial hair.

What you need?

One egg

Half tea spoon of turmeric

What you need to do?

Remove egg white from the egg and add turmeric powder then stir the solution and mix it well.

Apply this on facial hair and leave on till it dries.

Then gently peel it off slowly and clean your face.

Make sure to repeat the process for 2 times in a week.

Turmeric with Potato and Yellow Lentil

This combination helps in whitening of the skin while turmeric helps in pulling out the facial hair.

What you need?

1/4 cup of yellow lentil.

I potato

1 teaspoon of turmeric

1 teaspoon of honey

What you need to do?

Soak 1/4 cup of yellow lentil in water overnight and make it a paste by adding some water to it.

Grate the potato and extract the juice from it. Now mix yellow lentil paste by adding potato juice and one spoon of turmeric powder, stir it well until it become a thick paste.

Apply it on the face as face mask and remain it for 20 minutes.

Scrub off in the opposite direction of the hair growth. Repeat this process for twice in a week to see beneficial results.

Turmeric with Yogurt

Yogurt helps in moisturizing the skin and also removes the unwanted hair when it mixed with natural ingredient like turmeric.

What you need?

2 teaspoons of yogurt

2 teaspoon of turmeric

What you need to do?

Take equal amounts of turmeric and yogurt and beat them in a bowl until if forms a thick paste.

Apply the paste on the unwanted hair and remain it for 30 minutes.

Peel it off with wet cloth and rinse out properly.

Note: use some honey or granulated sugar to lessen the acidic nature of yougurt on your skin.

Turmeric with Indian Nettle

Indian nettle penetrates into the skin and gradually decreases the hair growth while turmeric pulls off the hair.

What you need?

Indian nettle leaves paste.

1 teaspoon of turmeric paste.

What you need to do?

Mix one table spoon of turmeric powder in 3 table spoon of Indian nettle paste and apply it on the clean face.

Let it rest for couple of hours and rinse it off with water.

Follow this process everyday for 4-5 weeks helps to get rid of facial hair.

Turmeric with Baking Soda

Baking soda is an effective solution for unwanted hair

What you need?

One table spoon of baking soda

½ table spoon of turmeric powder

Required amount of water

What you need to do?

Mix one table spoon of baking soda with ½ table spoon of turmeric along with some water to form a paste.

When the mixture turns in to thick paste massage it gently on the unwanted hair and let it sit there for 10 minutes.

Scrub off with wet cloth in circular motion against the direction of hair growth. Then rinse the place with normal water and pat dry.

Ayurvedic Treatments for Gray Hair

Gray hair is one of the common problems faced by young generation today. Usually hair color tend to change in late 30’s or early 4o’s, but if it is starting before, that means it is a matter of consideration.

Melanin is a substance that provides color to the hair.Gray hair occur due to insufficient melanin in the body.

Modern lifestyle with poor eating habits, contact with extreme pollution, dust and industrial waste leads to early graying of hair. Stress is also one of the major reason for premature graying of hair.

Nutritional deficiencies and certain health issues may also lead to graying of hair. Disorders like thyroid, anemia can cause hair to become gray.

But you can treat this gray hair by ayurvedic treatments without any side effects. Before that we will see causes and symptoms of gray hair.

Causes of Gray Hair

While most of the reasons and causes of gray hair we have seen above some of the causes are shown below:

  • Faulty diet
  • Nutrition deficiency
  • Improper protein synthesis.
  • Smoking
  • Anemia
  • Radiation
  • Hormonal imbalance
  • Extreme exposure to the sun
  • Lack of sleep
  • Chronic constipation
  • Heavy metal poisoning
  • Chronic sinusitis

Symptoms of Gray Hair

Although graying itself is a sign of ageing, some early symptoms can help you understand the situation better.

  • Dry hair
  • Hair loss
  • Hair thinning
  • Frequent headaches
  • Hair discolor before the age of 35

Ayurvedic Treatment for Gray Hair

There are many treatments available for gray hair but ayurveda is considered as the safest one. Ayurvedic remedies for gray hair last longer and have no side effects.

In ayurveda the graying is considered as an imbalance of vata dosha and this imbalance can be corrected by using ayurvedic recipes.

Amla or Gooseberry

Amla or gooseberry is an excellent remedy to reduce the growth of gray hair. Amla is rich in vitamin c which helps in preventing the gray hair and maintaining the natural pigmentation of hair.

What you need to do

Take 4-5 gooseberries and cut it in to pieces and let them dry in shade. If they are dried enough, boil these pieces in coconut oil until it becomes brown.

Then remove the pieces from the oil and let it cool. Apply this oil on your scalp and massage it for some time.

Make sure that you reach to every end of your scalp and let your scalp absorb the oil completely. Then wash your hair with normal water after 30 minutes.

You can also take 5 to 6 gooseberries and make it a paste with them and apply it on your scalp.

Wash your scalp with normal water after 20 minutes. Repeat this remedy twice in a week for good results.

Curry Leaves and Coconut Oil

Curry leaves are rich in anti oxidants that moisturize the scalp and help to get rid of dead hair follicles.

This is one of the best treatments that is practiced from olden days.

What you need to do

Take 1/8 cup of curry leaves and ¼ cup of coconut oil and boil these two things and let it cool at room temperature.

Apply this oil on your scalp and massage it for 20 minutes and wash your hair with mild shampoo and lukewarm water.

You can also apply this oil regularly for brighten black hair.

Curry Leaves and Buttermilk

Curry leaves consists of essential nutrients required for the growth of hair. As they are rich in anti oxidants and amino acids, it helps in reducing hair fall and stimulating hair growth.

Buttermilk also helps in further graying of hair, the combination of curry leaves and butter milk is an excellent solution for reducing gray hair.

What you need to do

Take handful of curry leaves and grind it, then mix it with one cup of buttermilk. Apply this mixture on your scalp and let it rest for 30 minutes.

Then wash your hair with water and clean your hair with mild shampoo.

Repeat this process thrice in a week for beneficial results.

False daisy Oil

False daisy or Bhringraj is an ayurvedic herb which is used from ancient times to treat all the hair problems.

The oil which is made from false daisy leaves may help you to get rid of gray hair because it contains all the nutrients required for the natural hair growth.

What you need to do

Take one table spoon of false daisy oil and mix it with gooseberry oil and apply this oil on your scalp before you go to sleep at night.

Repeat it regularly for a month which will help you to get rid of gray hair.

Sesame Oil and Carrot Seeds Oil

ayurvedic treatment for gray hair

Sesame oil is rich in vitamin E which helps in regrowth of hair and it also helps in moisturizing the skin.

Carrot seed oil provides numerous benefits to the hair as it is famous for anti bacterial and healing properties.Mixture of these two oils gives you tremendous response for your hair growth as well as hair color.

What you need to do

Mix 4 table spoons of sesame oil with 1 table spoon of carrot seed oil and apply this mixture on your scalp.

Massage this well on your scalp up to the roots of the hair. Remain it for 15 or 20 minutes then wash it with Luke warm water and then with a mild shampoo.

Continue this process for twice in a week for good results.

Lemon and Gooseberry powder

Gooseberry or amla helps in reproduction or aids in the formation of new cells in the scalp.

Lemon contains anti oxidant properties and healing properties which helps to prevent hair damage and white hair problems.

What you need to do

Take 4-5 drops of lemon juice in a bowl and mix it with some water. Then add amla powder to this water and make it a paste.

Apply this paste on your scalp and let it rest for 30 minutes and wash it with cool water and then clean it with a mild shampoo.

Repeat it twice in a week.

Henna and Gooseberry powder

Henna is also used for coloring your hair from ages. Henna strengthens the hair while amla gives color to the hair.

What you need to do

Mix henna and gooseberry powder with some water and make it a paste. Leave it for two hours.

Then apply it on your scalp and wait for one and half hour then wash it with water. This will provide you natural black hair.

Pepper and Curd

Curd helps in moisturizing your hair and pepper helps in coloring of your hair. This is one of the ayurvedic treatments for your hair.

What you need to do

Mix two table spoons of black pepper in cup of curd and mix it well.

Apply this paste on your scalp and leave it for 20-30 minutes and wash it with lukewarm water and then with shampoo. This gives you remarkable results of your hair color and nature.

Onions

Onions helps in stimulating your scalp and promotes hair growth cells. It is the best ayurvedic treatment for your hair.

What you need to do

Take 3 or 4 onions of medium size and make it a fine paste. Apply this paste on your scalp before your bath daily , it will help in bringing back the black color.

Triphala with Ginger Oil

Triphala is an ayurvedic herb which helps in improving blood circulation and helps your body to absorb nutrients, including minerals responsible for keeping hair healthy and black.

What you need to do

Mix triphala with ginger oil and apply it on the scalp regularly. This helps in returning of gray hair to original color.

Butter and Fenugreek Powder

Mixture of butter and fenugreek powder is also an ayurvedic treatment for your hair. It provides softness to your hair and brings back the original color.

What you need to do

Mix butter with fenugreek powder and make it a paste.

Apply this paste on your scalp and let it remain for 30 minutes. Always use cool water to wash your scalp after applying the paste because the medical properties from the mixture should not be removed by the heat.

Guava Foliage

Guava helps in developing the hair pigmentation and the leaves are very effective in curing premature graying of hair.

What you need to do

You need to make a paste of guava’s leaves and apply it on your scalp. Let it rest for 20 minutes and wash it with Luke warm water and then with mild shampoo.

Repeat this regularly and follow this ayurvedic treatment to color your hair naturally at home.

Another Ayurvedic Method to Get Rid of Gray Hair is Exercise

For this exercise you need to rub your fingernails from the right hand to left hand every single day. While rubbing your nails keep your thumbs straight.

Rubbing of nails will help to improve the blood flow in the scalp and reduces hair fall and also strengthens the root of the hair.

It is very easy process and can be done regularly; it returns the lost color of your hair.

Amazing Health Benefits of Eating Banana Flower

Every one of us are aware about the amazing benefits of banana, it is helpful in many of the health issues faced by us.

It doesn’t stop here, even the banana flower has incredible features and is enable of treating many health problems.

Ailments that can be treated with Banana Flower

  • Treats constipation
  • Cures ulcer
  • Enhances uterus
  • Helps in treating anaemia
  • Best food for lactating mothers
  • Best food for diabetic patients
  • Regulates kidney function
  • Controls high blood pressure
  • Balances menstrual cycle

Benefits of Banana Flower

Banana flower should not be used for mere decoration purpose, it gives multiple health benefits.

The following are Benefits of Banana Flower :
amazing-health-benefits-of-eating-banana-flower

  1. Diminishes free radical activity: your body might be at trouble, sometimes serious due to the presence of free radicals. Banana flower contains antioxidant properties as it is rich in methanol. In a way it helps your body from getting damaged due to free radicals. Banana flower also deals with problems like cancer and premature aging.
  2. Treats diabetes and anaemia: banana flower is the best food for anaemic and the one suffering from diabetes. Regular use of banana flower in the diet can control the blood sugar level as well as it increases the haemoglobin level in body.
  3. Cures infections and wounds: banana flower contains ethanol extracts which help in treating infections. The growth of pathogenic bacteria is constrained by the use of banana flower. It can also inhibit the growth of malaria parasite; however this is yet to be proved.
  4. Reduces menstrual bleeding: menstrual periods, especially the first three to four days are very painful for women. Some suffer from severe stomach pain while for some women excessive bleeding is the problem. Most women cannot step out of their homes or even cannot leave their bed. However these problems can be dealt by a cup of cooked banana flower along with yoghurt.
  5. Rich source of healthy nutrients: banana flower is the rich source of vitamin A, C and E.  It is also enriched with potassium and fibre making it a rich source of healthy nutrients.
  6. Reduces anxiety: it you are depressed and feeling low then the best way to boost your mood is banana flower. Do not go for anti depression pills just try banana flower it will boost your mood and reduce anxiety.
  7. Rich source of milk for breast feeding mothers: lack of sufficient milk is the major problem faced by breast feeding moms. Here is the solution to it. Banana flower helps in boosting the supply of milk to lactating mothers.

Banana Flower Recipe

Here is the simple banana flower curry which you can try out.

  • Heat a pan and put some oil, preferably vegetable oil
  • Add few mustard seeds
  • Now add chopped onions and green chillies and fry them for 2-3 minutes
  • Now add chopped banana flower along with salt, turmeric, black pepper, coriander powder, curry leaves
  • Add some water in it and cover the pan for few minutes
  • After it is cooker sprinkle some coriander leaves and enjoy.

Foods to Avoid During Pregnancy

Pregnancy is most beautiful phase in a woman’s life; to facilitate a happy pregnancy woman’s need to careful with the food habits that need to be infused in your system at near the beginning stage. Desire for your favourite food during pregnancy is an absolutely usual thing.

All you need is just to have a habit of averting few foods that are posing the health risks for you and also to your baby.

Pregnant women are usually showered with the tons of well meant advice on what not to be eaten when they are pregnant, which will be later arising confusions for the pregnant mother. In such situations it is best for you to seek only experts advice, they are better sources to confirm you what is need to be added or minus from your regular diet.

Eating well balanced meals is very important at all times but it is even more essential when you are pregnant. There are essential nutrients, vitamins and minerals that you are developing baby needs. Most of the foods are safe; conversely there are some of the foods that you have to avoid during the pregnancy.

Certain foods have to only be obsessive rarely, whereas others foods have to be avoided completely.

List of Foods to Avoid During Pregnancy:

1 Raw or Undercooked Eggs:

Raw or Undercooked Eggs

There are convinced ways of having your perfect egg during the pregnancy. Raw eggs, runny eggs and undercooked eggs are a big no, for the woman’s during pregnancy.

Some of the homemade desserts and also sauces such as chocolate mousse, mayonnaise, cakes etc foods are containing raw eggs that must be avoided as they may be contaminated with the salmonella bacteria causing vomiting and diarrhea. So this must be avoided by the woman’s during the pregnancy.

Note: The one and only way of having safe eggs are that, eggs should be cooked until the yolk are firm go for and become a well done omelette.

2 Unpasteurized Dairy Products:

Unpasteurized Dairy Products

Dairy Products raw milk and unpasteurized cheese can be containing an array of harmful bacteria, including Listeria, E. coli, campylobacter and salmonella.

The same bacterium goes for unpasteurized juice, which is also prone to the bacterial infections. These harmful infections can all have a life threatening penalty for an unborn baby.

Pasteurization is the most effectual way to kill off any harmful bacteria, without altering the nutritional value of the products. To reduce the risk of the infections, pregnant women are advised to get through only pasteurized milk, fruit juice and cheese.

Note: Always drink fresh and boiled milk. The pasteurized milk label should be notice while the time of purchasing the dairy products such as paneer, ghee, ice cream etc. Milk without pasteurized is not healthy for the pregnant women.

3 Certain Seafood and Fish:

Salmon-Easily-Digested-Foods

Not all type of fishes has to be avoided; only some types of the fishes should be avoided to stay away from any fetal damage possibilities and other difficulties.

Fish Containing Mercury: The consumption of mercury during the period of pregnancy can be leading to the brain damage and also to developmental delays. Therefore, it is advisable that not to take any fish that contains high levels of mercury.

Raw Shellfish: Shellfish that are undercooked like oysters, clams and mussels can be causing you majority of the sea borne illness. You can prevent some of the infections by cooking this raw shellfish, but it is not algae related infections. Hence, it is good to avoid shellfish during pregnancy.

Fishes Exposed to Pollutants: Avoid fish cultivated in contaminated rivers and lakes that are extremely uncovered to the polychlorinated biphenyls.

Smoked Seafood: chilled and smoked seafood with the labels such as jerky, lox, kippered or nova style should not be obsessive as they will be polluted with the Listeria bacteria.

Note: Fishes are very rich in Omega 3 fatty acid; if you cannot do without fish then you can go for the fresh water fishes.

4 Undercooked and Raw Meat:

Uncooked Ingredient Raw Meatballs Beef Meat

Eating undercooked or raw meat will be increasing the risk of the infections from the numerous bacteria or parasites.

This is also including Salmonella, Listeria, Toxoplasma and E. coli; these bacteria may threaten the health of the unborn baby, and possibly primary leading to stillbirth or severe neurological illnesses and also including retardation, epilepsy and blindness.

Refrigerated meat such as goat, lamb, beef etc must be heated up to 73 degree Celsius. Same is for poultry such as ham, turkey, Chicken, geese and duck.

Note:  if all you need to get through meat, then make it sure that uncooked or beneath cooked. You have to wash the meat and poultry items very well before consuming it and one should be always prefer to eat meat at home only slightly than outside.

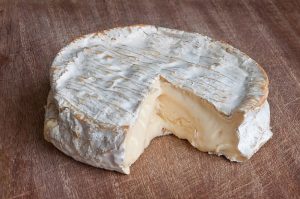
5 Unpasteurized Soft Cheese:

Unpasteurized soft cheese

Just we listen the word Cheese; possibly for sure the watering will be taking place in our mouths. In pregnancy women must have to follow the diet rules. Unpasteurized soft cheese such as Brie, feta, queso fersco, camembert etc. Should be must avoided by the pregnant woman’s as they may be containing Listeria bacteria, that will be causing Listeriosis.  Premature birth or birth defects are common results for having these cheeses.

Note: if you want to eat cheese then you must have to use cheese which is made from the pasteurized milk. Firstly check the labels before purchasing any dairy products.

6 Raw Vegetable Sprouts:

Raw Vegetable Sprouts

We all know that sprouts are very good sources of proteins and minerals, but this are another food that is to be avoided when it is raw during the period of pregnancy.

Whenever the raw sprouts are taken they will harbour harmful bacteria and also some of the harmful viruses that can be causing you bad food poisoning.

Note: if you want consume the vegetable sprouts, you can consume it, but raw vegetable sprouts can be risk factor for the pregnant women, so fried sprouts or well cooked are better to consume and even they will be giving you good taste when they are cooked.

7 Excessive Caffeine Related Products:

Caffeine

Excessive caffeine is never good for your health and especially at the time of pregnancy it is not good for the health of baby and pregnant women both. During the period of pregnancy it will be acting as a diuretic and it is concurrent to low birth weight. Caffeine is often hidden in some of the products that you have never assumed, so it is very dangerous.

Moreover tea, chocolate and coffee, Caffeine is also a part of some of the energy drinks as well as cold and flu medications. If pregnant women are consuming more caffeine during the period of pregnancy then there will be higher risk of stillbirths, spontaneous abortions or fetal deaths.

Note: if you want to take caffeine then you must take it in a limit to a maximum of 200 ml or 2 cups of coffee in a day.

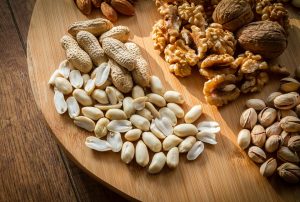
8 Nuts That Causes Allergies:

Nuts-Easily-Digested-Foods

There are various kinds of the nuts that are available in the market, these various kinds of the nuts will be very good for your daily diet, breakfast or evening snacks. When you are consuming nuts during the period of pregnancy then it will causing you discretion.

Nuts are also one of the foods that should be avoided during the period of pregnancy, as the consumption of the nuts will be resulting in the swelling of the body parts.  Nuts can also cause you skin rashes and allergies on your body.

Note: Before including nuts in your pregnancy diet you must have to consult with your doctor on what kind of nuts should be included into your pregnancy diet.

9 Unwashed Fruits and Vegetables:

unwashed vegetable

There are about 78% people eat or cook fruits and vegetables without first washing them with water. If any women do this during the pregnancy then, one should beware! First you have wash fruits and vegetables with fresh water and then you can consume.

The harmful pesticides in the fruits ad veggie skins which is containing Listeria and toxoplasma gondii parasite can cause considerable damage to the fetus. So before eating any fruits or vegetables, first it must be washed with fresh water.

Note: one should always wash the fruits and vegetables accurately, peel them and then you can take them in another separate clean utensil.

10 Canned Foods:

canned foods

Generally canned foods are those foods which are packed and stored for a long period of time in the markets and these are completely not at all recommended during the period of pregnancy.

These are very harmful to the pregnant women’s because it is lining in the cans and often they are also containing Bisphenol A, this will be affecting the endocrine activities. Tinned foods might be too old and harbour harmful bacteria due to their extensive shelf life.

So avoid eating canned foods during the pregnancy it may cause food poisonings to both mother and baby.

Note:  in pregnancy you need not to go for the canned foods, fresh is better and always good for your health.

11 Leftovers:

If you are being pregnant then you should not be obsessive leftovers. Even if these foods are well stored in the refrigerator, there will some of the chances of attracting bacteria.

Unhealthy consumptions of the foods must be avoided during the special phase of the life that is pregnancy.

Note: in this special phase of your life you must eat fresh cooked foods. If it is required then you may need to heat the leftovers in a clean utensil.

12 Home Made Goodies:

If you are baking lover, well then you must avoid this during this special phase of your life. More specially in these 9 months of the pregnancy because if while the time of baking, if bread is left even to some extent raw, then it may attract harmful bacteria and your body may get in contact with some of the severe foods poisoning.

Note: always you should purchase baked treats form the well known bakeries, if you just can’t keep your hands off the baked treats.

13 Licorice:

Licorice

Licorice or Mulethi is a familiar and it is one of the most harmless spices that will be used in many of the cuisines. Though in taking Licorice during the period of the pregnancy can be cause you the constructions of the uterine.

Note: during this special phase of your life it will best to avoid Licorice in all its forms.

14 Street Foods:

During the period of pregnancy you must avoid the foods that are made on the street stalls, roadside stalls fast foods. If you consume these unhygienic street foods during the pregnancy then it may be giving you Food poisoning, stomach upset and many other problems.

During pregnancy eating unhygienic foods can be not good for both mother and baby health. So you must avoid these street foods.

Note: if you like these street foods so much that you don’t want to avoid these, and then you must search foods recipes online and make these foods at home.

15 Artificial Sweeteners:

Generally artificial sweeteners are not well filtered by the placenta, so the artificial sweeteners should be not consumed by the pregnant women’s. If they consumed these artificial sweeteners then the pregnant women’s will be giving sugar to their unborn baby. It is better, not to consume the artificial sweeteners during the pregnancy.

Note: the substitution of the normal sugar to the artificial sugar is not good during the period of pregnancy.

16 Simple Carbohydrates:

Simple carbohydrates are just the simple fancy name of the ‘carbs’ like muffins and bread. They are not exactly harmful for the babies but the only thing is that, they can be causing you painful constipation.

So any simple carbohydrate foods which are made from the fine flour can be causing you painful constipation. Bread, pizza etc can cause you constipation. Simple carbohydrates should be avoided by the women’s during pregnancy.

Note: The pregnant women’s should avoid these foods as much as they can and they should be replacing these foods with the high fibre flour. The best carbs for the pregnant women’s during pregnancy are brown bread or whole grain carbs.

food to avoid during pregnancy

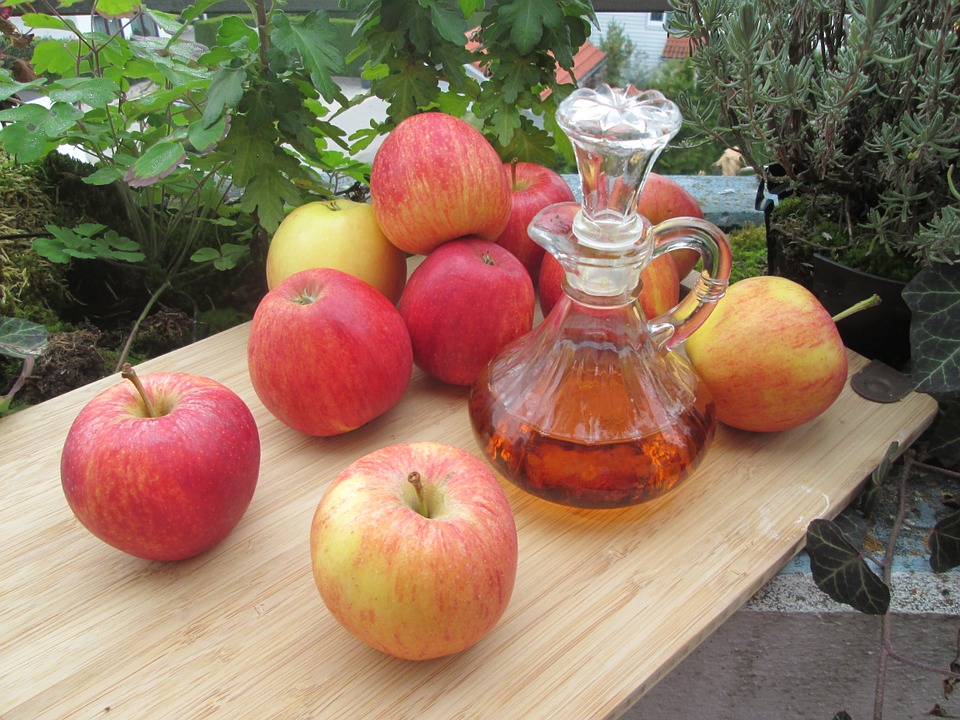
Apple Cider Vinegar for Dark Underarms – 5 DIY Methods

The dark yellowing discoloration is not a severe health problem, as it is caused due to shaving, hormonal imbalance, excessive sweating, accretion of dead cells and dirt, usage of certain deodorants or medications etc.

If love to wear sleeveless tops, spaghettis and strapless gowns, but the dark underarms are holding you back without wearing those favorite outfit,  then you must stop suffering in silence and start taking care of your underarms to maintain it clean and bright.

You can simply try some natural home remedies for treating the dark underarms, instead of using skincare products to lighten your dark underarms.

How Apple Cider Vinegar works to Lighten Dark Underarms:

  • Apple cider vinegar is having very rich content of acids such as amino acids, alpha hydroxyl acids and malic acids that help to exfoliate the skin and also it will be clearing dead skin cell that dissolves the fat deposits in the skin and lessen the scars.
  • The properties of apple cider vinegar such as antibacterial, antiseptic and antimicrobial will be killing the bacteria that are causing body odor and clears dirt, overload oil and other impurities are causing dark discoloration on the skin.
  • Apple cider vinegar is helping to restore the skins pH balance which in turns will be helping to put off the unnecessary dryness or oiliness.
  • Apple cider vinegar is having an astringent property that will tighten the skin pores and unclogs it, to reduce the darkness of the skin.
  • It makes the armpits area smooth and also it reduces the fowl skin texture.

Home Remedies to use Apple Cider Vinegar to lighten your Dark Underarms

The following are some home remedies and methods to use apple cider vinegar to lighten your dark underarms.

1 Apple Cider Vinegar

Apple cider vinegar alone is an effectual remedy to treat the dark armpits and smelly underarms, as it working as a natural deodorant as well.

How to Use:

  • Take a cotton pad and pour some raw, organic apple cider vinegar.
  • Apply this vinegar directly on over clean armpits areas with the same cotton pad.
  • After applying it leave it like that only without washing your armpits and wear your clothes after drying this apple cider vinegar.
  • For good results repeat it daily.

Apple Cider Vinegar as Underarm Spray

2 Armpit Scrub using Apple Cider Vinegar

The mixture of the baking soda and cider vinegar will exfoliate the skin to remove the dead cells, oiliness, toxins etc, which will be contributing to the discoloration of the armpits and lightens the skin slowly but surely.

How to Use:

  • Take 1 teaspoon of baking soda and mix it with apple cider vinegar in a bowl.
  • As soon as you mix it, it starts to fizz and when this fizzing stops, at that time you can apply it as a paste on your armpits.
  • After applying the paste scrub it gently for few minutes and then you can take a bath.
  • From good and quick results repeat this armpit scrub daily to enjoy the light and even tone armpits.

3 Apple Cider Vinegar with Coconut oil

Coconut oils help to lighten your dark underarms with its rich contents of antimicrobial, saturated, anti-inflammatory, fatty acids and vitamin E that is helping your skin to nourish and also lightens your dark underarms.

  • Take a bowl and mix 2 tablespoons of coconut oil with apple cider vinegar.
  • Now spread this mixture on your clean underarm skin and wait for 20 to 25 minutes.
  • After the waiting time is completed then you have to wash the underarm area with lukewarm water followed by the cool water.
  • For good result repeat the same process once daily to achieve the lighter underarms.

Apple Cider Vinegar

4 Apple Cider Vinegar with Water

Apple cider vinegar with water is one of the simplest methods to get relief from the dark armpits. In this method, the water will be reducing the acidic nature of the apple cider vinegar and this is the best remedy that is widely used by the people with dry or sensitive skin.

How to Use:

  • Take 1 cup of water and mix 2-3 tablespoons of apple cider vinegar.
  • Now stir this well and use this same water to rinse your underarms.
  • Once it is rinsed on your underarms you have to wait for 5 minutes and take shower.
  • Repeat it daily until you get rid of dark and smelly armpits.

5 Using Apple Cider Vinegar as Underarm Spray:

The process of using apple cider vinegar as the underarm spray will tone up your underarms and thus you may lighten your dark underarms. The combination of the apple cider vinegar and rose water will soothe the skin; it will be clearing the dark discoloration and dead cells of your skin.

  • Take ½ cup of rose water add few drops of Lavender essential oil and add 3-4 teaspoons of the apple cider vinegar.
  • Now stir this well and pour this mixture into an empty spray bottle.
  • After pouring it into a spray bottle, spray it on your underarms before bedtime and leave it over a night.
  • For good results make sure to shake the spray bottle before using it.
Unicode
Unicode

Tips and Precautions:

  • To grab the best benefits of apple cider vinegar that has mother content benefits, one should always use organic, raw, and unfiltered apple cider vinegar.
  • While stepping out in the sun always apply sun block or sunscreen, as this apple cider vinegar may increases the skin’s sensitivity to the sunlight.
  • If any one of you is using apple cider vinegar for the first time then make sure that you will perform a skin patch test to find out if you are allergic to this apple cider vinegar or not.
  • Always avoid using of the harsh chemical which is based on antiperspirants and deodorants, instead of other deodorants you can use some natural deodorants.
  • You have to wear loose cotton or any other fabric, which absorbs your underarms sweat, as wearing tight clothes causes fabrication and thereby it appears the areas darken.
  • While you are going to for a shower to remove the dead cells and other impurities that are causing this dark color to your armpits make sure to exfoliate the skin.
  • Instead of going for shaving or using hair removal creams, you must prefer for waxing. Waxing will be helping you to remove the dead cells and also other impurities on the skin.

Dandelion Tea for Weight Loss

How Dandelion is effective and beneficial in weight loss?

Dandelion is a blooming plant having a place with the Taraxacum species. Despite the fact, dandelion is viewed as a weed in many patio nurseries, it is completely palatable and furthermore an imperative herb in traditional medication.

Despite the fact that dandelion is native to North America, Europe and Asia, it is additionally now ordinarily found in all aspects of the world.

Despite the fact that a garden weed, most plant specialists promote the development of dandelion. This is on account as it is an astounding companion plant that has different advantages.

Some of these advantages incorporate raising required supplements to the top layers of the dirt for plants with shallow roots to utilize; drawing in pollinating creepy insects with its splendid blooms; adding different supplements particularly nitrogen to the dirt; and releasing ethylene gas to hasten the maturing of fruits.

Dandelion Tea for Weight Loss

Dandelion has traditionally been utilized to make diverse beverages including wine and sans caffeine espresso. It is additionally a key element of root beer.

Dandelion is rich in supplements. It is a decent source of the considerable number of vitamins with the exception of vitamin D. It additionally contains sodium, calcium, potassium, magnesium, manganese, phosphorus, iron and zinc.

Dandelion contains proteins and in addition sugars. Of its starch content, just a little is taken up by sugars and the mass by dietary fiber.

This high dietary fiber content adds to the laxative and detoxifying properties of dandelion.

How Dandelion Extract can Promote Weight Loss?

Some additionally assert its activities as a stomach related aid and detoxifier may equally add to this.

Dandelion remove as a weight reduction herb is broadly promoted among muscle heads who need to shed some water weight.

The diuretic properties of dandelion are now confirmed and very much well-studied as well. One such review was distributed in 2009 in The Journal of Alternative and Complementary Medicine.

dandelion

This pilot concentrate utilized a leaf concentrate of dandelion and included 17 volunteers. Before giving these volunteers the dandelion extract, the scientists initially settled the volunteers’ pattern liquid admission and pee volumes. They were then given 8 ml of the dandelion separate 3 times day by day for one day and afterward observed for an additional 24 hours.

The outcomes demonstrated that the dandelion extricate expanded the recurrence of pee and the volume of pee.

Despite the fact that dandelion extract promotes diuresis and can help shed some water weight, it is doubtful it can bring about weight reduction in most overweight individuals.

Dandelion can be joined with other dietary supplements or sold alone, it is accessible in various dosage forms including as tea, tincture, fluid extract, capsule and tablet.

Dandelion is additionally sold as dried leaves, leaf squeeze and dried roots. The dose relies on upon the form in which the herb is provided.

Grown-up Doses of Dandelion tea for Weight Loss

  • Tea produced using dried leaves – 1 – 2 teaspoonful taken 3 times day by day (4 – 10 grams day by day). To set up the tea implantation, pour boiling hot water on the dried leaves and let them soak for 5 – 10 minutes
  • Tea produced using dried roots – ½ – 2 teaspoonful taken 3 times day by day. To set up the root decoction, put the dried roots in bubbling water, and let them soak for 5 – 10 minutes before straining.
  • Standardized powdered leaf extract (4:1) – 500 mg taken 1 – 3 times day by day
  • Standardized powdered root separate (4:1) – 500 mg taken 1 – 3 times day by day
  • Leaf tincture (1:5 in 30% liquor) – 30 – 60 drops taken 3 times day by day
  • Root tincture (1:2 in 45% liquor) – 30 – 60 drops taken 3 times day by day

Despite the fact, dandelion is a secure food for youngsters, you ought to counsel your specialist before offering it to a take as a supplement.

Dandelion extracts ought to be kept away from individuals who are sensitive to iodine or related plants, for example, ragweed, yarrow, chrysanthemum, marigold and daisies.

Other than potassium-saving diuretics, dandelion concentrate may likewise not be utilized with some different medications.

Medications to stay away incorporate acid neutralizers (dandelion expands the levels of stomach corrosive), anticoagulants (dandelion builds the danger of dying), lithium (dandelion declines the reactions of lithium), ciprofloxacin (one types of dandelion lessened the assimilation of the medication) and against diabetic medications (dandelion likewise brings down glucose levels and may build the danger of hypoglycemia).

In conclusion, since dandelion is a diuretic, it can shorten the time a medication spends in the body by accelerating its elimination in the pee. Hence, individuals put on different medications ought to counsel their specialists before beginning on dandelion supplements.

Allowed it can create automatic weight reduction brings about edema patients, most cases of obesity is brought on by fat amassing in the body. Therefore, since its extract does not increase fat metabolism or thermogenesis, its weight loss claims are not very strong.

This does not imply that its extract does not have some weight reduction potential. It implies that its weight reduction impact is no doubt not strong, and that the herb ought not be taken as the main supplement to lose weight.

Still, there are many weight loss supplements that incorporate its extract. This is on account of it can make some involvement to weight loss. It may not influence stored fat in the body but what it does (promoting diuresis) can prompt the loss of some body weight.

This is how Dandelion Tea for Weight Loss is beneficial; one can go with the above-mentioned usage in order to use this in a beneficial manner.